Monitoring Quarkus JVM Mode With Cryostat

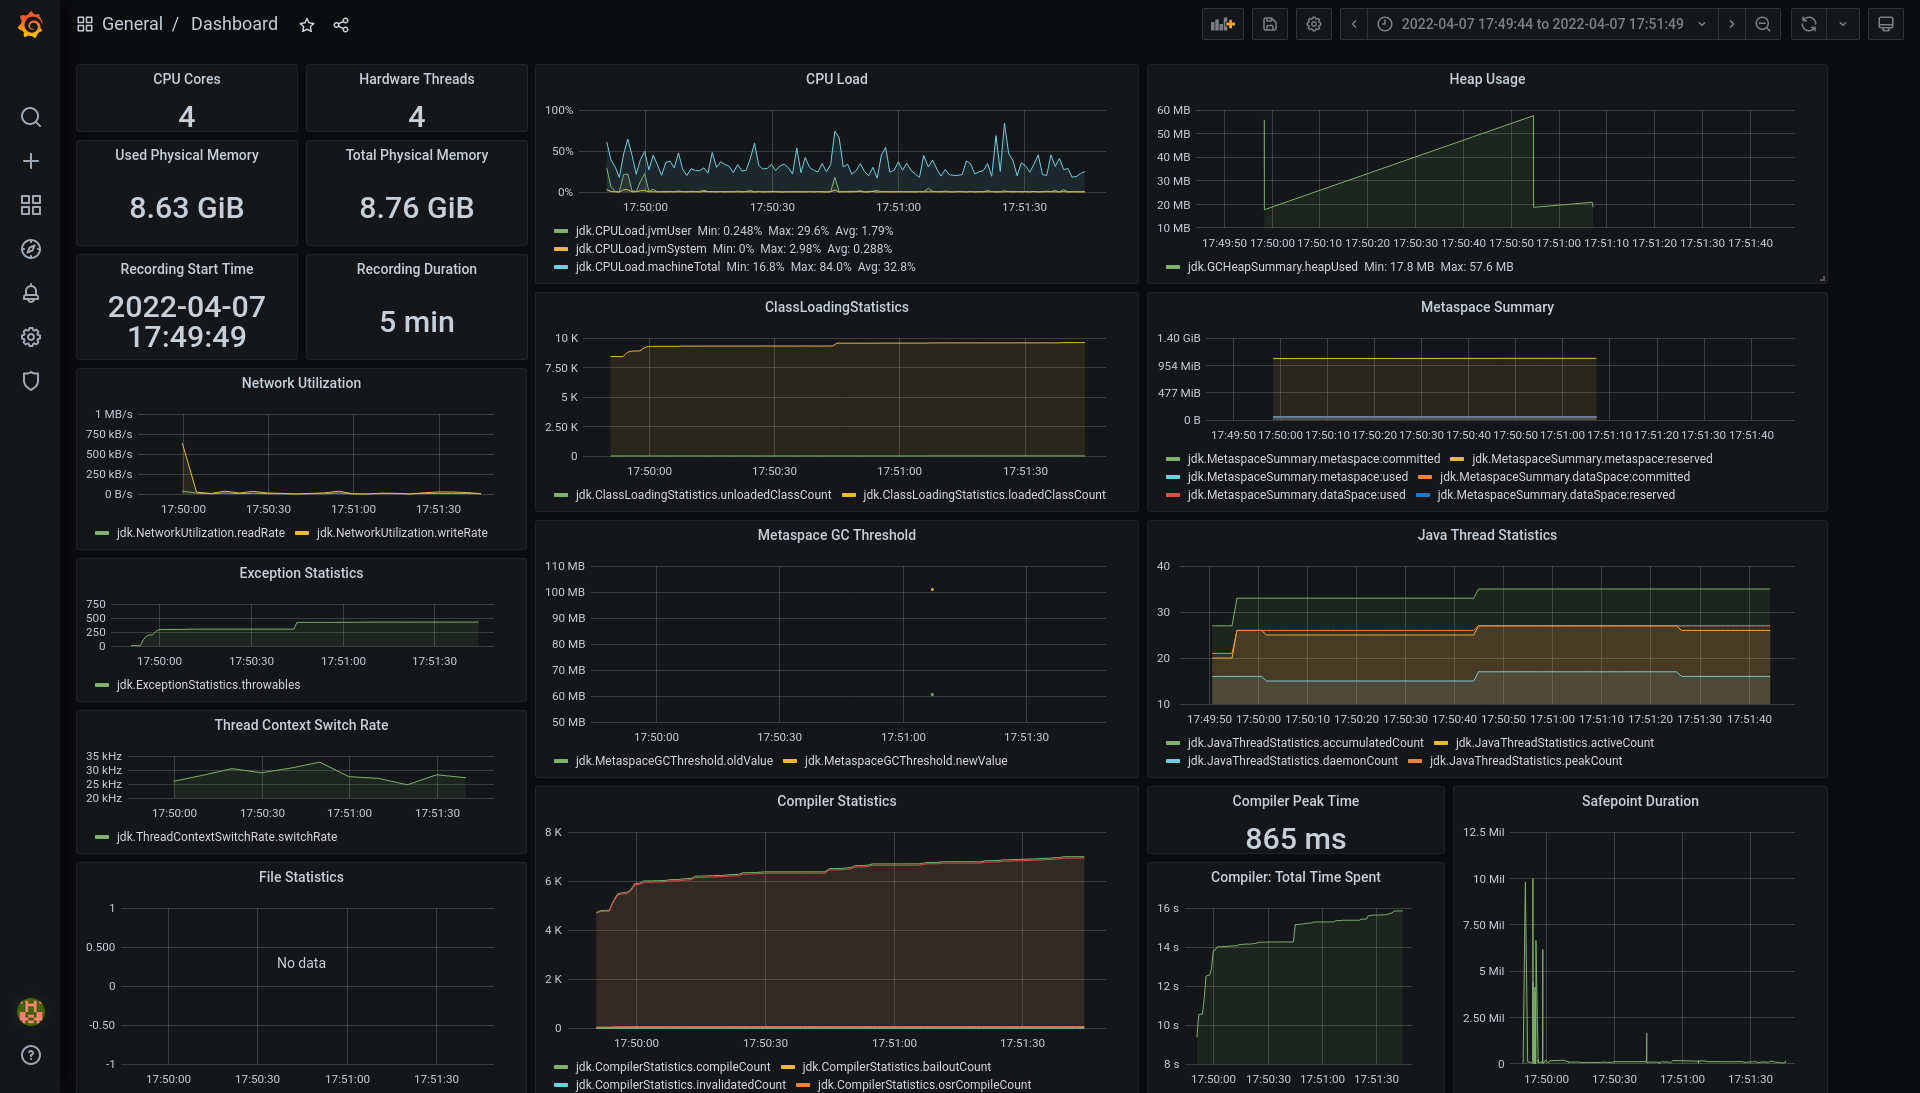
Cryostat is a profiling and monitoring tool that leverages the JDK Flight Recorder (JFR) framework already present in your Java applications running on the HotSpot JVM. Cryostat provides an in-cluster collection hub for easy and secure access to your JDK Flight Recorder data from outside the cluster. Cryostat is a cloud-native application primarily targeting deployment on OpenShift, so this guide will assume you are also deploying your Quarkus applications to OpenShift for simplicity.
In this article we will explore how to configure Quarkus applications to allow Cryostat to connect to them, allowing Cryostat to communicate with Quarkus and provide its JDK Flight Recorder collection, storage, and analysis tooling.

Caveats for Cryostat with Quarkus
Quarkus famously has the ability to be built in standard JVM mode (the build produces .JAR files to be loaded and run by the JVM at runtime) or native mode (the build produces a native binary to be directly executed). Cryostat relies upon both JDK Flight Recorder (JFR), which is only partially supported in Quarkus native mode, and JDK Management Extensions (JMX), which is not supported in native mode at the time of writing. This means that, unfortunately, only JVM-mode Quarkus applications can be configured for use with Cryostat.
Getting Started with Cryostat
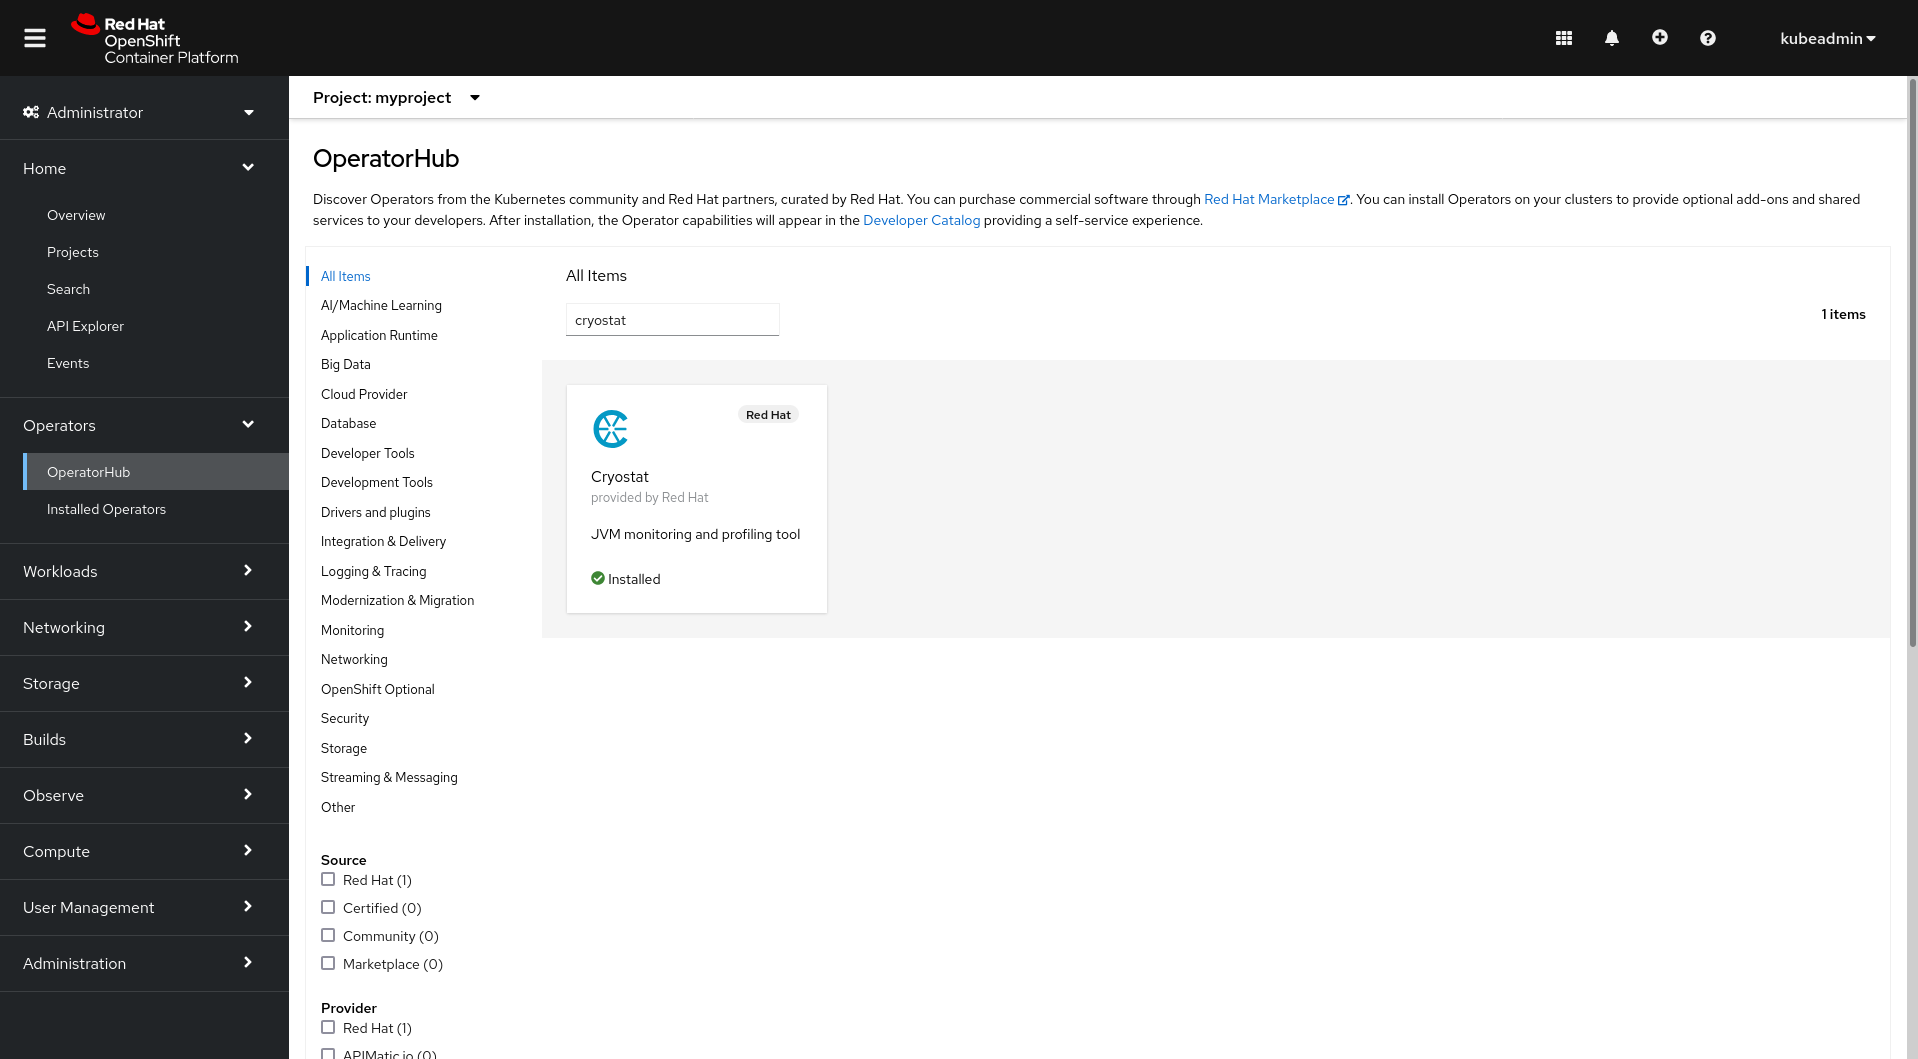
Getting started with Cryostat on OpenShift is quick and easy - just install it from OperatorHub:
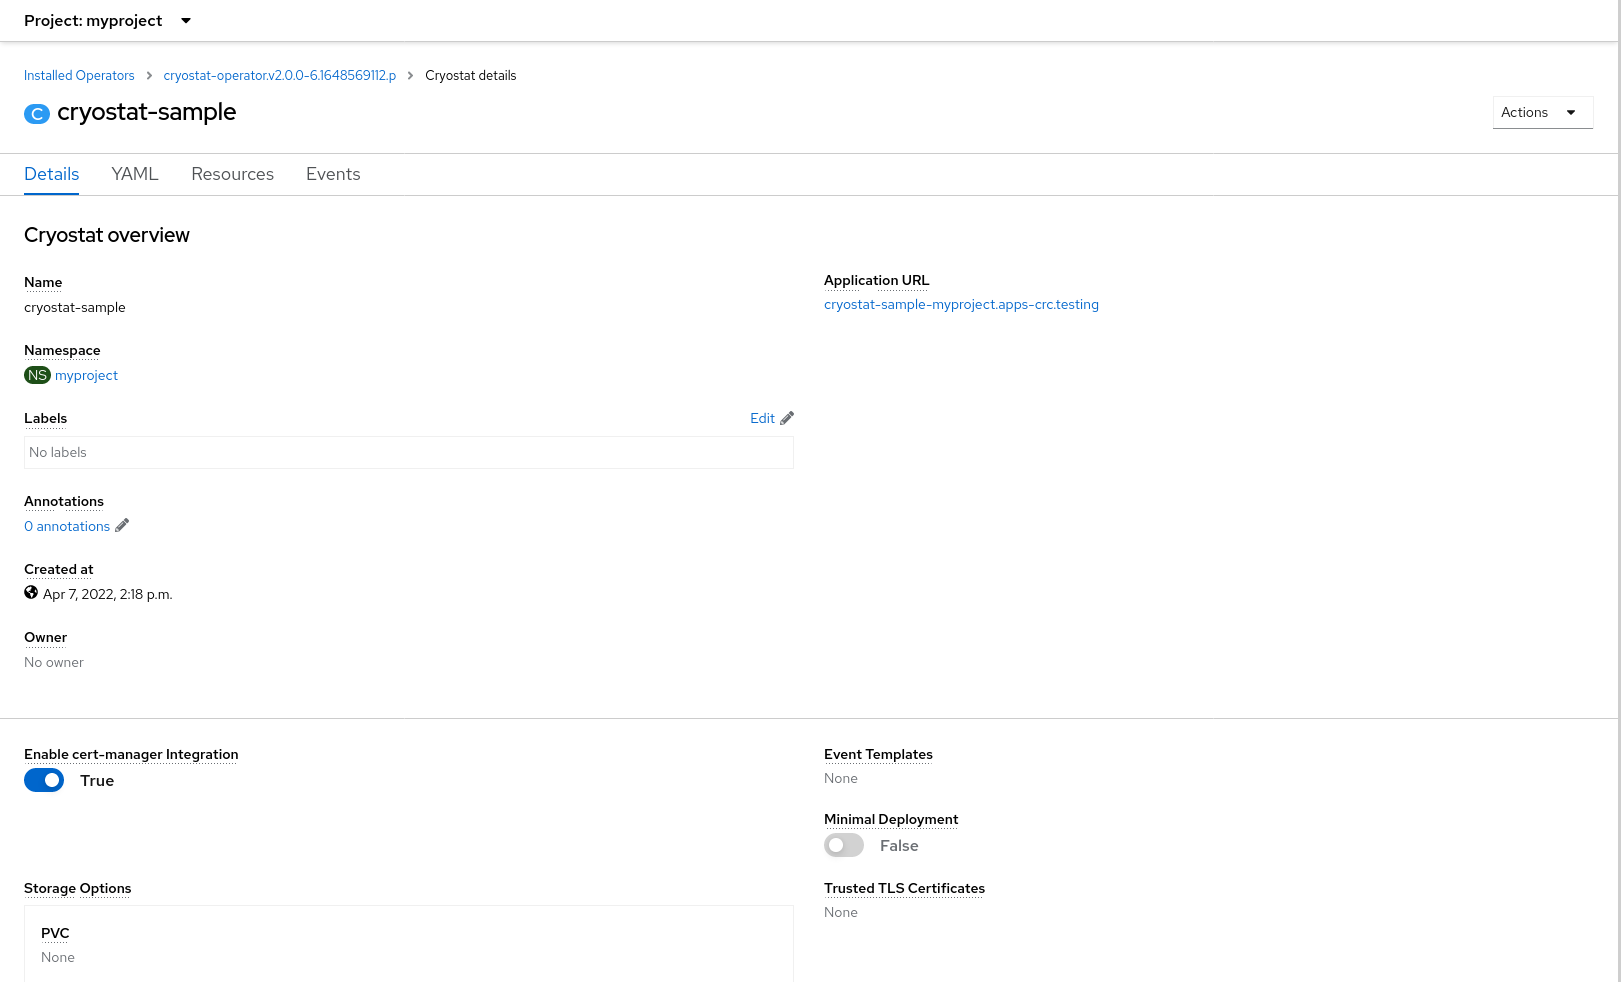
Then create a Cryostat CR resource instance to let the Operator know you’d like to deploy a Cryostat instance. At this stage you can also choose some configuration options, but we’ll assume the defaults for now.
Cryostat Communication
Cryostat uses JMX to talk to applications running on the HotSpot JVM, including but not limited to Java and Scala applications. JMX is a standard Java technology that allows tools to connect to applications and perform actions or retrieve data across a variety of underlying transport protocols. If you build and deploy your Quarkus application in JVM mode then JMX support is already built-in and ready out of the box. There are two ways to enable JMX on your application.
Method 1: Enable it at runtime
JMX can be enabled by setting JVM system properties:
-Dcom.sun.management.jmxremote
-Dcom.sun.management.jmxremote.port=${RJMX_PORT}
-Dcom.sun.management.jmxremote.rmi.port=${RJMX_PORT}
-Djava.rmi.server.hostname=127.0.0.1
-Dcom.sun.management.jmxremote.authenticate=false
-Dcom.sun.management.jmxremote.ssl=false
-Dcom.sun.management.jmxremote.local.only=false
Where ${RJMX_PORT} is replaced with your chosen port number for the remote JMX network connection over RMI. In this example we disable JMX authentication and JMX SSL - in
practice these should both be enabled for security reasons, but configuring these particular options is out of scope for this guide. Please see
this document for further information.
Quarkus uses a feature-rich application startup script, which allows us to add JVM system properties at runtime by simply setting an environment variable:
JAVA_OPTS_APPEND="-Dcom.sun.management.jmxremote -Dcom.sun.management.jmxremote.port=${RJMX_PORT} -Dcom.sun.management.jmxremote.rmi.port=${RJMX_PORT} -Djava.rmi.server.hostname=127.0.0.1 -Dcom.sun.management.jmxremote.authenticate=false -Dcom.sun.management.jmxremote.ssl=false -Dcom.sun.management.jmxremote.local.only=false"
If you are running your Quarkus application in OpenShift or Kubernetes then try setting this environment variable in your Deployment or DeploymentConfig, nested
within the Spec for the application’s Container. This method of enabling JMX does not require the Quarkus application to be rebuilt, only to be redeployed.
Method 2: Enable it at build time
The same JVM system properties as before can be added to containerized Quarkus applications by editing the Dockerfile.jvm under src/main/docker/. Below is a sample
Dockerfile.jvm from a basic Quarkus project - pay attention to the ENV JAVA_OPTS_APPEND line that has been added to append the JVM properties and expose the port number:
FROM registry.access.redhat.com/ubi8/openjdk-11:1.11

ENV LANG='en_US.UTF-8' LANGUAGE='en_US:en'


# We make four distinct layers so if there are application changes the library layers can be re-used
COPY --chown=185 target/quarkus-app/lib/ /deployments/lib/
COPY --chown=185 target/quarkus-app/*.jar /deployments/
COPY --chown=185 target/quarkus-app/app/ /deployments/app/
COPY --chown=185 target/quarkus-app/quarkus/ /deployments/quarkus/

EXPOSE 8080 ${RJMX_PORT}
USER 185
ENV JAVA_OPTS="-Dquarkus.http.host=0.0.0.0 -Djava.util.logging.manager=org.jboss.logmanager.LogManager"
ENV JAVA_OPTS_APPEND="-Dcom.sun.management.jmxremote -Dcom.sun.management.jmxremote.port=${RJMX_PORT} -Dcom.sun.management.jmxremote.rmi.port=${RJMX_PORT} -Djava.rmi.server.hostname=127.0.0.1 -Dcom.sun.management.jmxremote.authenticate=false -Dcom.sun.management.jmxremote.ssl=false -Dcom.sun.management.jmxremote.local.only=false"
ENV JAVA_APP_JAR="/deployments/quarkus-run.jar"
Again, be sure to replace ${RJMX_PORT} on all lines with a port number in this file.
This method is less flexible because it requires the remote JMX port number to be known at build time, and it requires the application to be rebuilt and redeployed.
Cryostat Discovery
Now that we have enabled JMX on our Quarkus application and redeployed it, it is ready to talk to Cryostat. Before this can happen, however, Cryostat needs to know how and where to find the application. There are two ways to achieve this: automatic discovery and custom targets. Automatic discovery is the preferred method and is enabled by default. Custom targets can be used to fill in gaps for deployed application targets that do not meet the criteria for automatic discovery, but which are known to be reachable over the network.
Automatic Discovery
Cryostat can discover target applications automatically and use their discovered Remote JMX service URLs to connect. Automatic discovery depends on the deployment platform - at
the time of writing, Cryostat will use the OpenShift/Kubernetes API to discover Endpoints objects when deployed on OpenShift/Kubernetes. If no OpenShift/Kubernetes API server
is available then Cryostat falls back to using the Java Discovery Protocol (JDP). In any case the automatically discovered targets are merged with the custom targets. If
OpenShift/Kubernetes Endpoints discovery is used then the target application should have an associated Service object that exposes a port for cluster-internal JMX traffic.
This port must either use the port number 9091 or have the name jfr-jmx for Cryostat to pick it up as an intended target application.
Custom Targets
This is a way for Cryostat clients (end users or other automated tooling) to tell Cryostat how and where to find a single target application instance. A Custom Target definition
is at its core simply a network-reachable remote connection JMX URL and a human-readable alias. These can be created in the Cryostat web client by clicking the + (Plus) icon
on the target selection dropdown or by using your preferred HTTP client:
curl \
  -X POST \
  -F alias=myapp \
  -F connectUrl=service:jmx:rmi:///jndi/rmi://myapp.my-openshift-cluster.example.com:1234/jmxrmi \
  https://cryostat.my-openshift-cluster.example.com/api/v2/targets
Once a custom target definition is added the connectUrl can be used as a targetId URL parameter anywhere one is expected in the Cryostat HTTP API.
Please see the following links for further information on Cryostat: