Configuring Well-Known OpenID Connect Providers
This document explains how to configure well-known social OIDC and OAuth2 providers.
Introducción
If you use OpenID Connect Authorization Code Flow to protect Quarkus endpoints, then you need to configure Quarkus to tell it how to connect to OpenID Connect providers, how to authenticate to such providers, which scopes to use, and so on.
Sometimes you need to use the configuration to work around the fact that some providers do not implement OpenID Connect completely or when they are in fact OAuth2 providers only.
The configuration of such providers can become complex, very technical and difficult to understand.
quarkus.oidc.provider configuration property has been introduced to refer to well-known OpenID Connect and OAuth2 providers. This property can be used to refer to a provider such as github with only a minimum number of customizations required, typically, an account specific client id, client secret and some properties have to be set to complete the configuration.
This property can be used in application.properties and in custom TenantConfigResolvers if the tenant configurations are created dynamically.
Well Known Providers
Apple
In order to set up OIDC for Apple you need to create a developer account, and sign up for the 99$/year program, but you cannot test your application on localhost like most other OIDC providers:
you will need to run it over HTTPS and make it publicly accessible, so for development purposes
you may want to use a service such as https://ngrok.com.
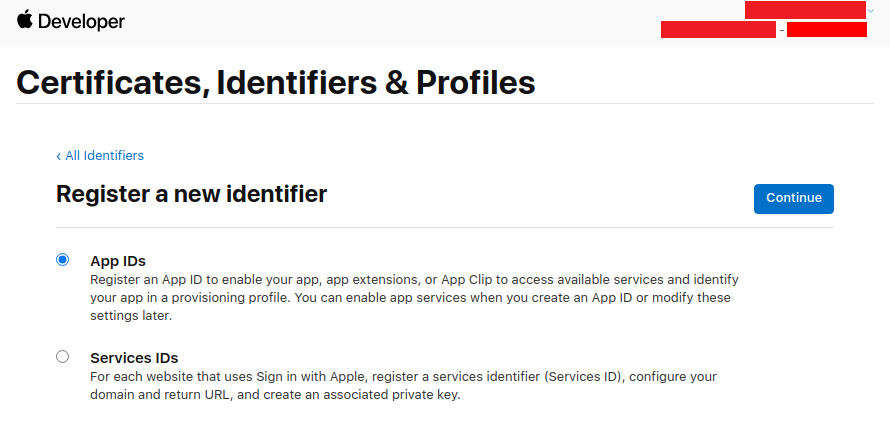
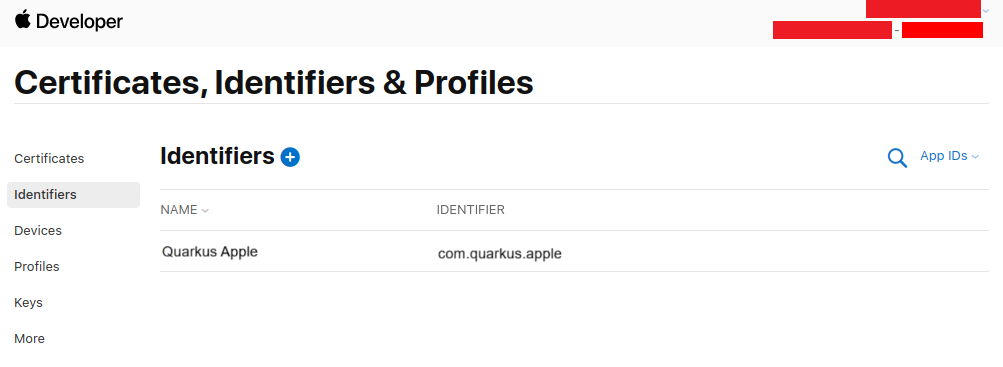
Go to Create a new identifier and press +

Don’t touch anything, keep App IDs selected, and press Continue:
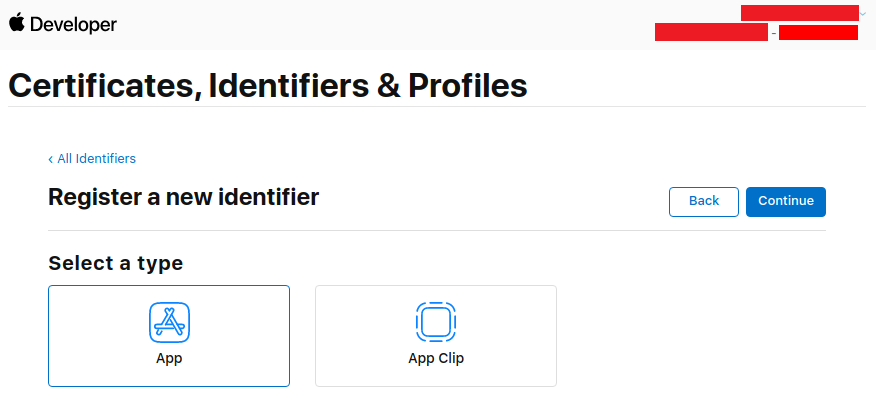
Don’t touch anything, keep App selected, and press Continue:
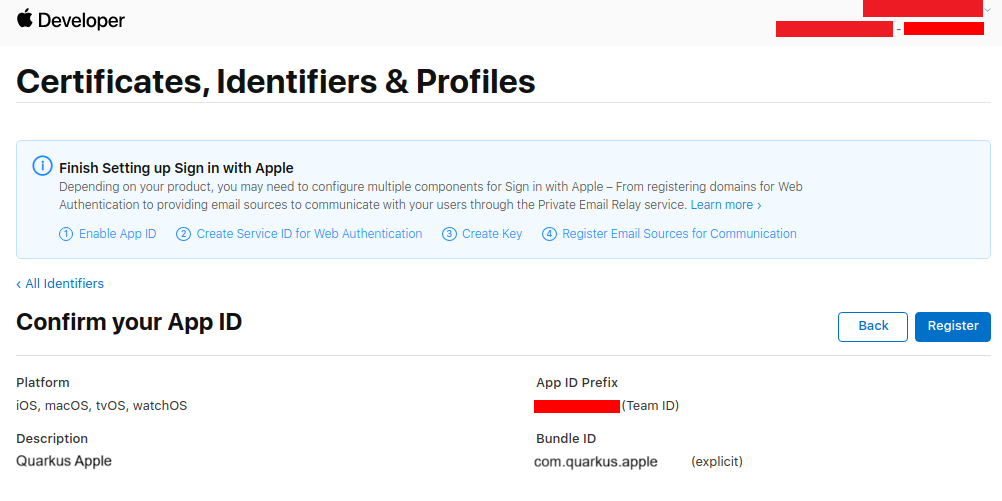
Enter a description and a Bundle ID (use your application package name):
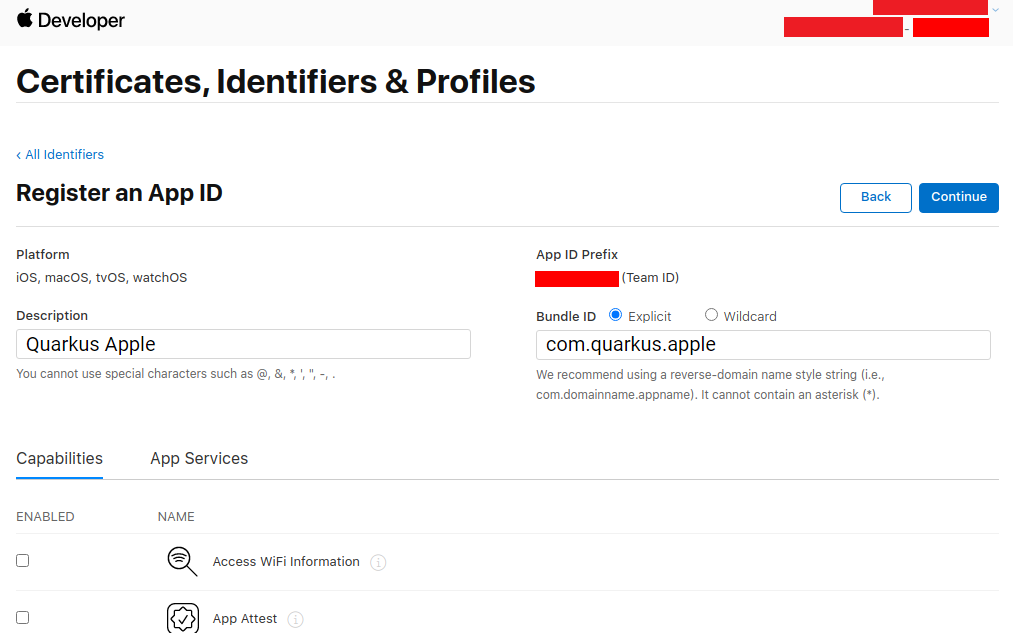
Then scroll down to find the Sign in with Apple Capability, select it, and press Continue:
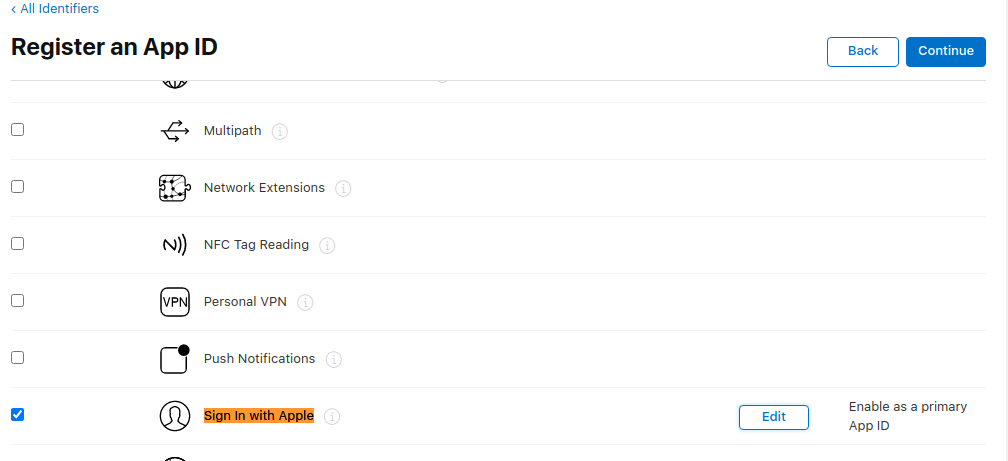
Write down your App ID Prefix, then press Register:
Back on the Identifiers page, press +:
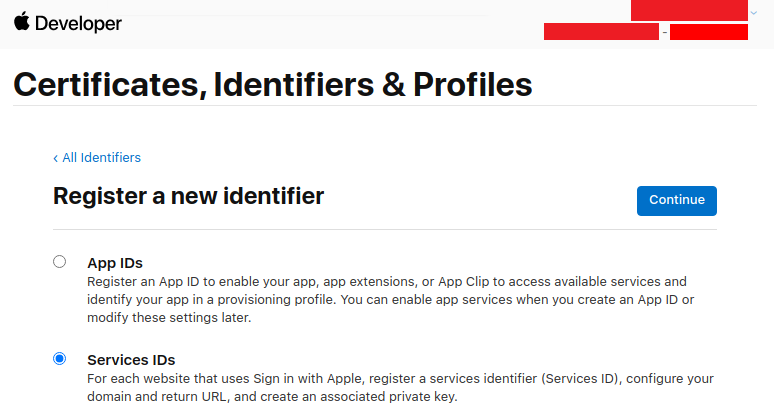
Select Service IDs and press Continue:
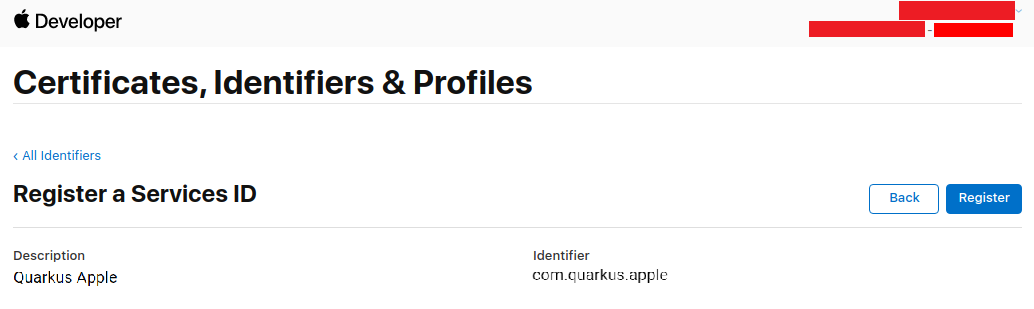
Enter a description and Bundle ID (use your application package name), then press Continue:
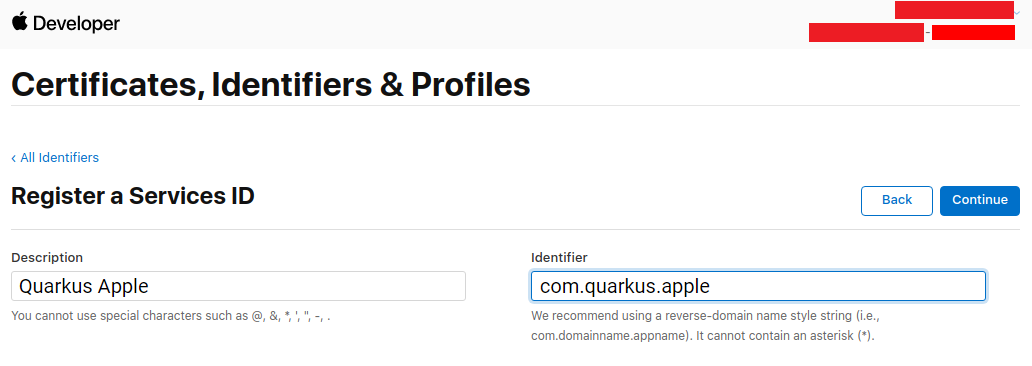
Now press Register:
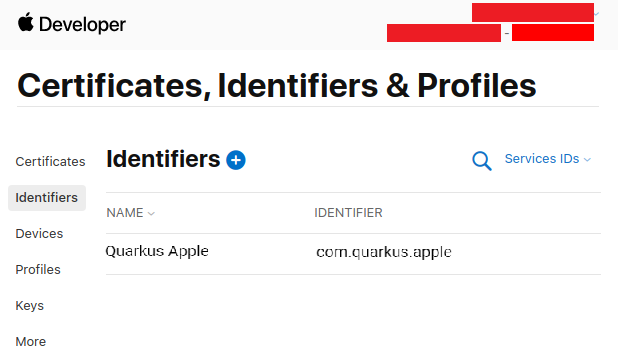
Back on the service list, click on your newly created service:
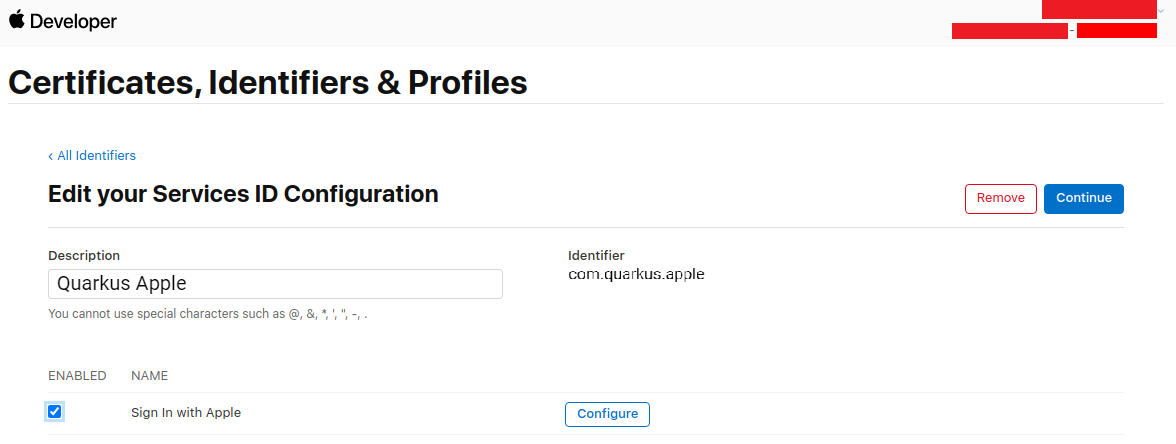
Enable Sign in with Apple and press Configure:
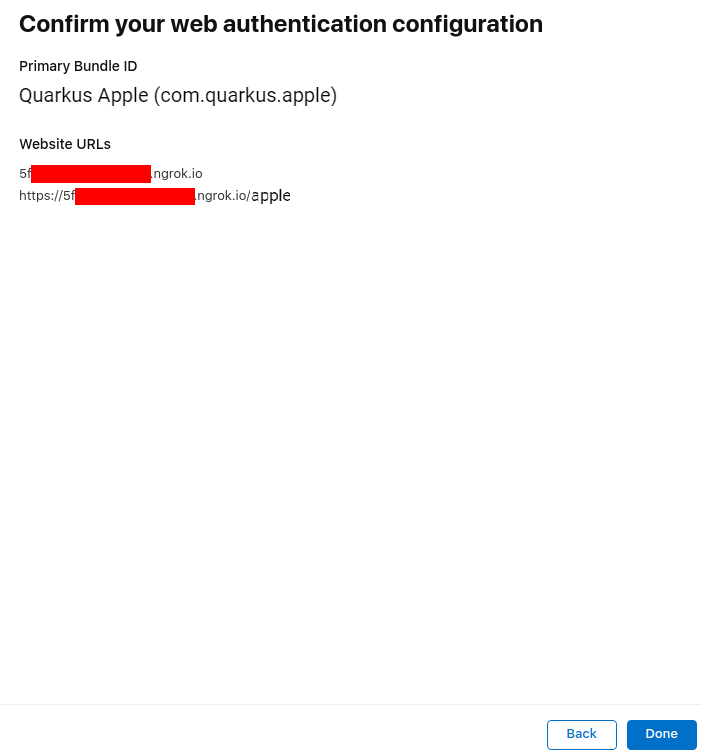
Add your domain and return URL (set to <host>/apple) and press Next:
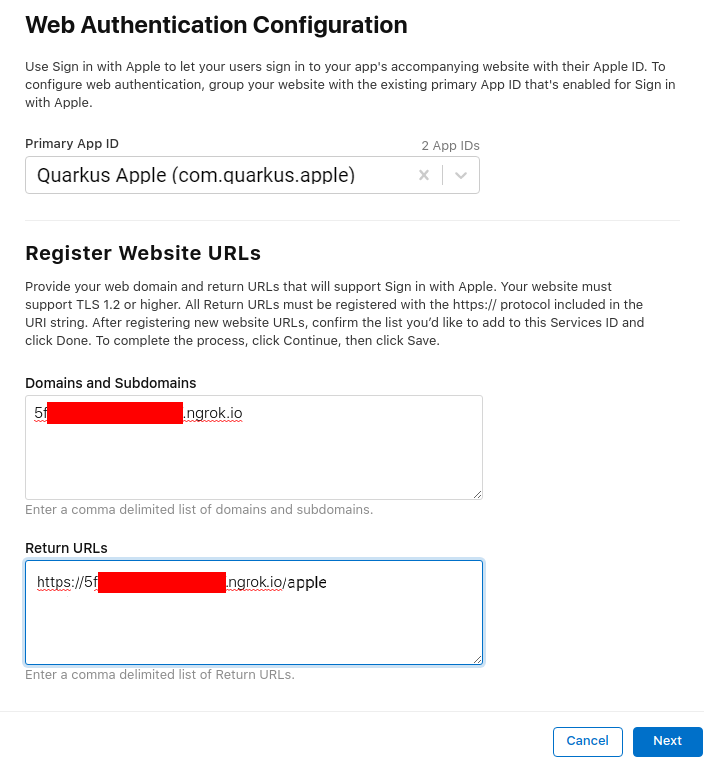
Now press Done:
Now press Continue:

And now press Save:

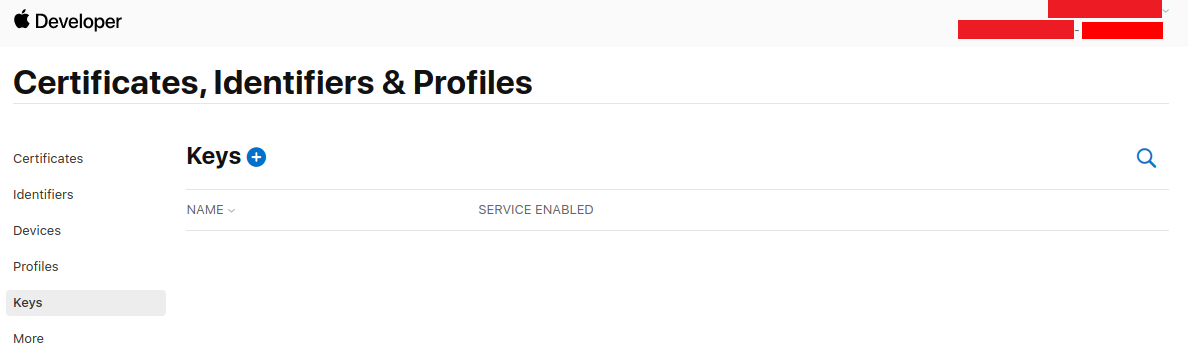
Go to the Keys page on the left menu, and press +:
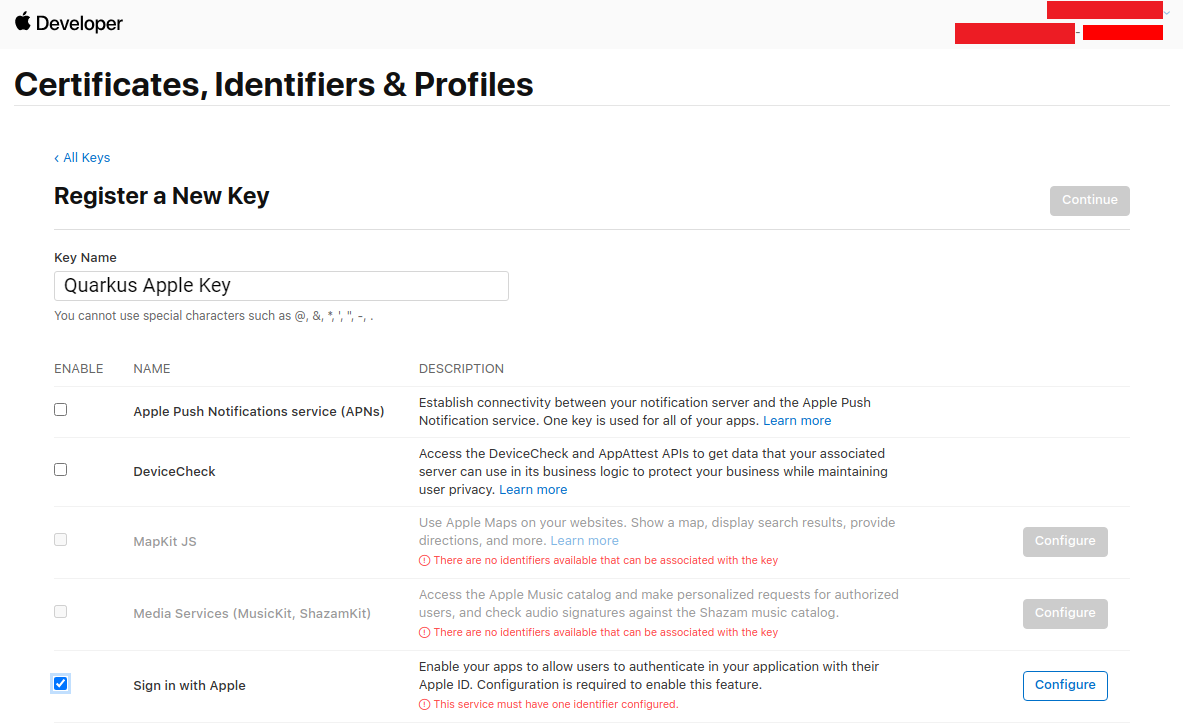
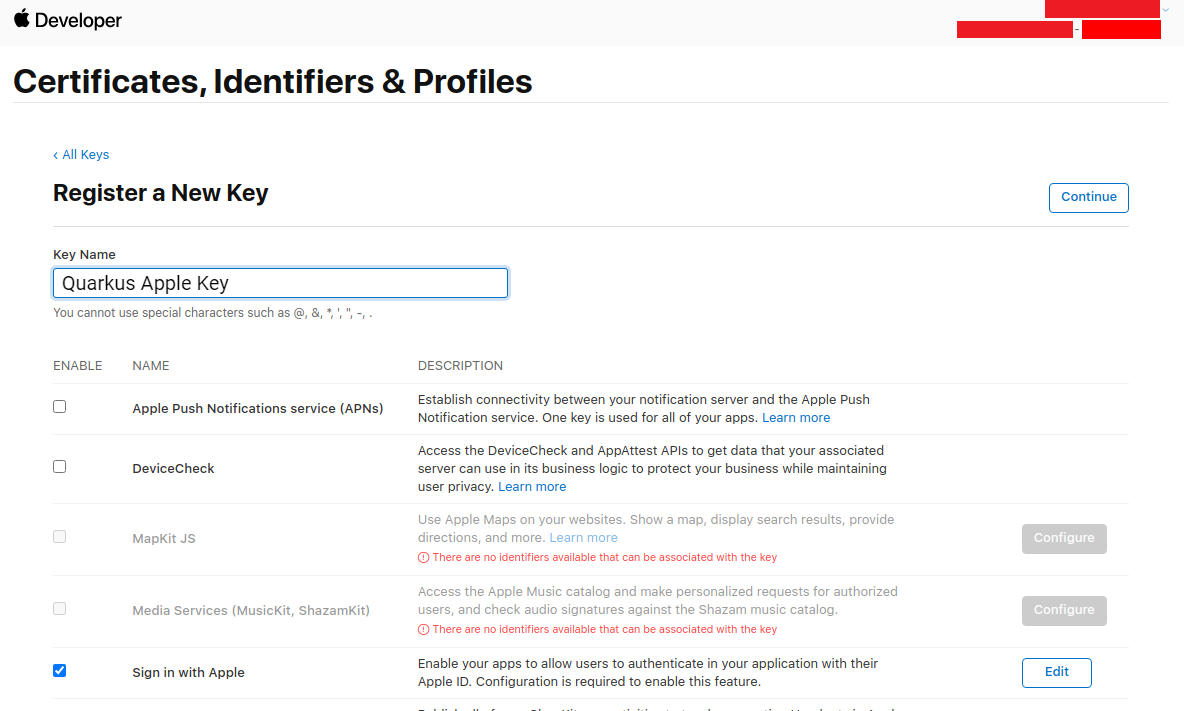
Fill in a key name, enable Sign in with Apple, and press Configure:
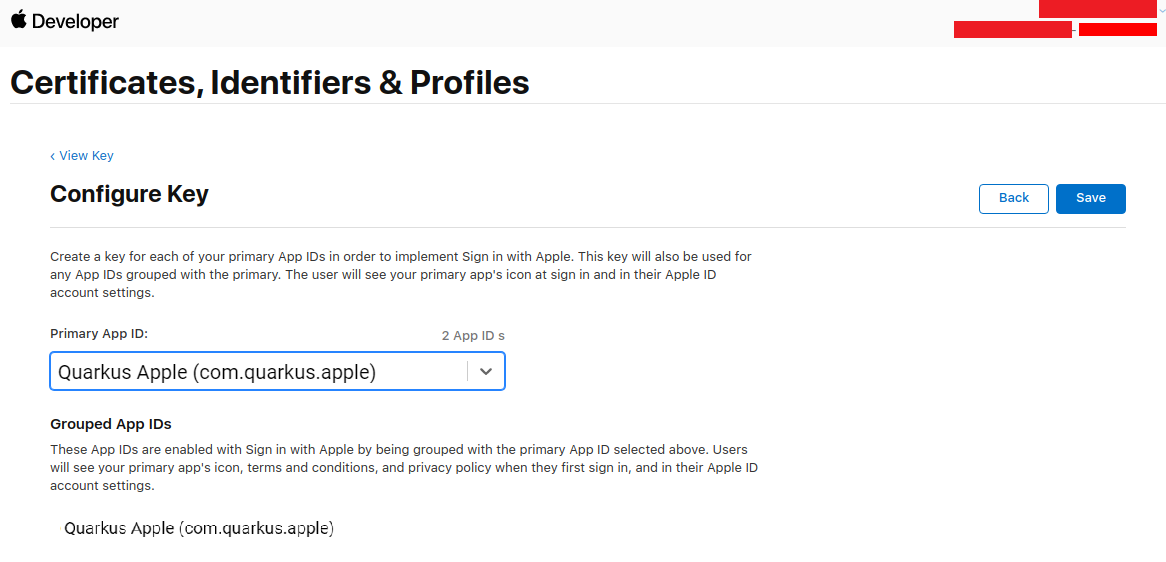
Select your Primary App ID and press Save:
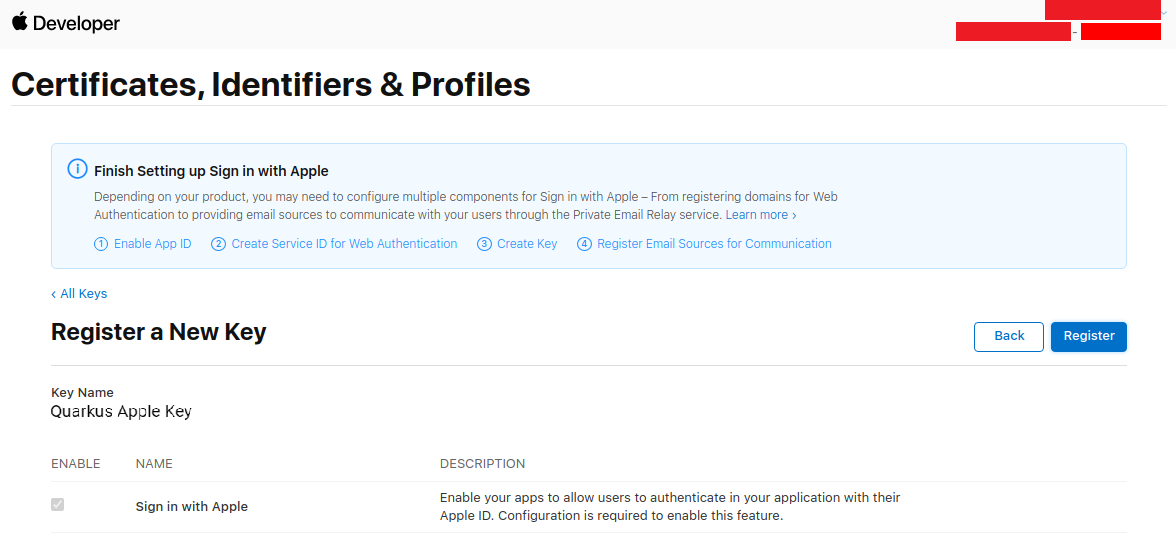
Back on the key page, press Continue:
Now press Register:
Write down your Key ID, download your key and save it to your Quarkus application in src/main/resources/AuthKey_<KEYID>.p8:
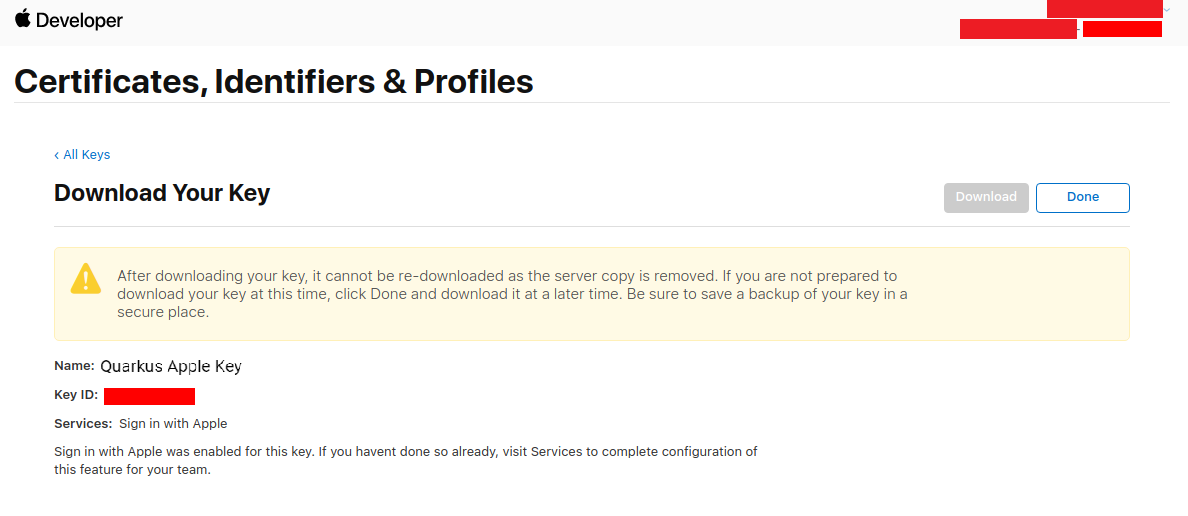
You can now configure your application.properties:
quarkus.oidc.provider=apple
quarkus.oidc.client-id=<Bundle ID>
quarkus.oidc.credentials.jwt.key-file=AuthKey_<Key ID>.p8
quarkus.oidc.credentials.jwt.token-key-id=<Key ID>
quarkus.oidc.credentials.jwt.issuer=<App ID Prefix>
quarkus.oidc.credentials.jwt.subject=<Bundle ID}
quarkus.oidc.provider=apple will request Apple to add openid, email and name scopes to issued access tokens. For information about overriding these scopes or requesting more scopes, see the Provider scopes section.
Discord
Create a Discord application:
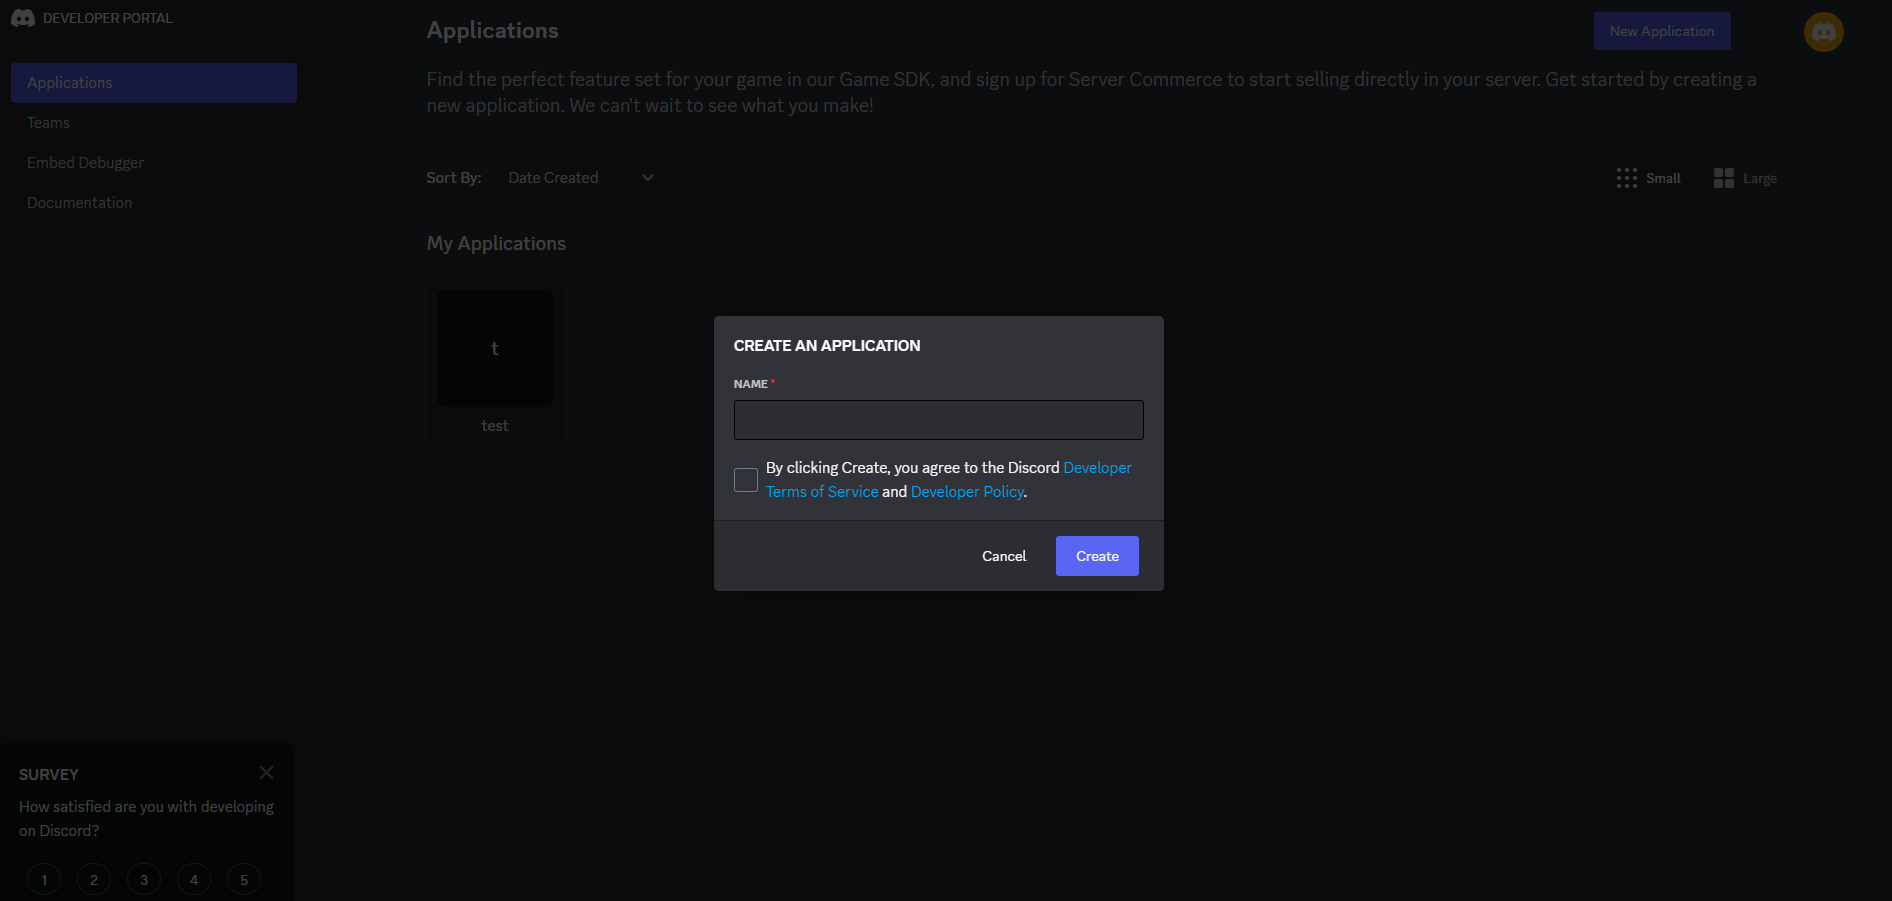
You now can get your client id and secret:
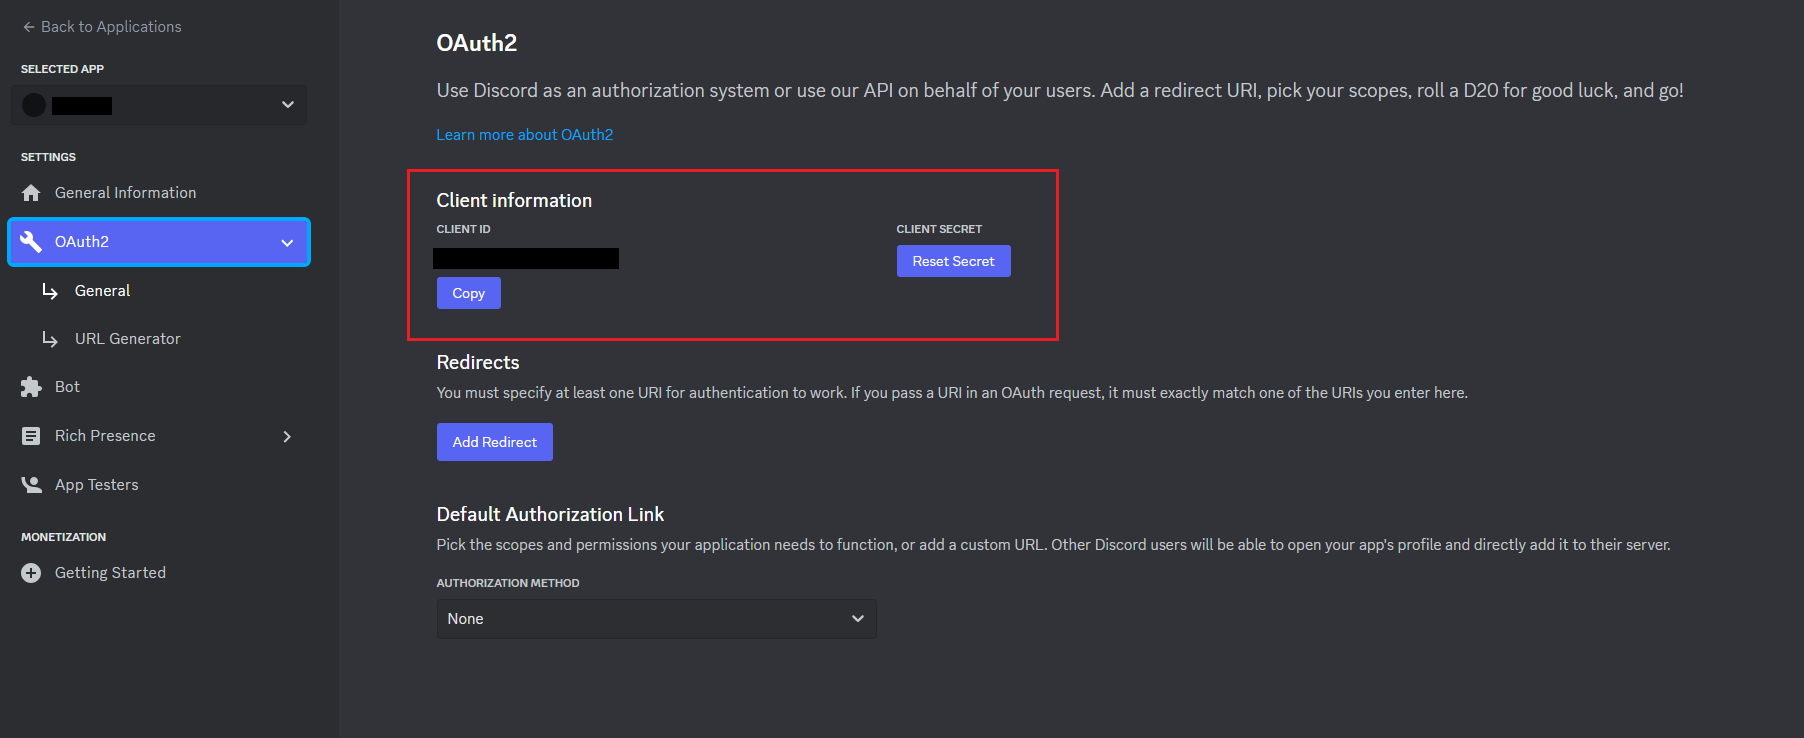
You can now configure your application.properties:
quarkus.oidc.provider=discord
quarkus.oidc.client-id=<Client ID>
quarkus.oidc.credentials.client-secret=<Client Secret>
Facebook will not let you test your application on localhost like most other OIDC providers:
you will need to run it over HTTPS and make it publicly accessible, so for development purposes
you may want to use a service such as https://ngrok.com.
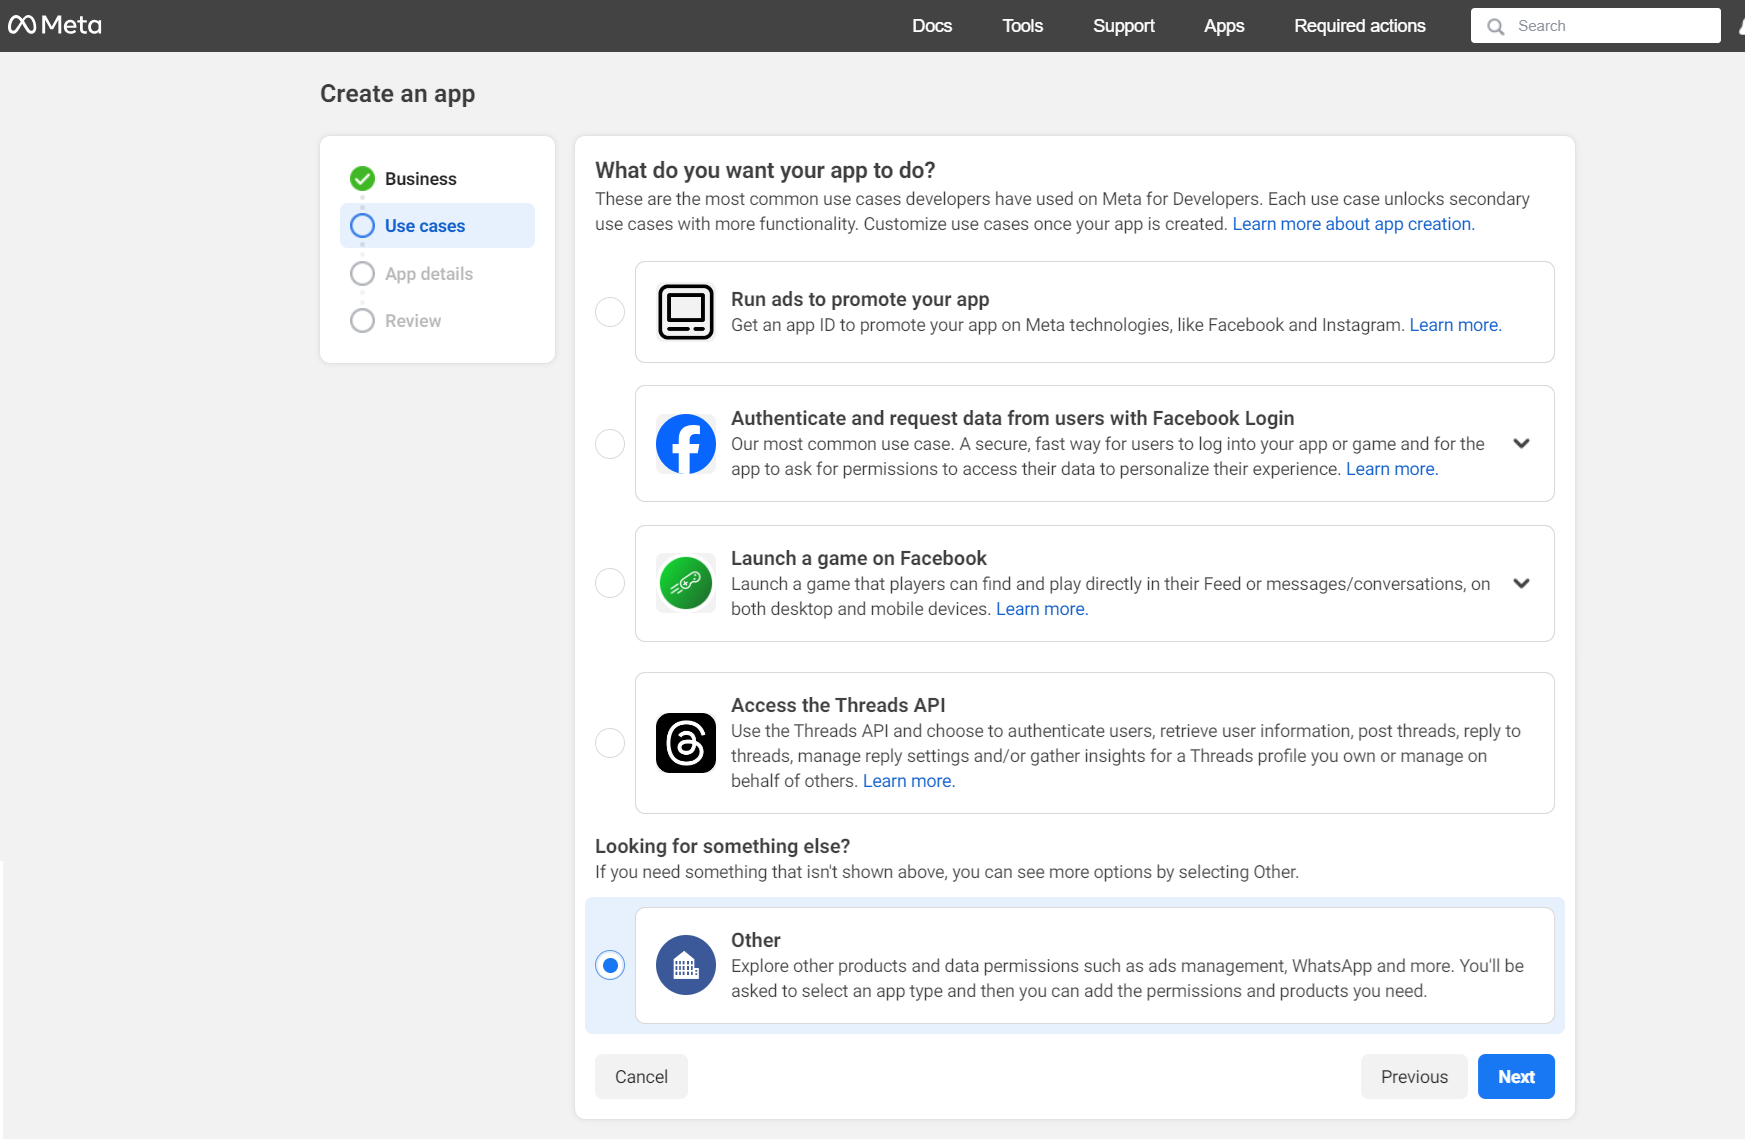
In order to set up OIDC for Facebook start by Creating an application, select Other as an app type, and click Next.
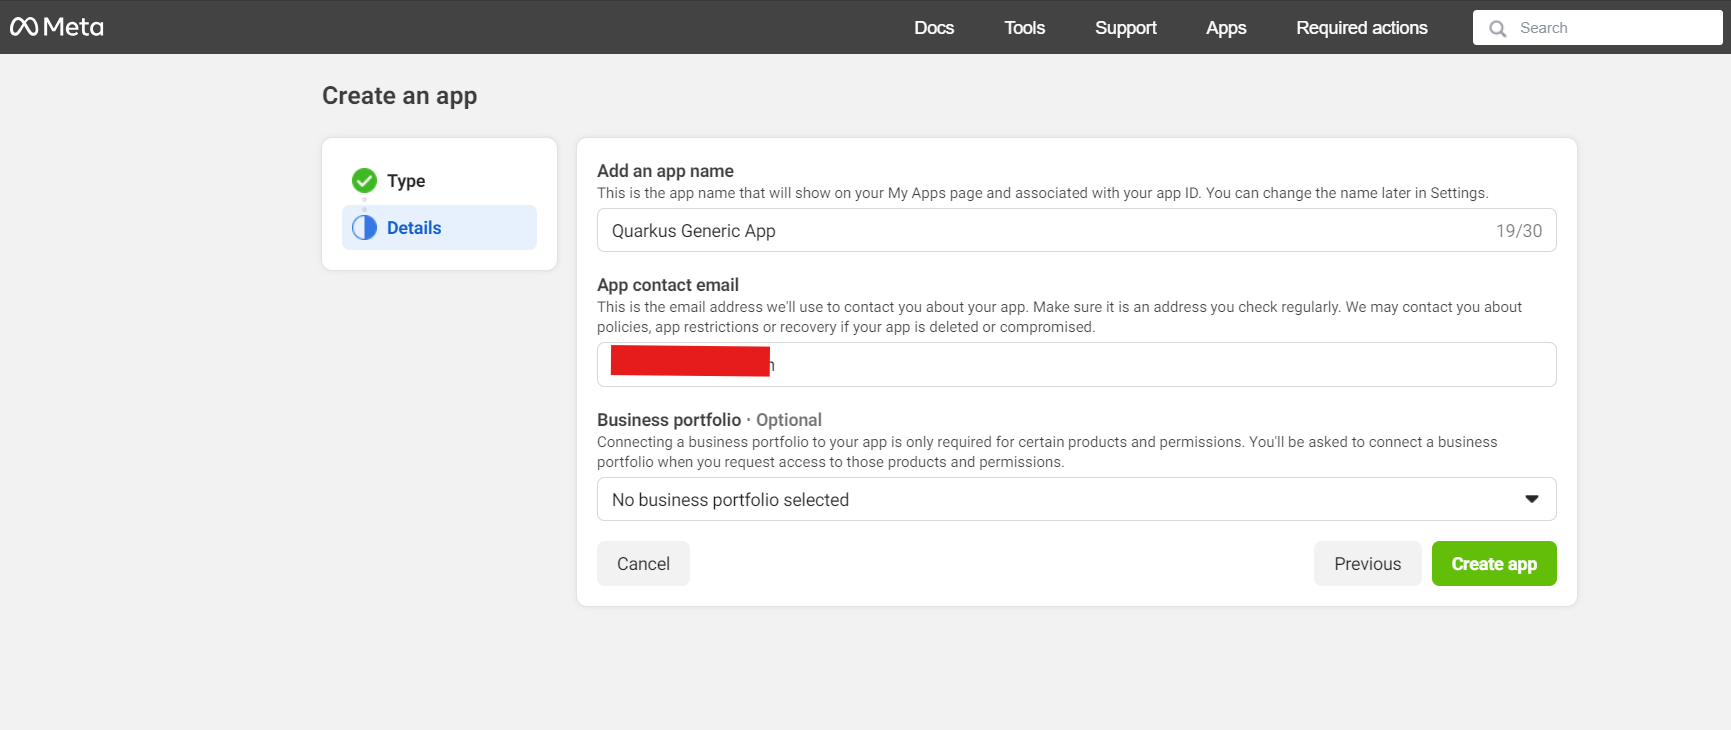
Now choose your application type. For this guide choose Consumer and click Next until you reach the screen below. Now enter an application name, and contact email, and press Create app:
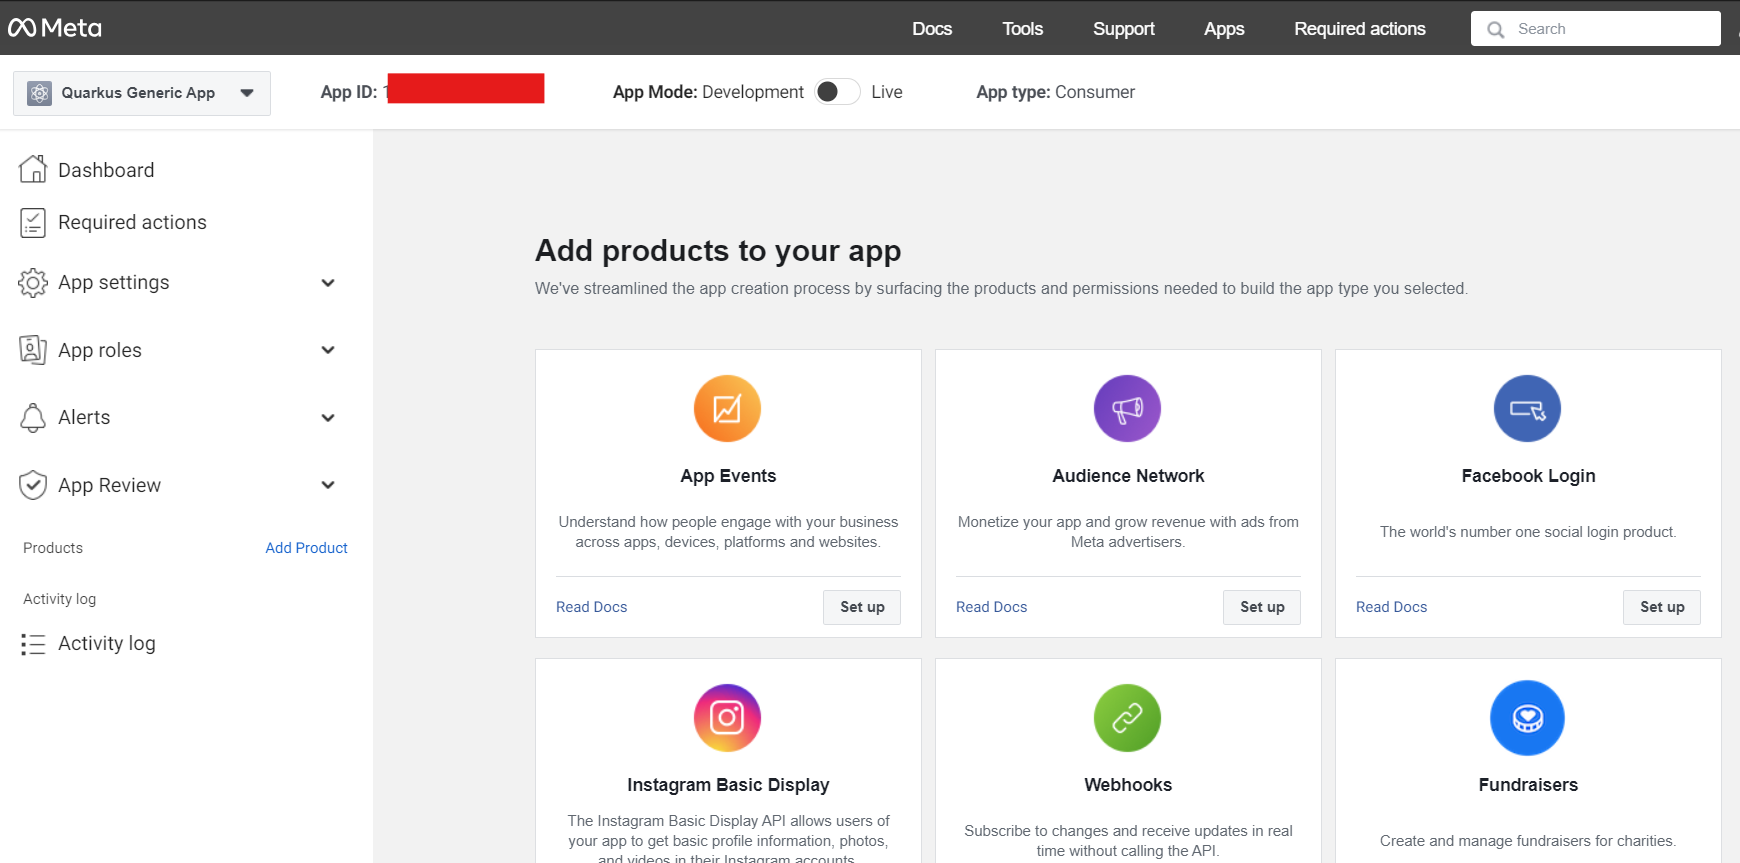
On the app page, click Set up on the Facebook login product:
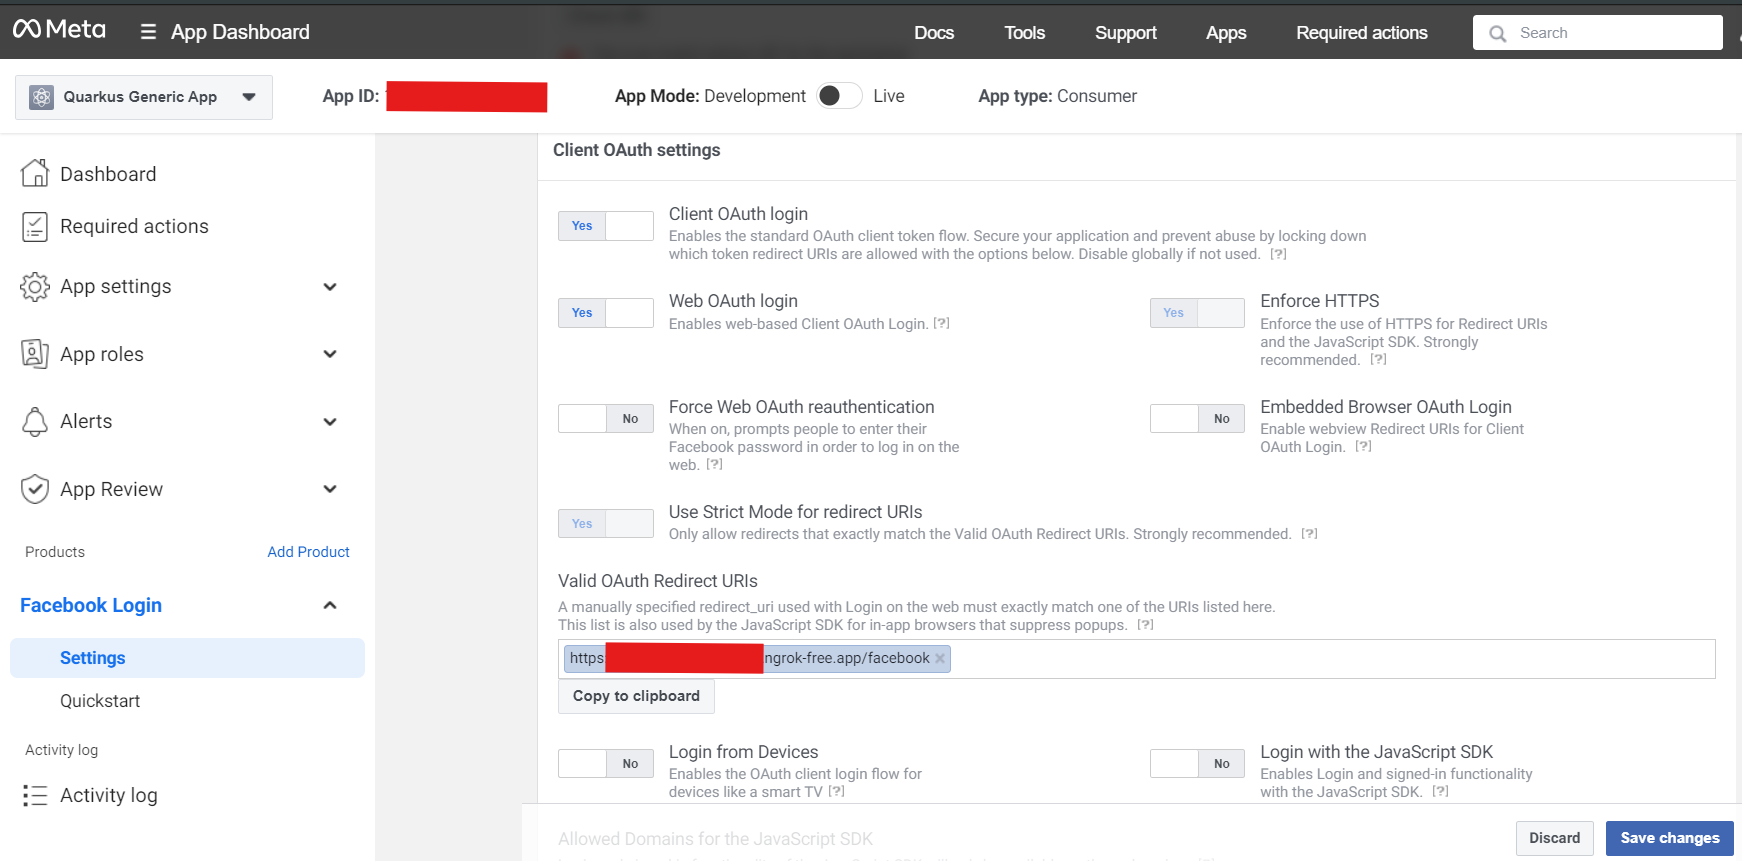
On the Quickstart page click on Facebook login > Settings on the left menu:

First click on Get Advanced Access to switch public_profile to advanced access.
Then enter your Redirect URIs (set to <host>/facebook) and press Save changes:
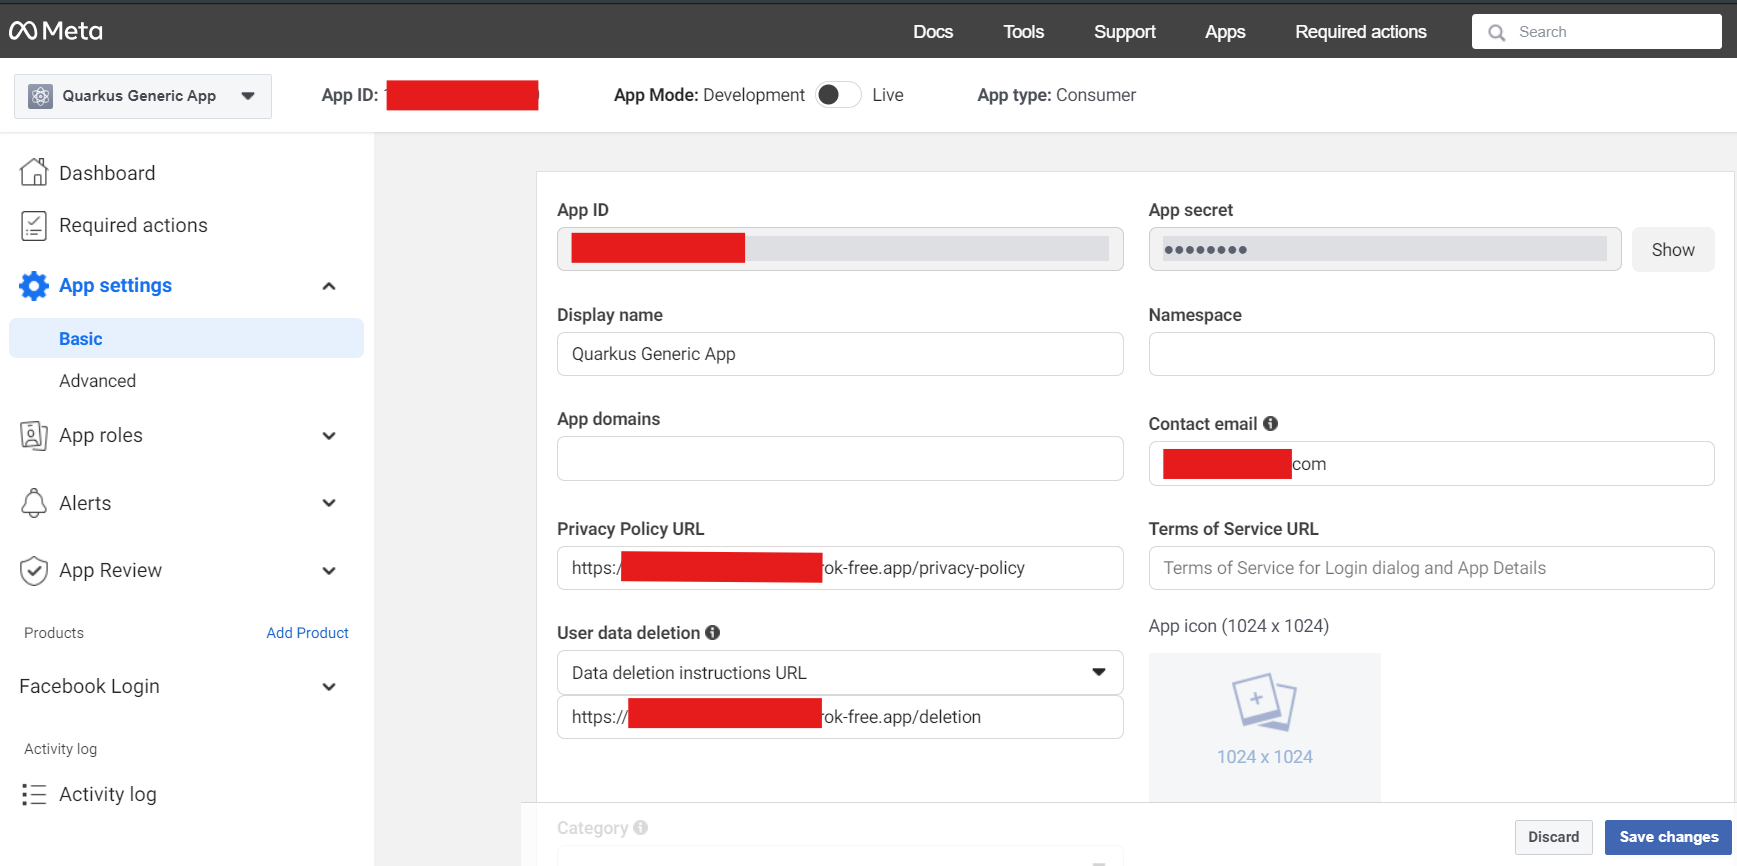
Now go to Settings > Basic on the left-hand menu, and write down your App ID and App secret:
You can now configure your application.properties:
quarkus.oidc.provider=facebook
quarkus.oidc.client-id=<App ID>
quarkus.oidc.credentials.secret=<App secret>
quarkus.oidc.provider=facebook will request Facebook to add email and public_profile scopes to issued access tokens. For information about overriding these scopes or requesting more scopes, see the Provider scopes section.
GitHub
In order to set up OIDC for GitHub you need to create a new OAuth application in your GitHub developer settings:
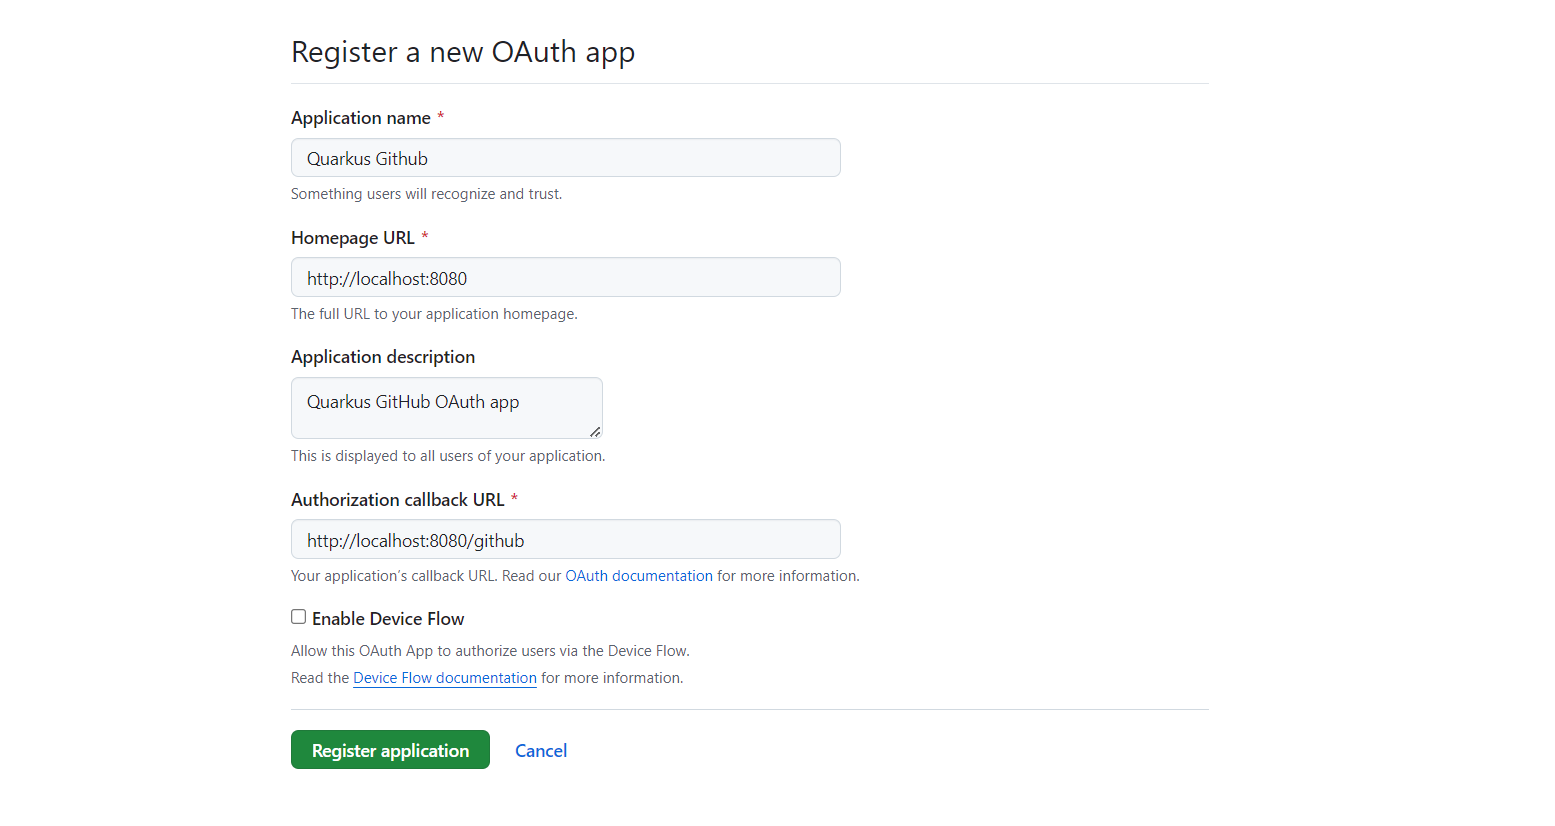
Make sure to fill in the appropriate details, but more importantly the Authorization Callback URL, set to http://localhost:8080/github
(if you intend to test this using the Quarkus dev mode).
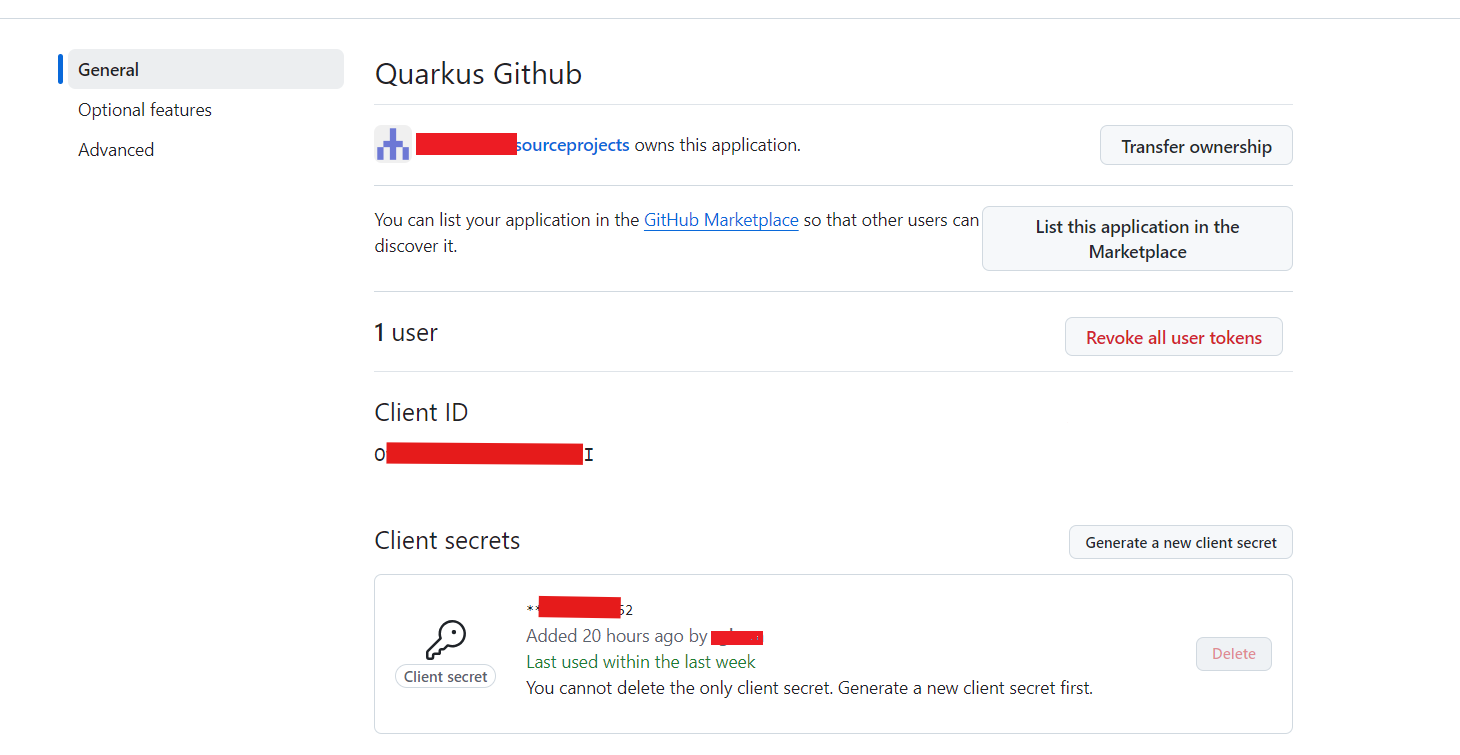
Now click on Register application and you’ll be shown your application page:
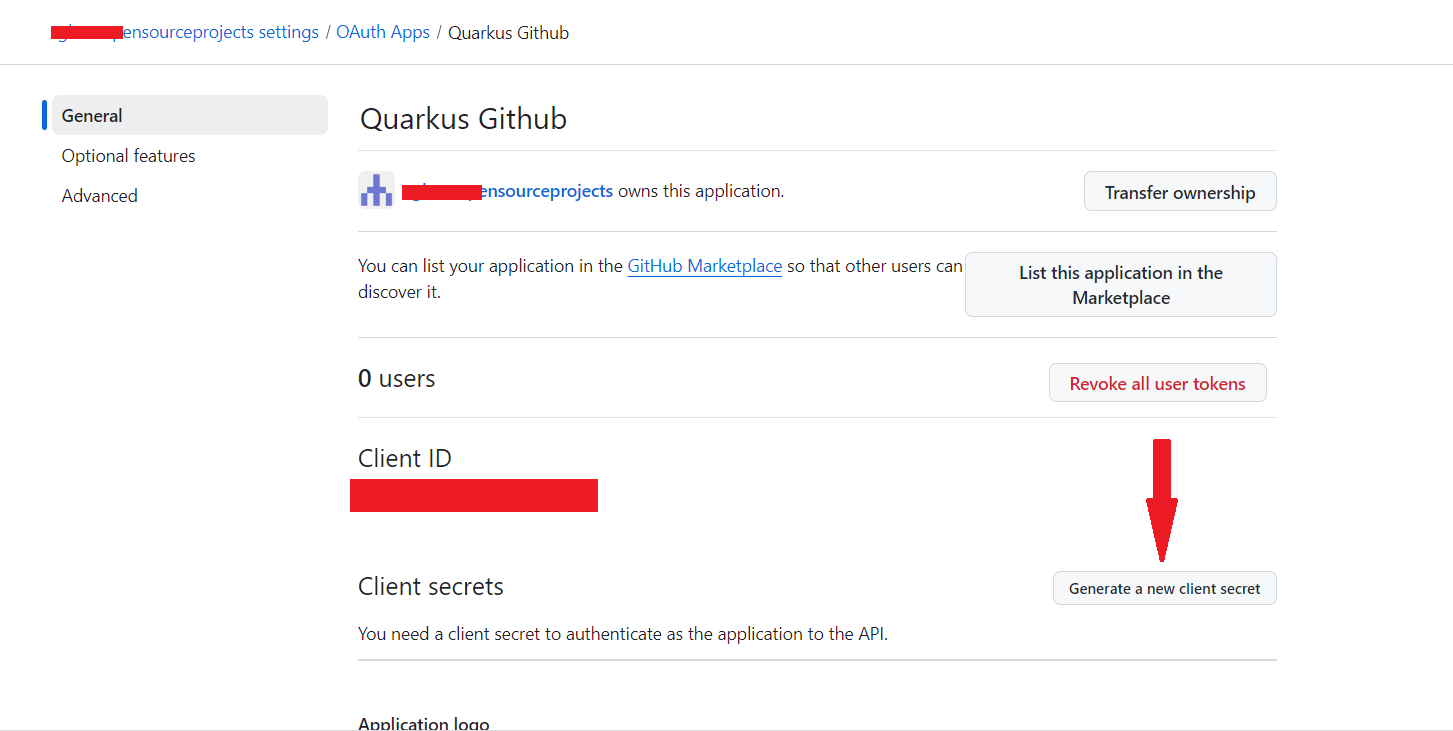
You need to click on Generate a new client secret, confirm your credentials, and write down
your Client ID and Client secret (especially that one, because you will not be able to see it again
later from that page, but you can always recreate one, do don’t worry too much):
Now add the following configuration to your application.properties:
quarkus.oidc.provider=github
quarkus.oidc.client-id=<Client ID>
quarkus.oidc.credentials.secret=<Secret>|
By default, Quarkus GitHub provider submits the client id and secret in the HTTP Authorization header.
However, GitHub may require that both client id and secret are submitted as form parameters instead.
When you get HTTP 401 error after logging in to GitHub and being redirected back to Quarkus MCP server,
replace the |
quarkus.oidc.provider=github will request GitHub to add a user:email scope to issued access tokens. For information about overriding this scope or requesting more scopes, see the Provider scopes section.
You can also send access tokens issued by GitHub to quarkus.oidc.application-type=service or quarkus.oidc.application-type=hybrid Quarkus applications.
|
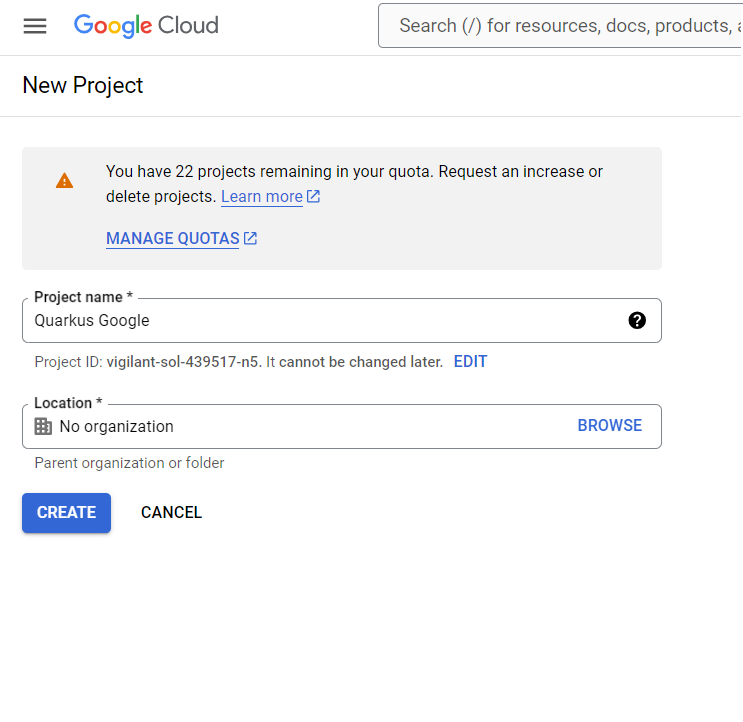
In order to set up OIDC for Google you need to create a new project in your Google Cloud Platform console:
Pick a project name and click on CREATE.
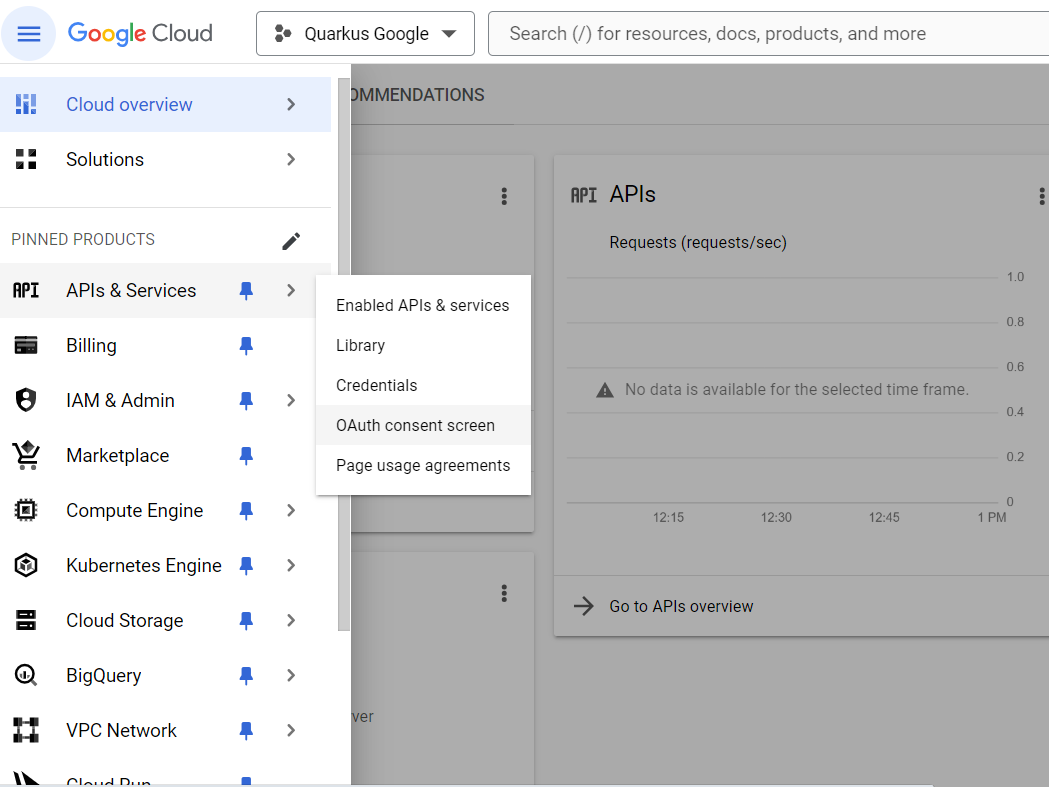
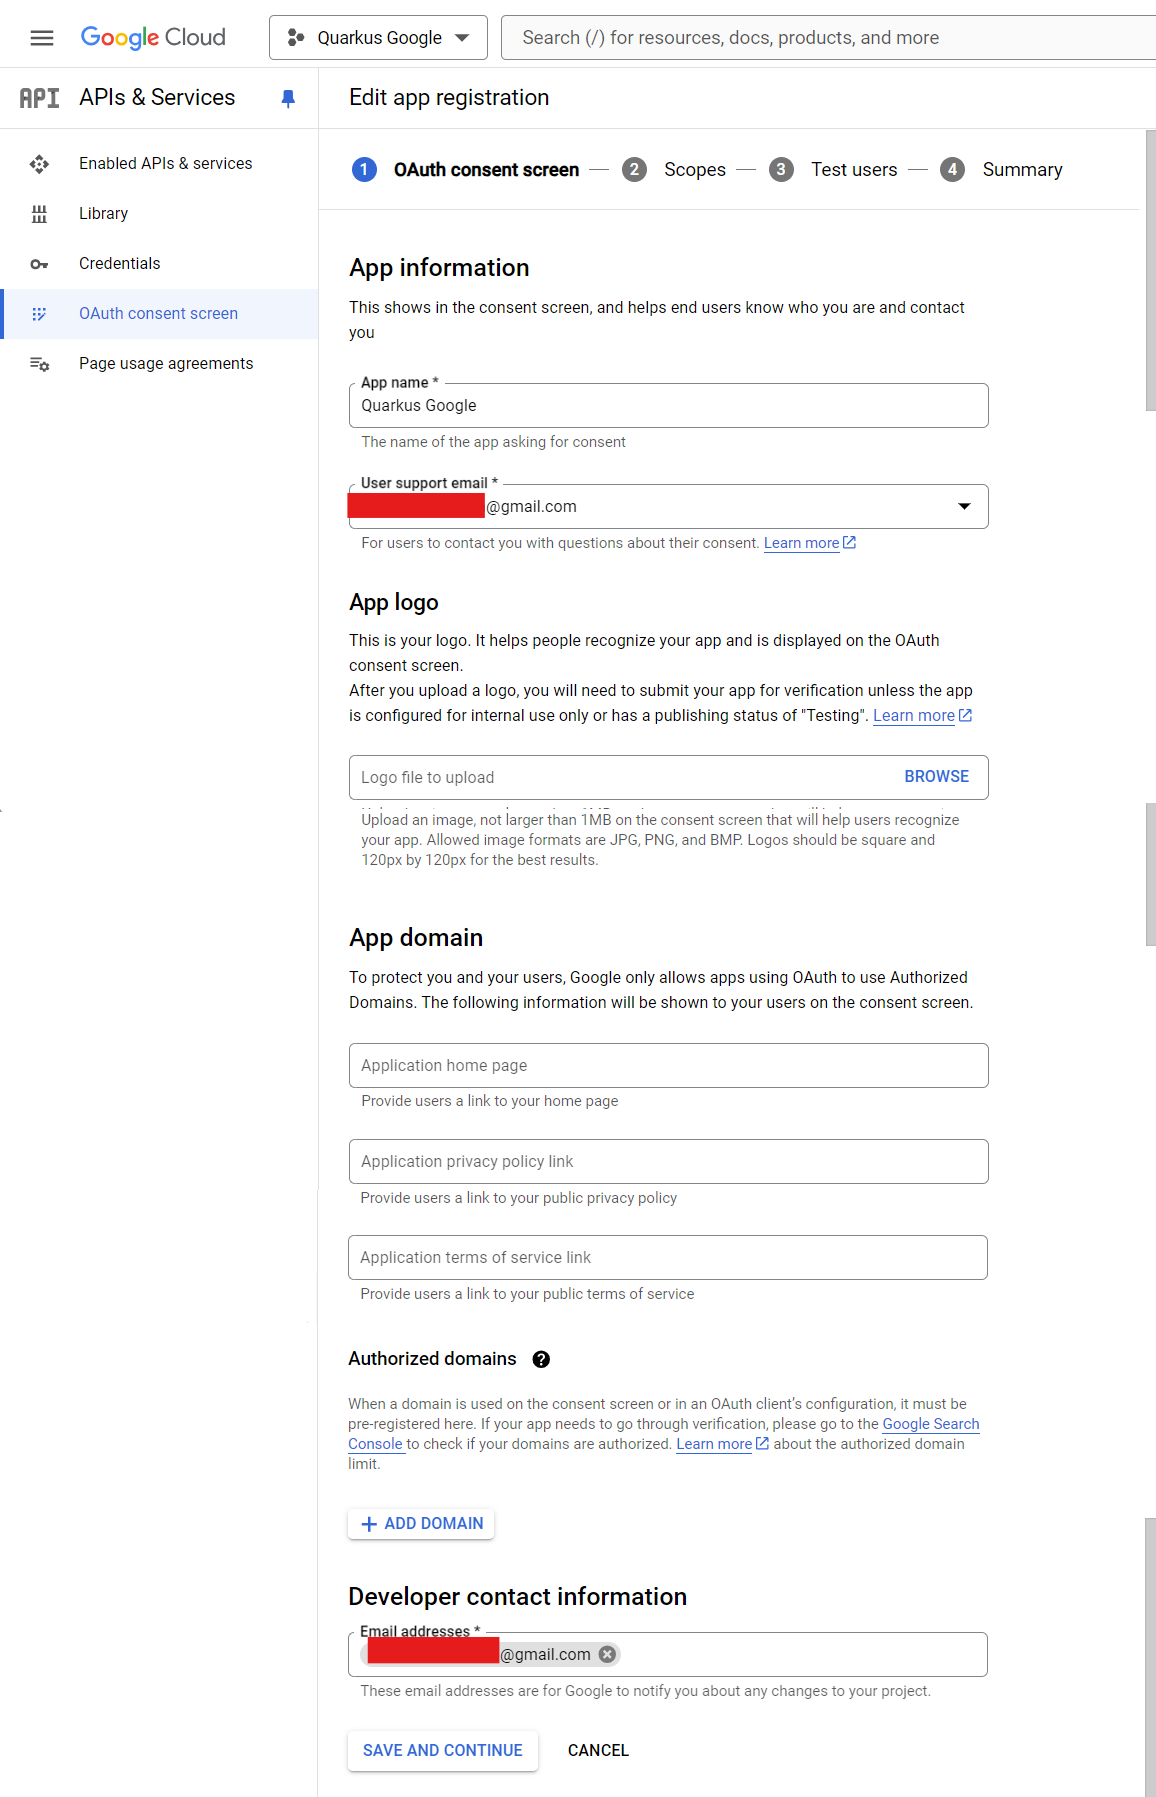
Now make sure you select your project in the top selector, and click on the left-hand bar menu on APIs and Services > OAuth consent screen:
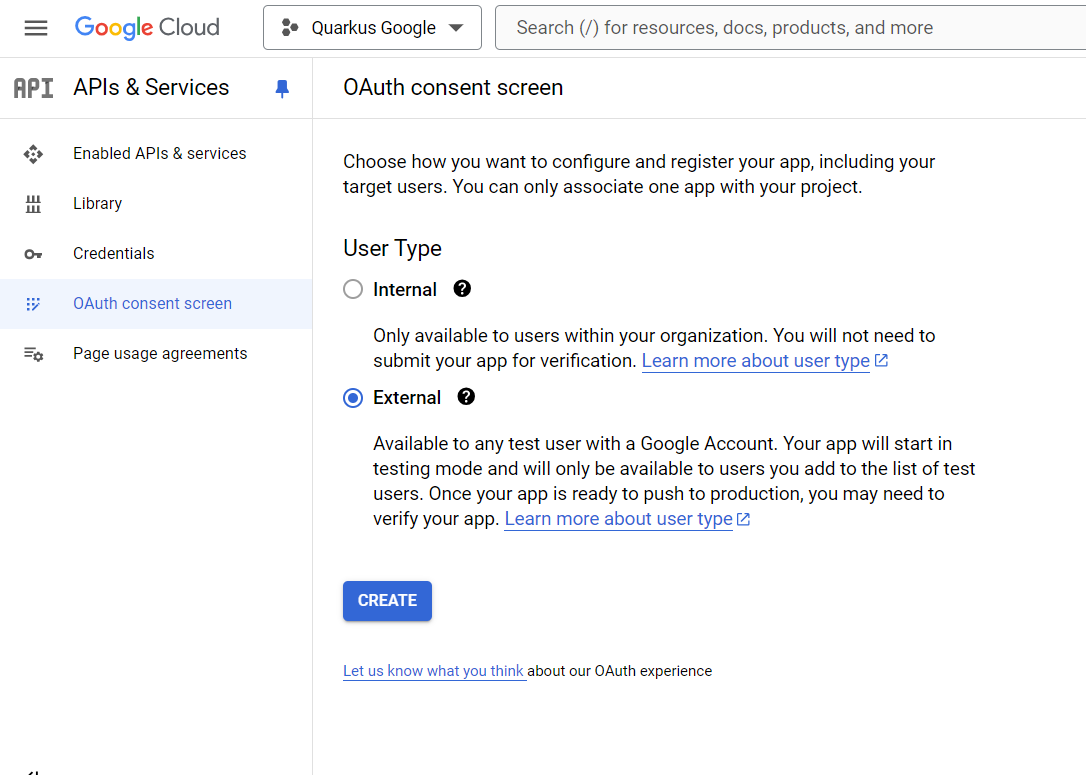
Select External to authorise any Google user to log in to your application and press CREATE:
Now you can fill in your application name, your support email, your developer contact information and press SAVE AND CONTINUE:
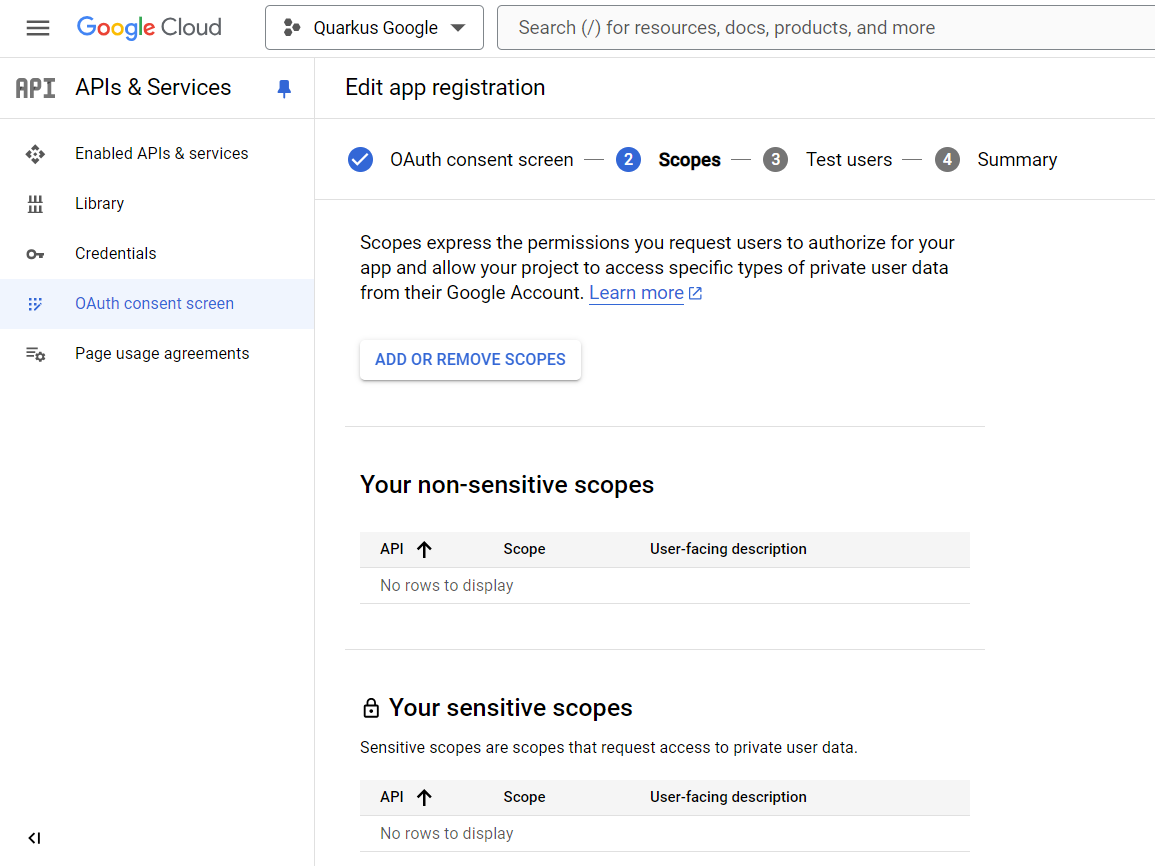
Do not add any scopes on the next page, and press SAVE AND CONTINUE:
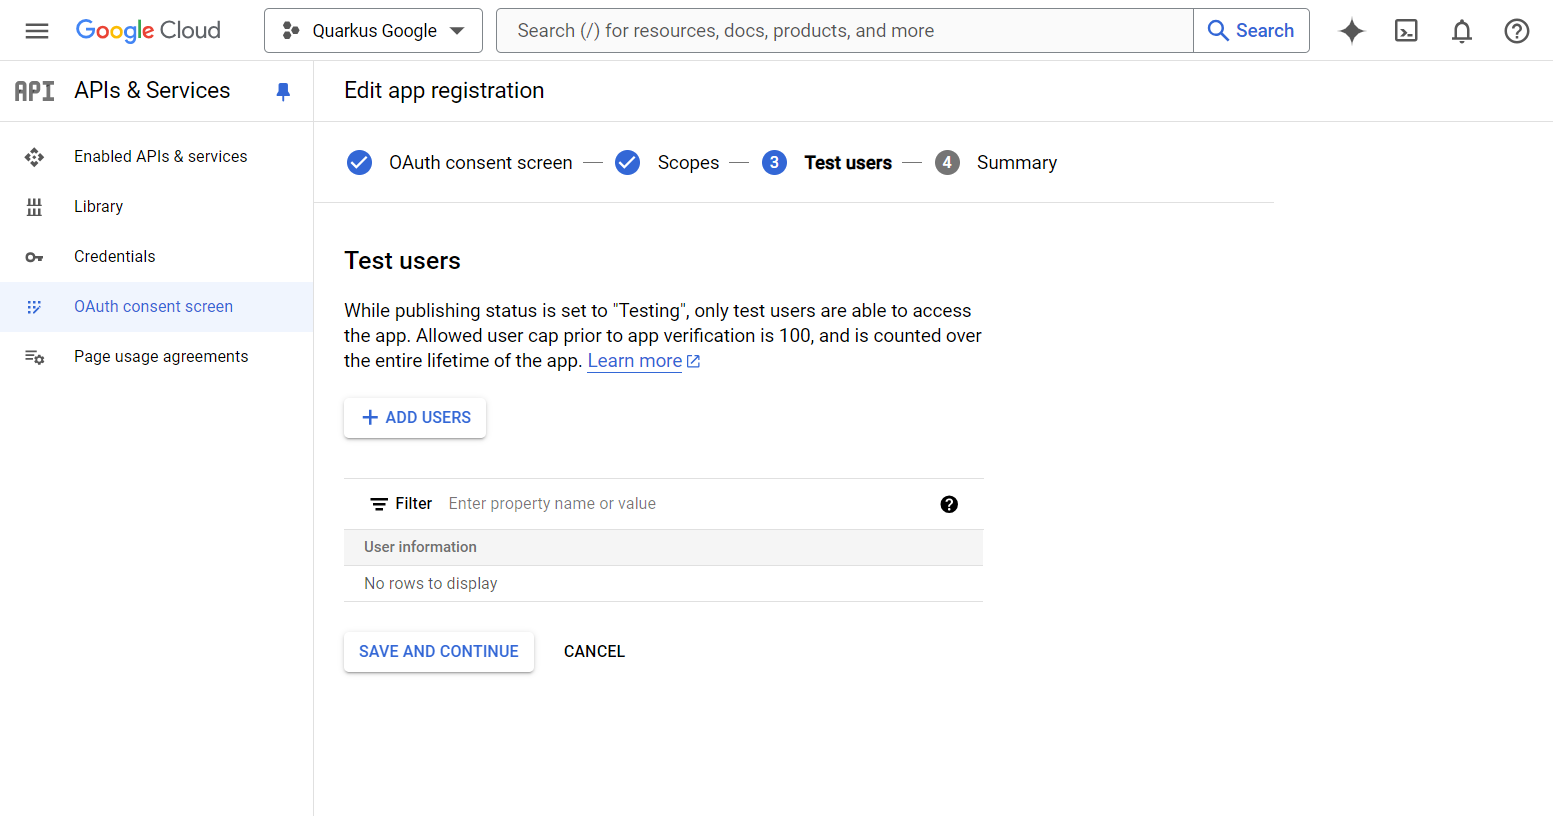
Do not add any test user on the next page, and press SAVE AND CONTINUE:
Click on the top menu CREATE CREDENTIALS > OAuth client ID:
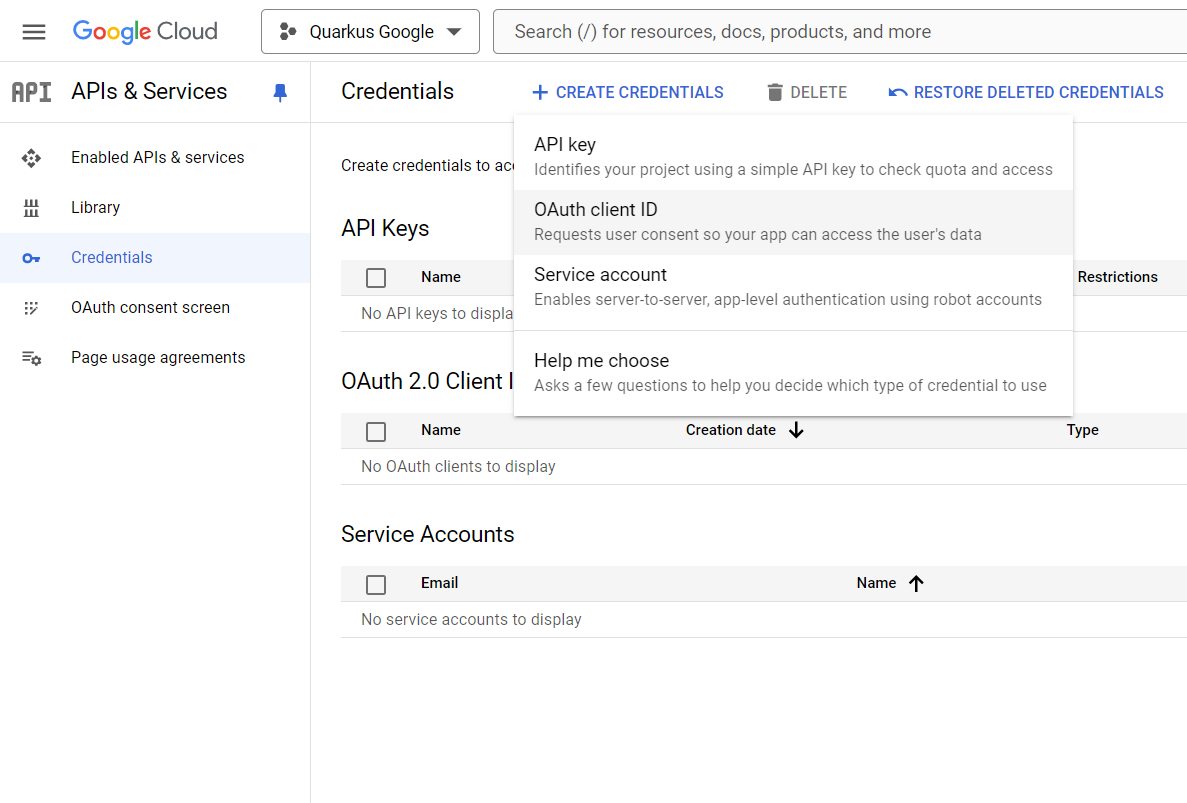
Select Web application as Application type, and add http://localhost:8080/google in
the Authorised redirect URIs list, then press CREATE:
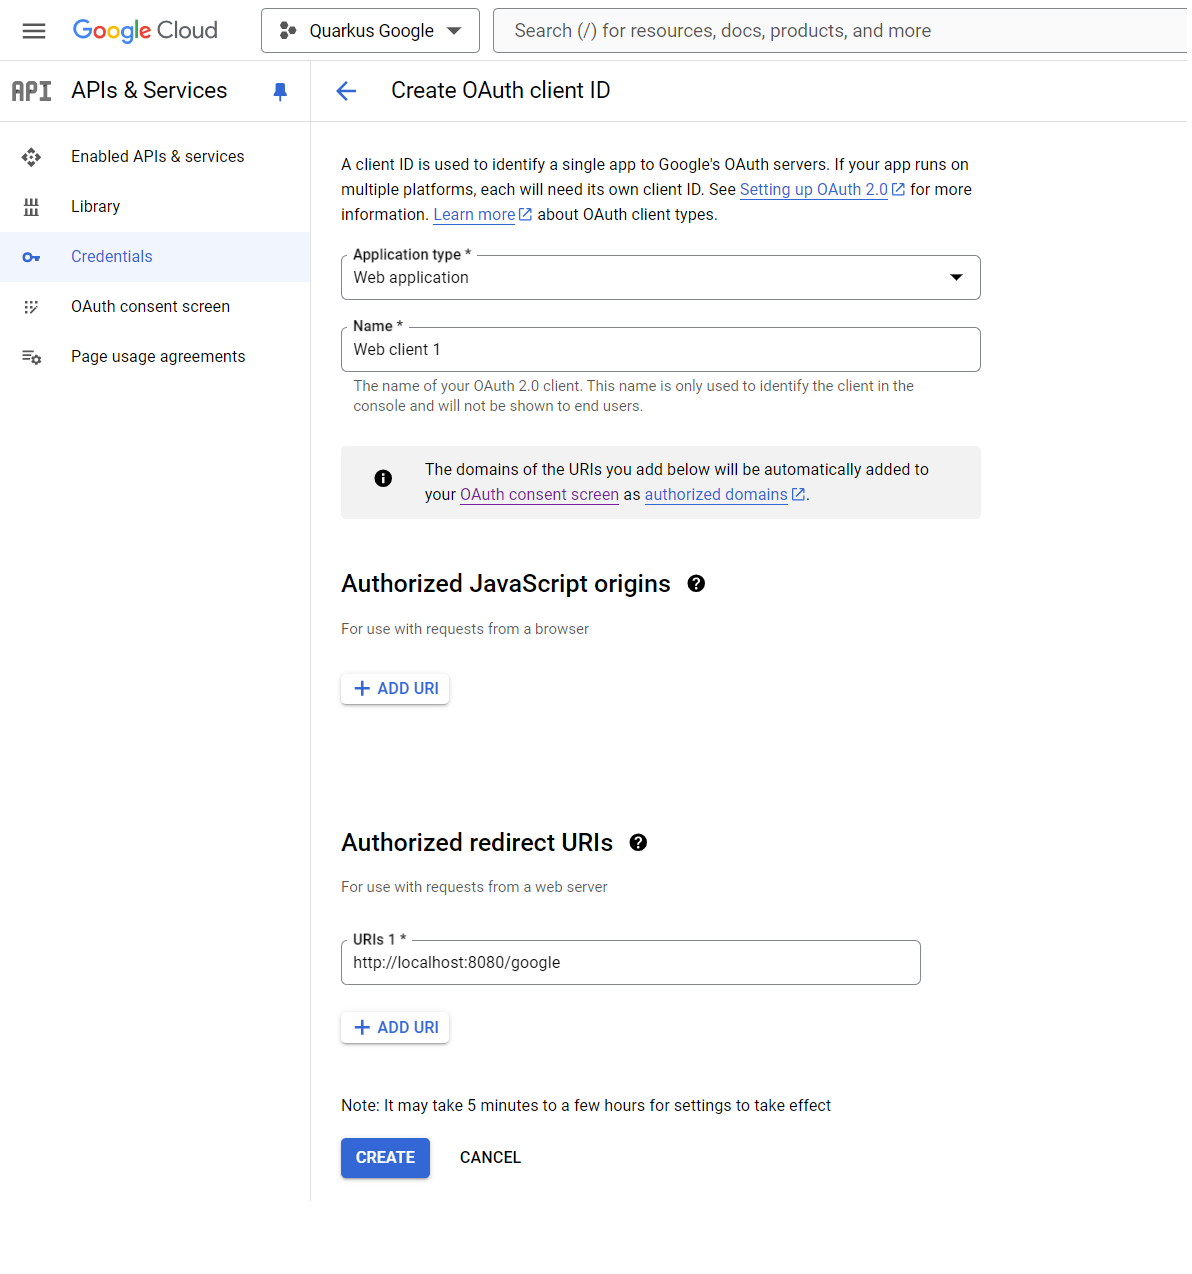
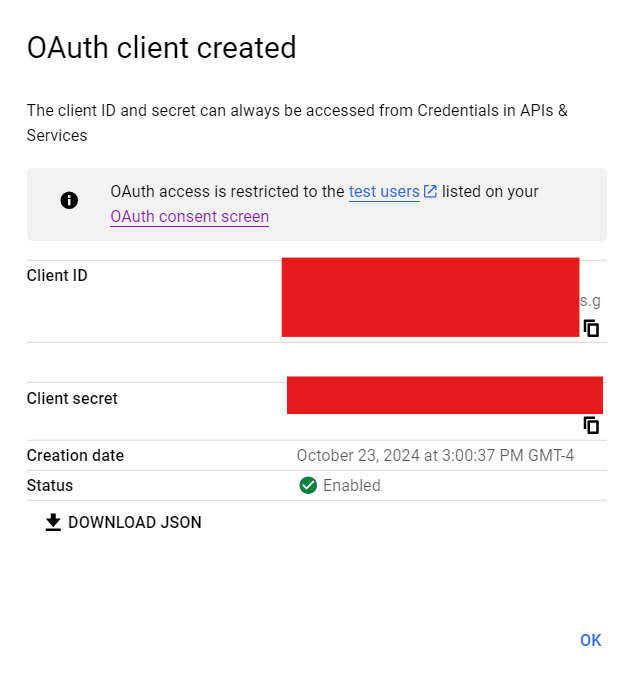
Copy your Client ID and Client Secret:
You can now configure your application.properties:
quarkus.oidc.provider=google
quarkus.oidc.client-id=<Client ID>
quarkus.oidc.credentials.secret=<Secret>
quarkus.oidc.provider=google will request Google to add openid, email and profile scopes to issued access tokens. For information about overriding these scopes or requesting more scopes, see the Provider scopes section.
You can also send access tokens issued by Google to quarkus.oidc.application-type=service or quarkus.oidc.application-type=hybrid Quarkus applications.
|
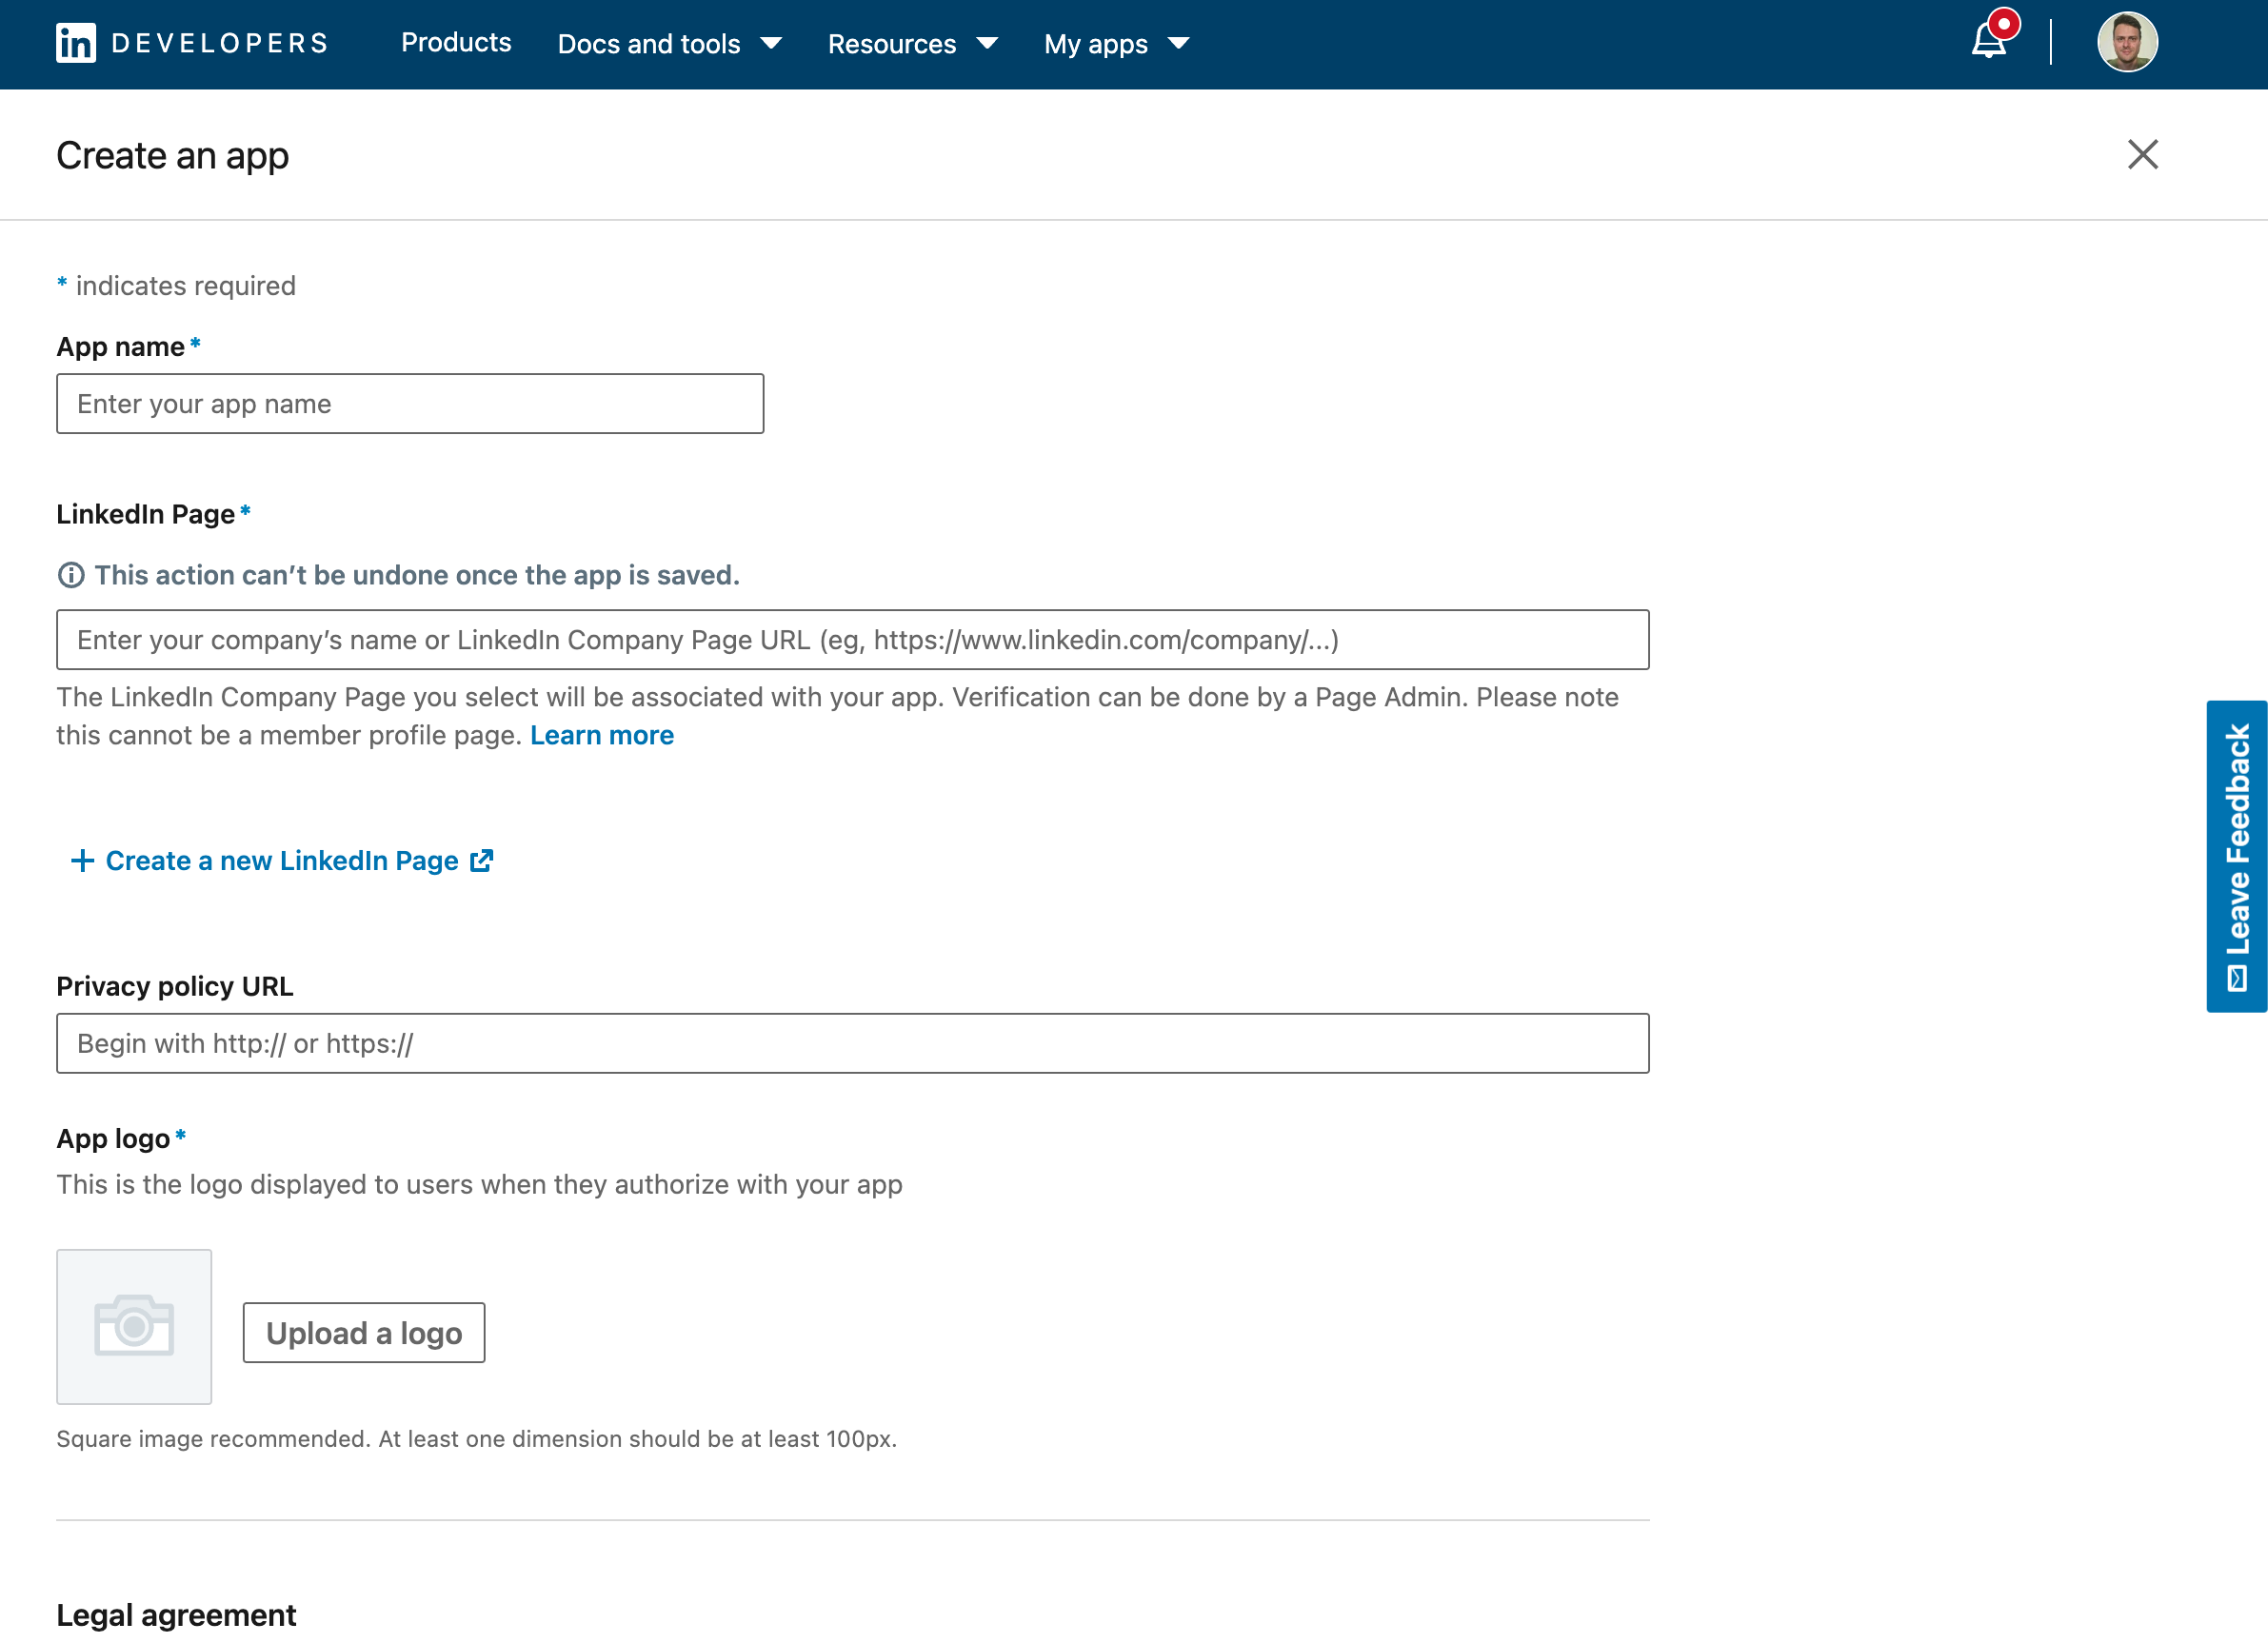
Create a LinkedIn application:
Add the Sign In with LinkedIn using OpenId Connect product:
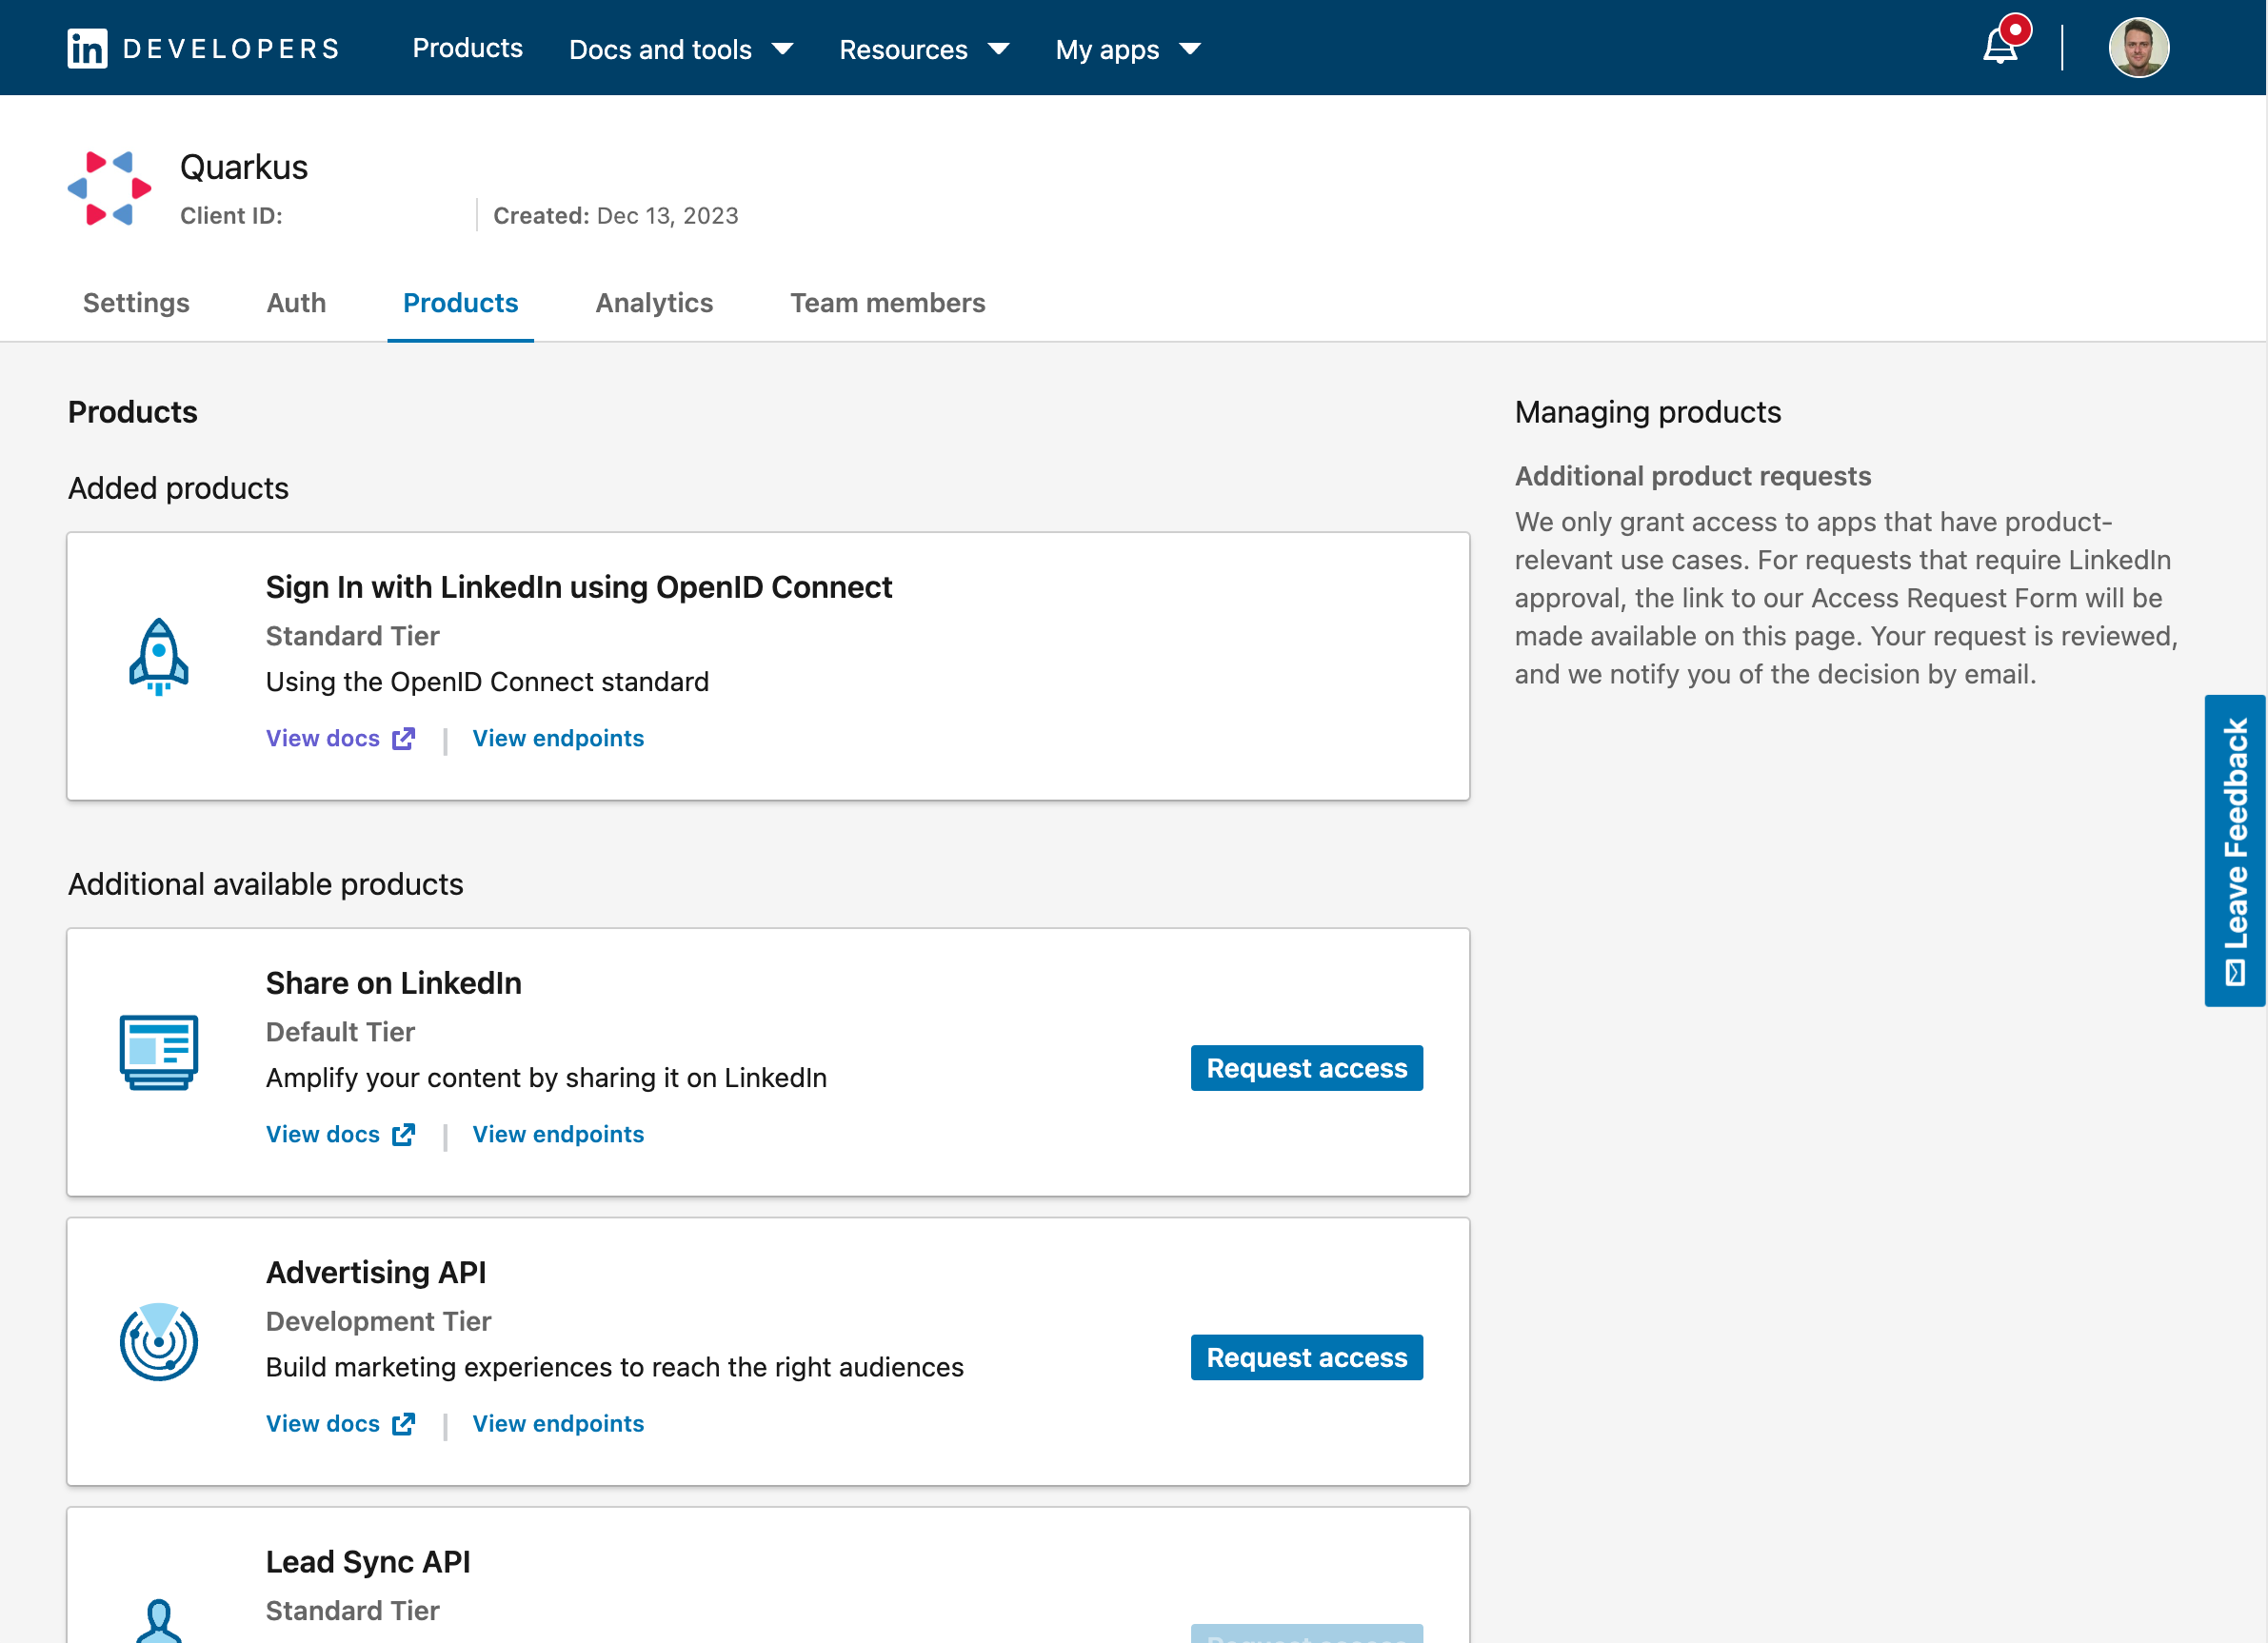
You now can get your client id and secret. Don’t forget to also add the authorized redirect URLs for your application:
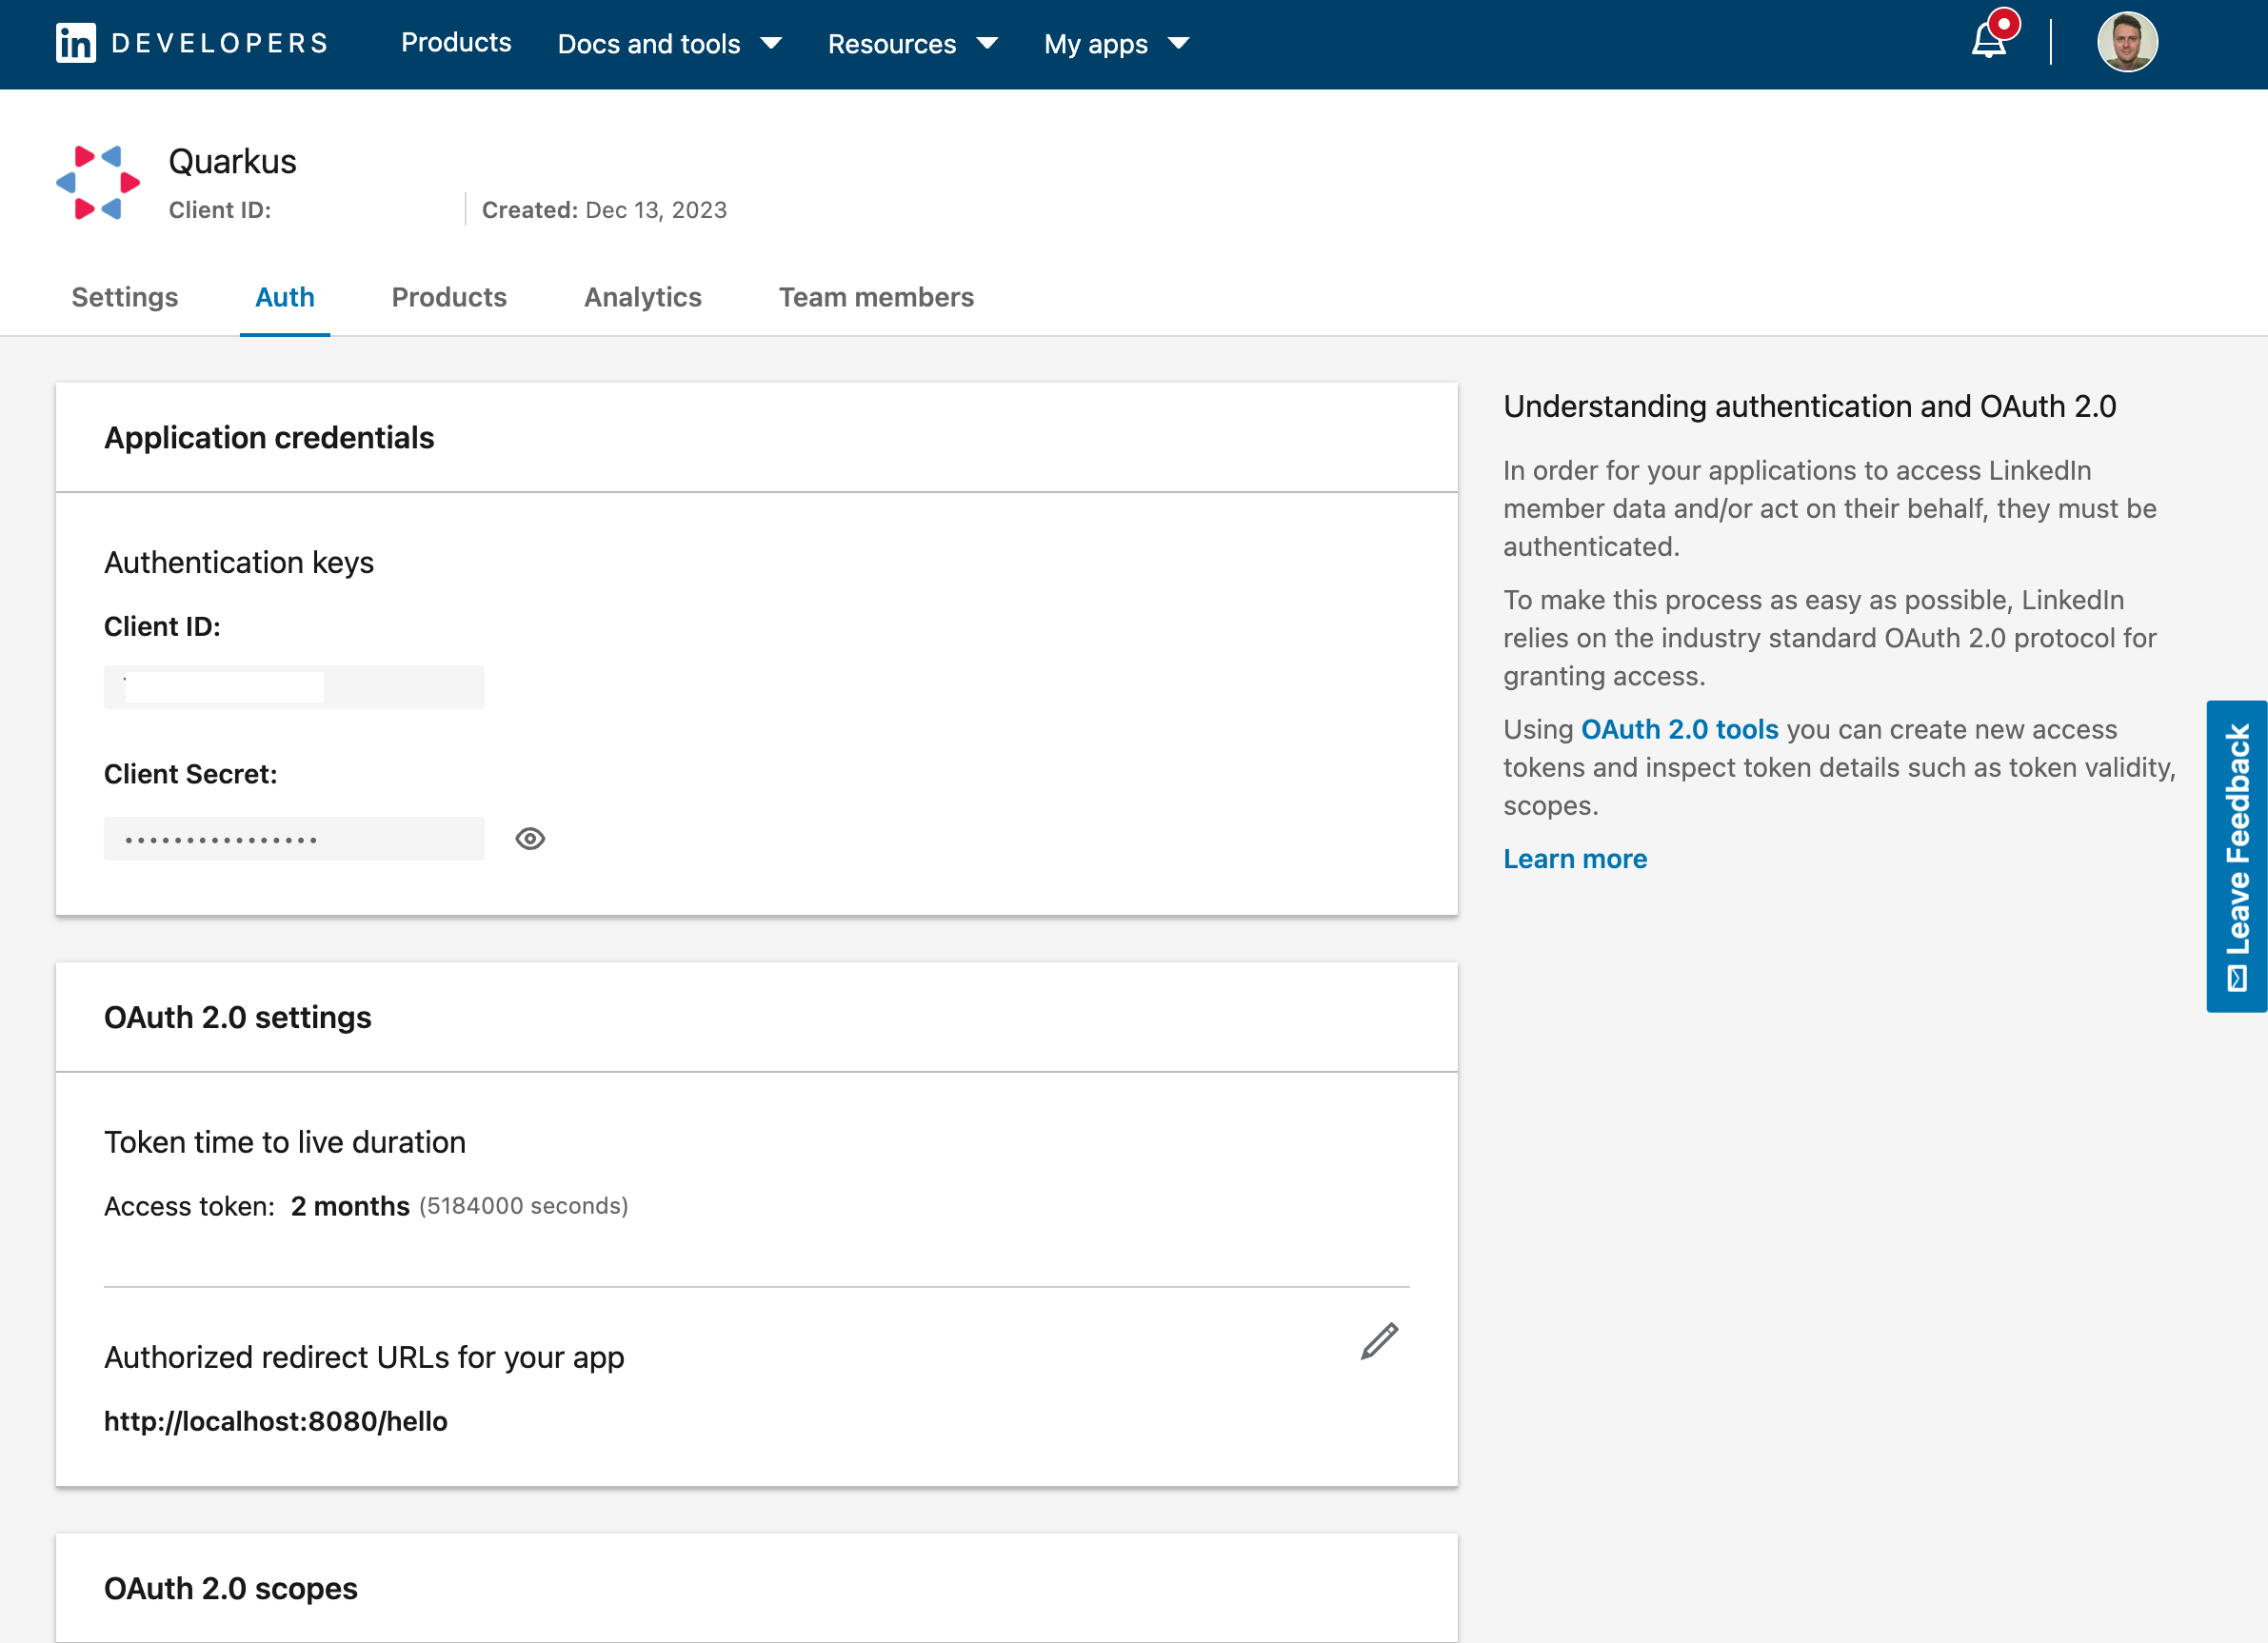
You can now configure your application.properties:
quarkus.oidc.provider=linkedin
quarkus.oidc.client-id=<Client ID>
quarkus.oidc.credentials.client-secret=<Client Secret>
Mastodon
Create a Mastodon account. You must pick a server, for example, mastodon.social.
Select a Development option in your account and register an application, for example:
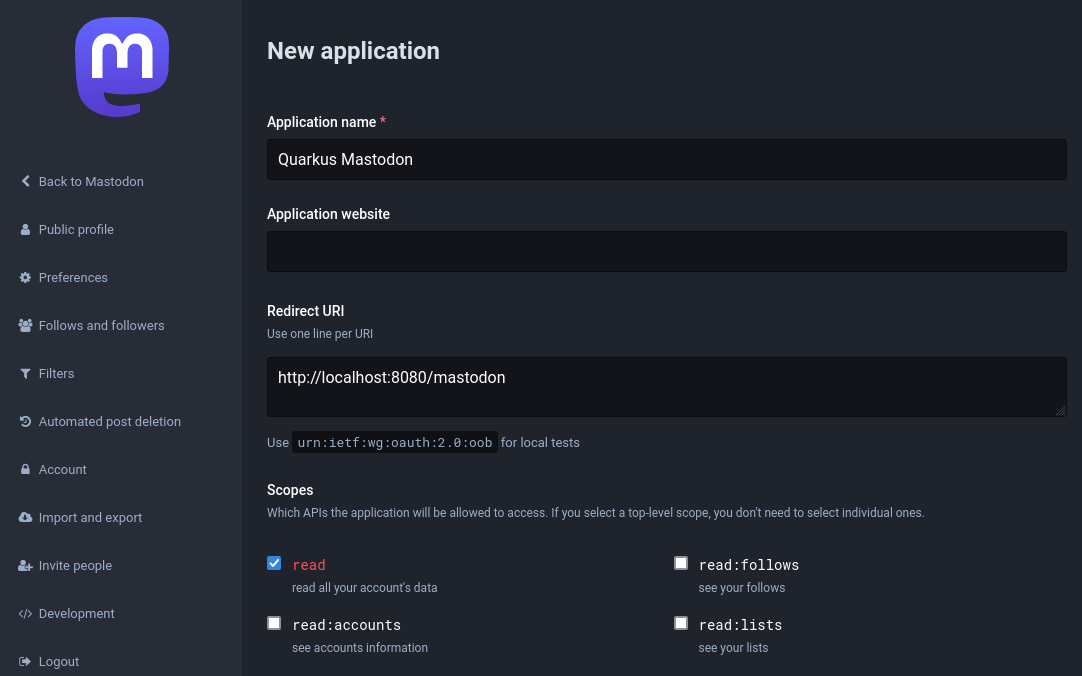
Select the registered application:
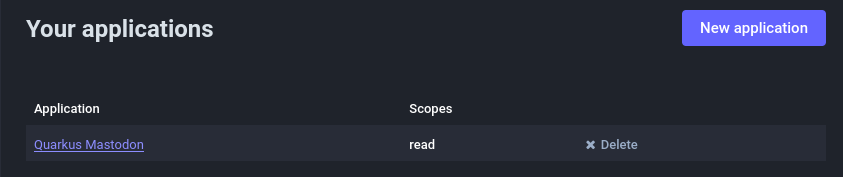
and note its client id and client secret properties, use them to configure your application.properties:
quarkus.oidc.provider=mastodon
quarkus.oidc.client-id=<Client ID>
quarkus.oidc.credentials.client-secret.value=<Client Secret>
By default, quarkus.oidc.provider=mastodon sets quarkus.oidc.auth-server-url to the https://mastodon.social Mastodon server address.
You can override quarkus.oidc.auth-server-url if you have created your account in another Mastodon server, for example:
quarkus.oidc.provider=mastodon
quarkus.oidc.auth-server-url=https://infosec.exchange
quarkus.oidc.client-id=<Client ID>
quarkus.oidc.credentials.client-secret.value=<Client Secret>
Microsoft
In order to set up OIDC for Microsoft you need to go to your Microsoft Azure Portal,
and search for Microsoft Entra ID formerly known as Azure Active Directory , then click on it:
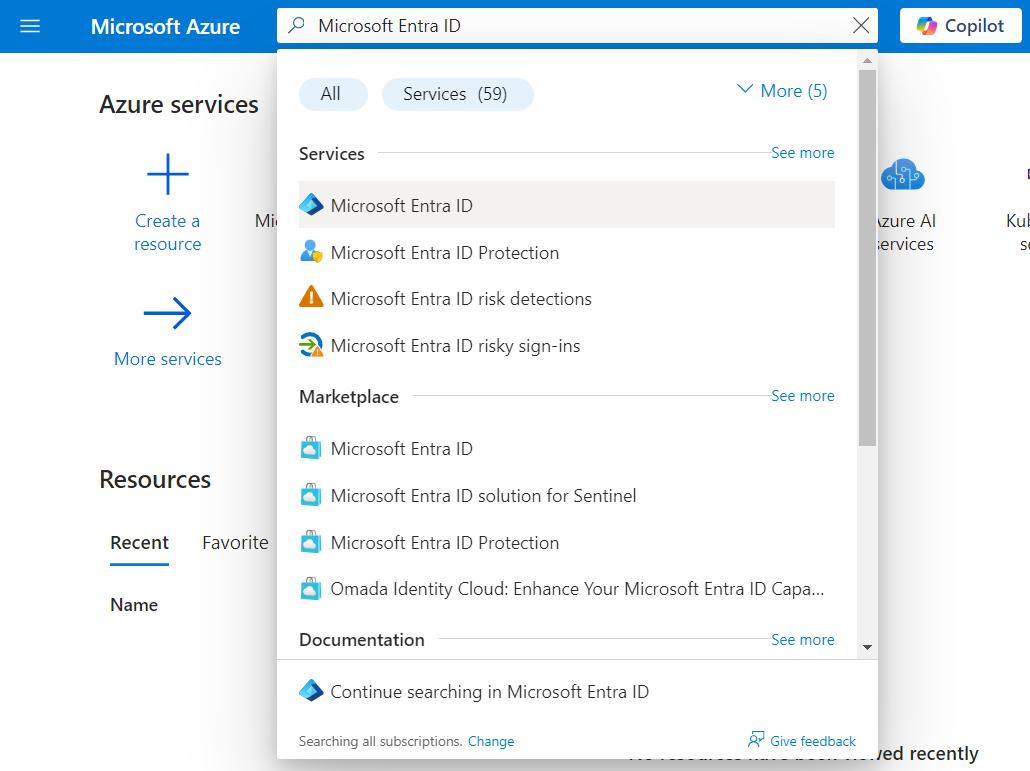
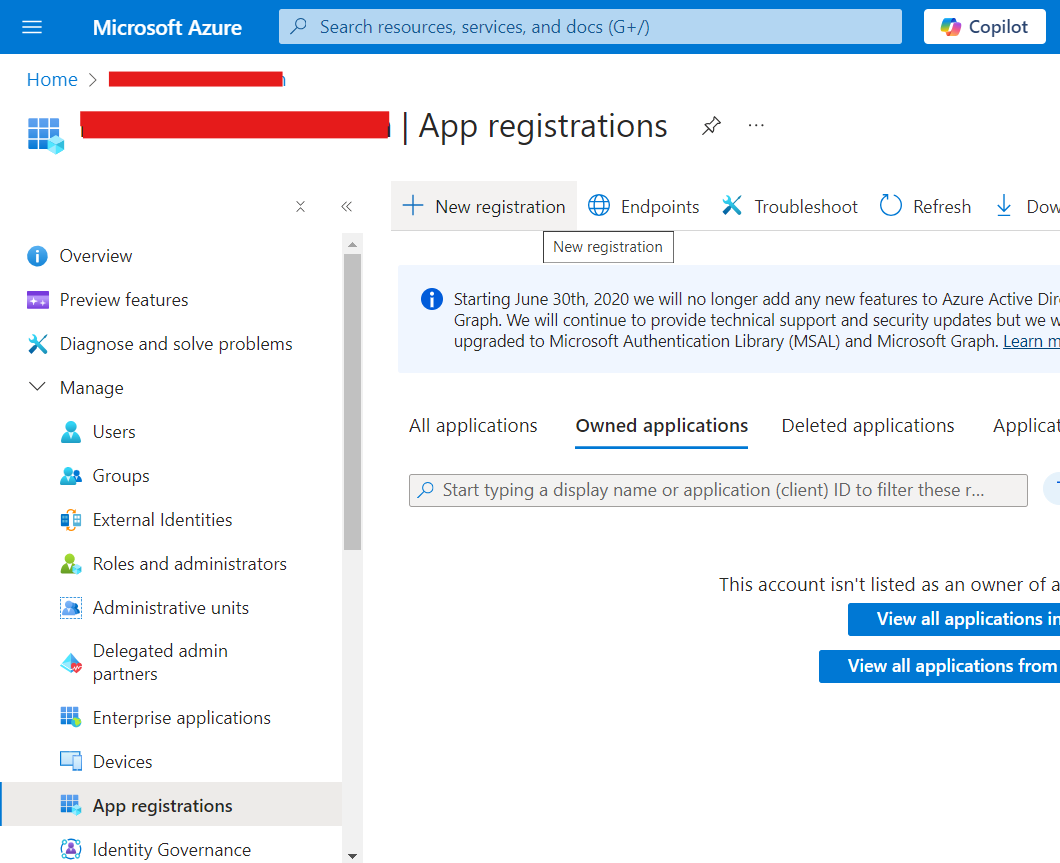
Once there, on the left side under Manage, click on App registrations then click on New registration:
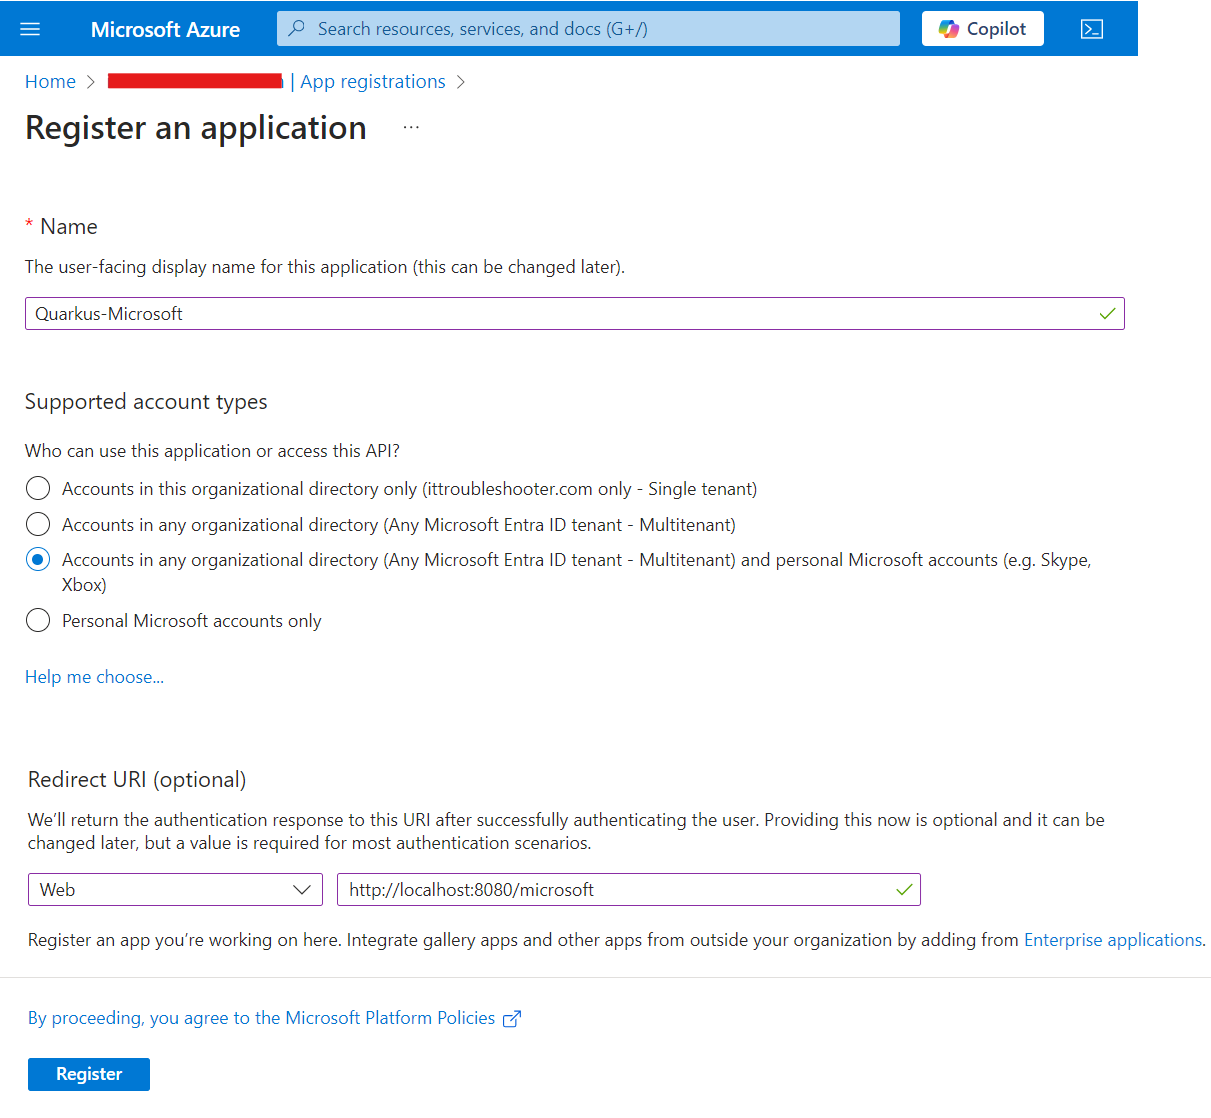
Fill in your application name, select Accounts in any organizational directory (Any Azure AD directory - Multitenant) and personal Microsoft accounts (e.g. Skype, Xbox) to allow anyone to log in, and add a Web Redirect URI as http://localhost:8080/microsoft,
then click on Register:
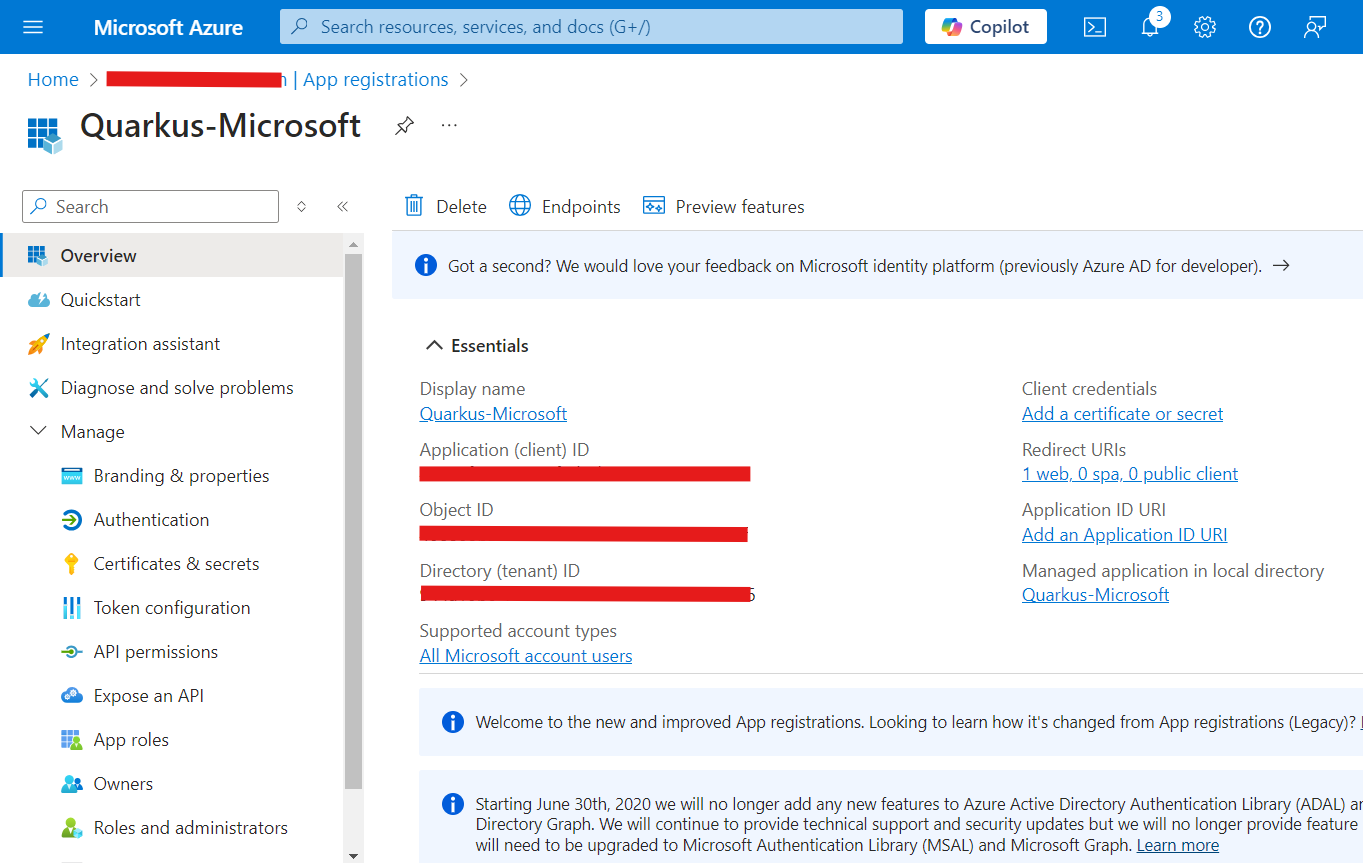
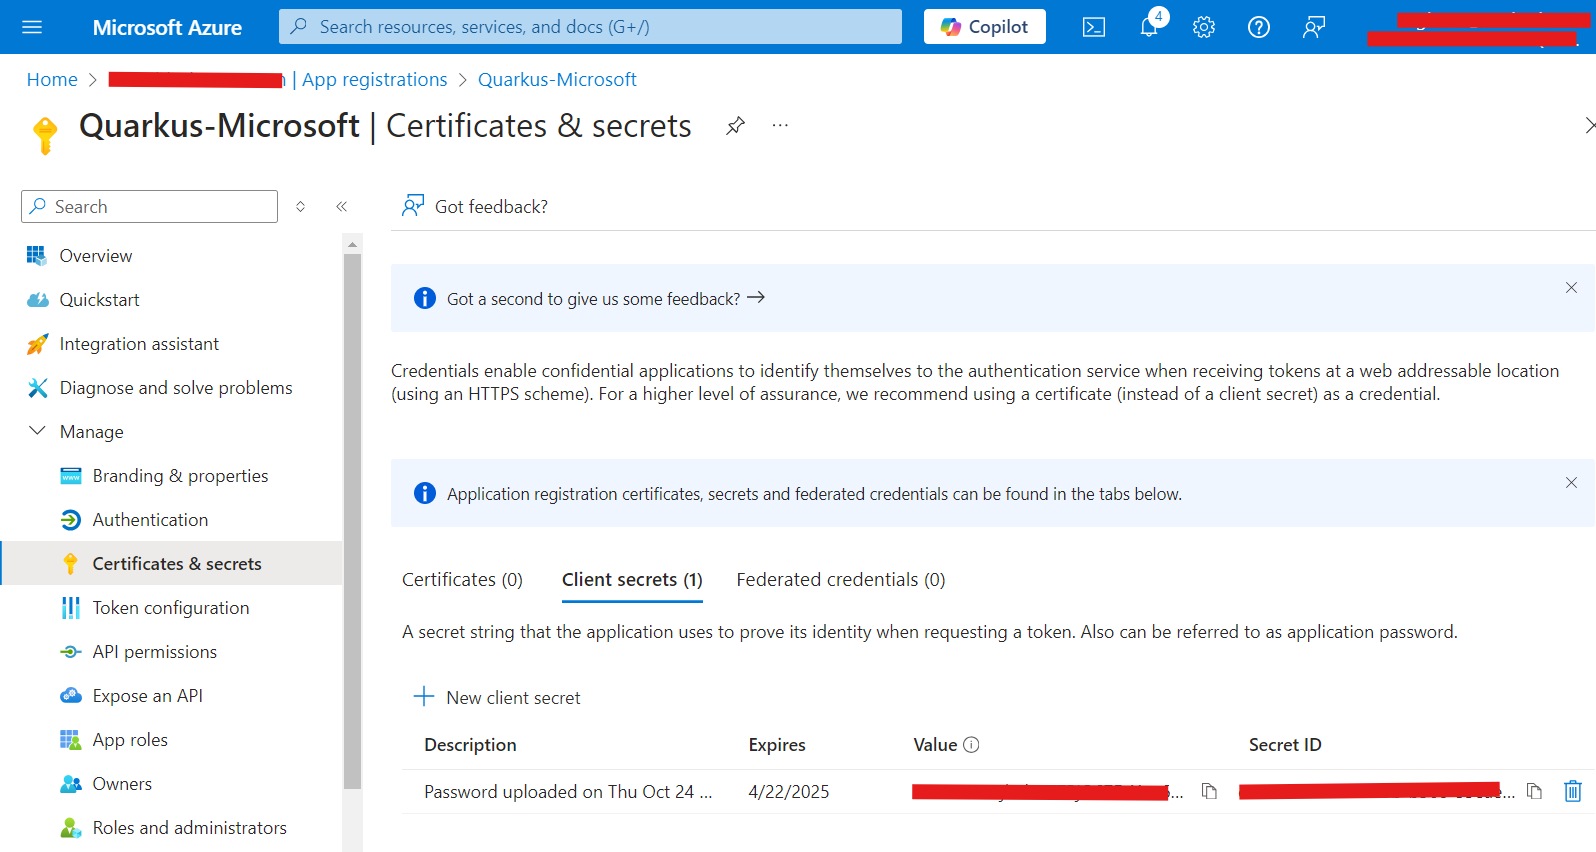
On that resulting page, copy the Client Id (under Application (client) ID, then click on Add a certificate or secret:
Now, under Client secrets (0), click on New client secret:
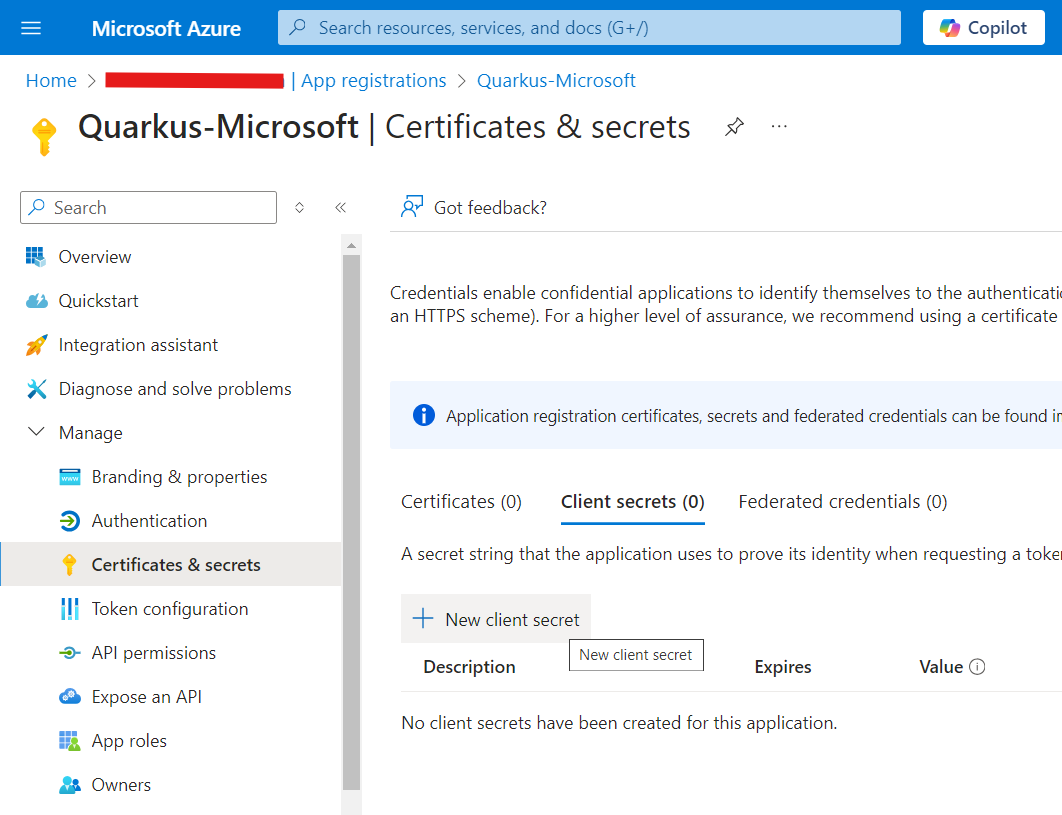
Click on Add in that dialog without changing anything:

On the resulting page, copy your Secret Value:
You can now configure your application.properties:
quarkus.oidc.provider=microsoft
quarkus.oidc.client-id=<Client ID>
quarkus.oidc.credentials.secret=<Secret>
quarkus.oidc.provider=microsoft will request Microsoft to add openid, email and profile scopes to issued access tokens. For information about overriding these scopes or requesting more scopes, see the Provider scopes section.
You can also send access tokens issued by Microsoft to quarkus.oidc.application-type=service or quarkus.oidc.application-type=hybrid Quarkus applications but you may need to set quarkus.oidc.verify-access-token-with-user-info configuration property to true if access tokens issued by Microsoft are not in JWT format.
|
|
Some Microsoft services may issue tokens whose signatures can only be verified if the current token’s |
Slack
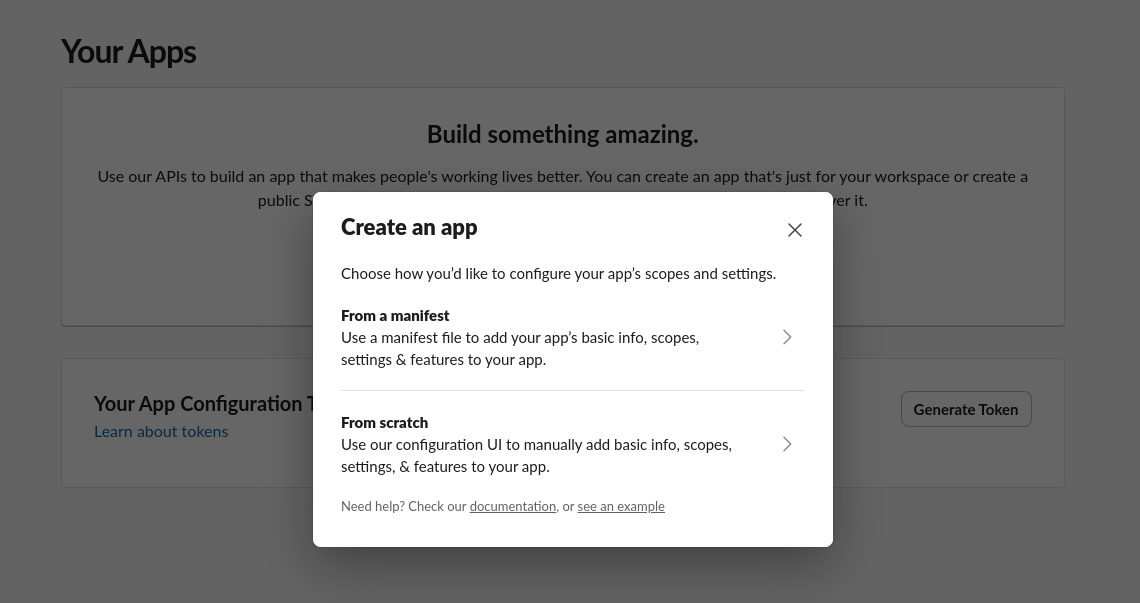
Create a Slack application:
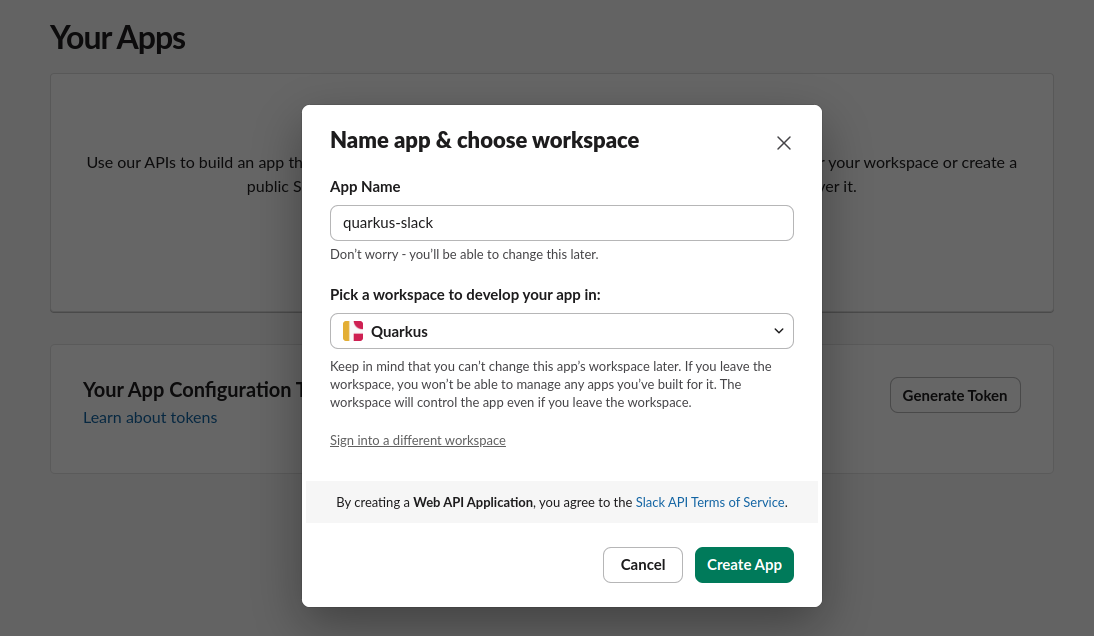
Select application name, workspace, and remember it, you will need it later:
Please save client id and secret displayed on the next page, you will need them later:

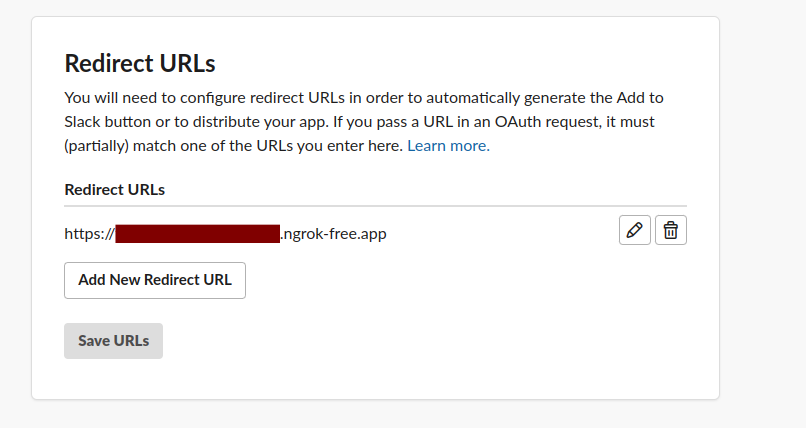
Configure redirect URLs. Slack provider requires HTTPS protocol, for development purposes, you can use ngrok:
You can now configure your application.properties:
quarkus.oidc.provider=slack
quarkus.oidc.client-id=<Client ID>
quarkus.oidc.credentials.secret=<Client Secret>
quarkus.oidc.authentication.extra-params.team=quarkus-slack (1)| 1 | Use the team parameter to refer to the workspace you chose during the Slack OIDC application registration. |
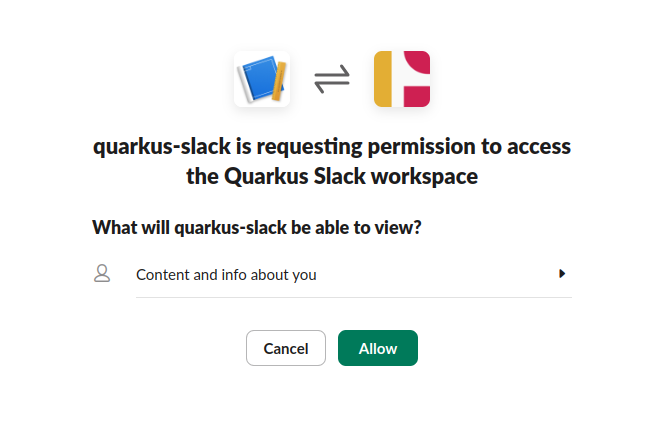
Open your browser and navigate to your application https://<your ngrok instance>.ngrok-free.app/.
Quarkus will redirect you to Slack provider on the first request where you can grant required permissions:
Spotify
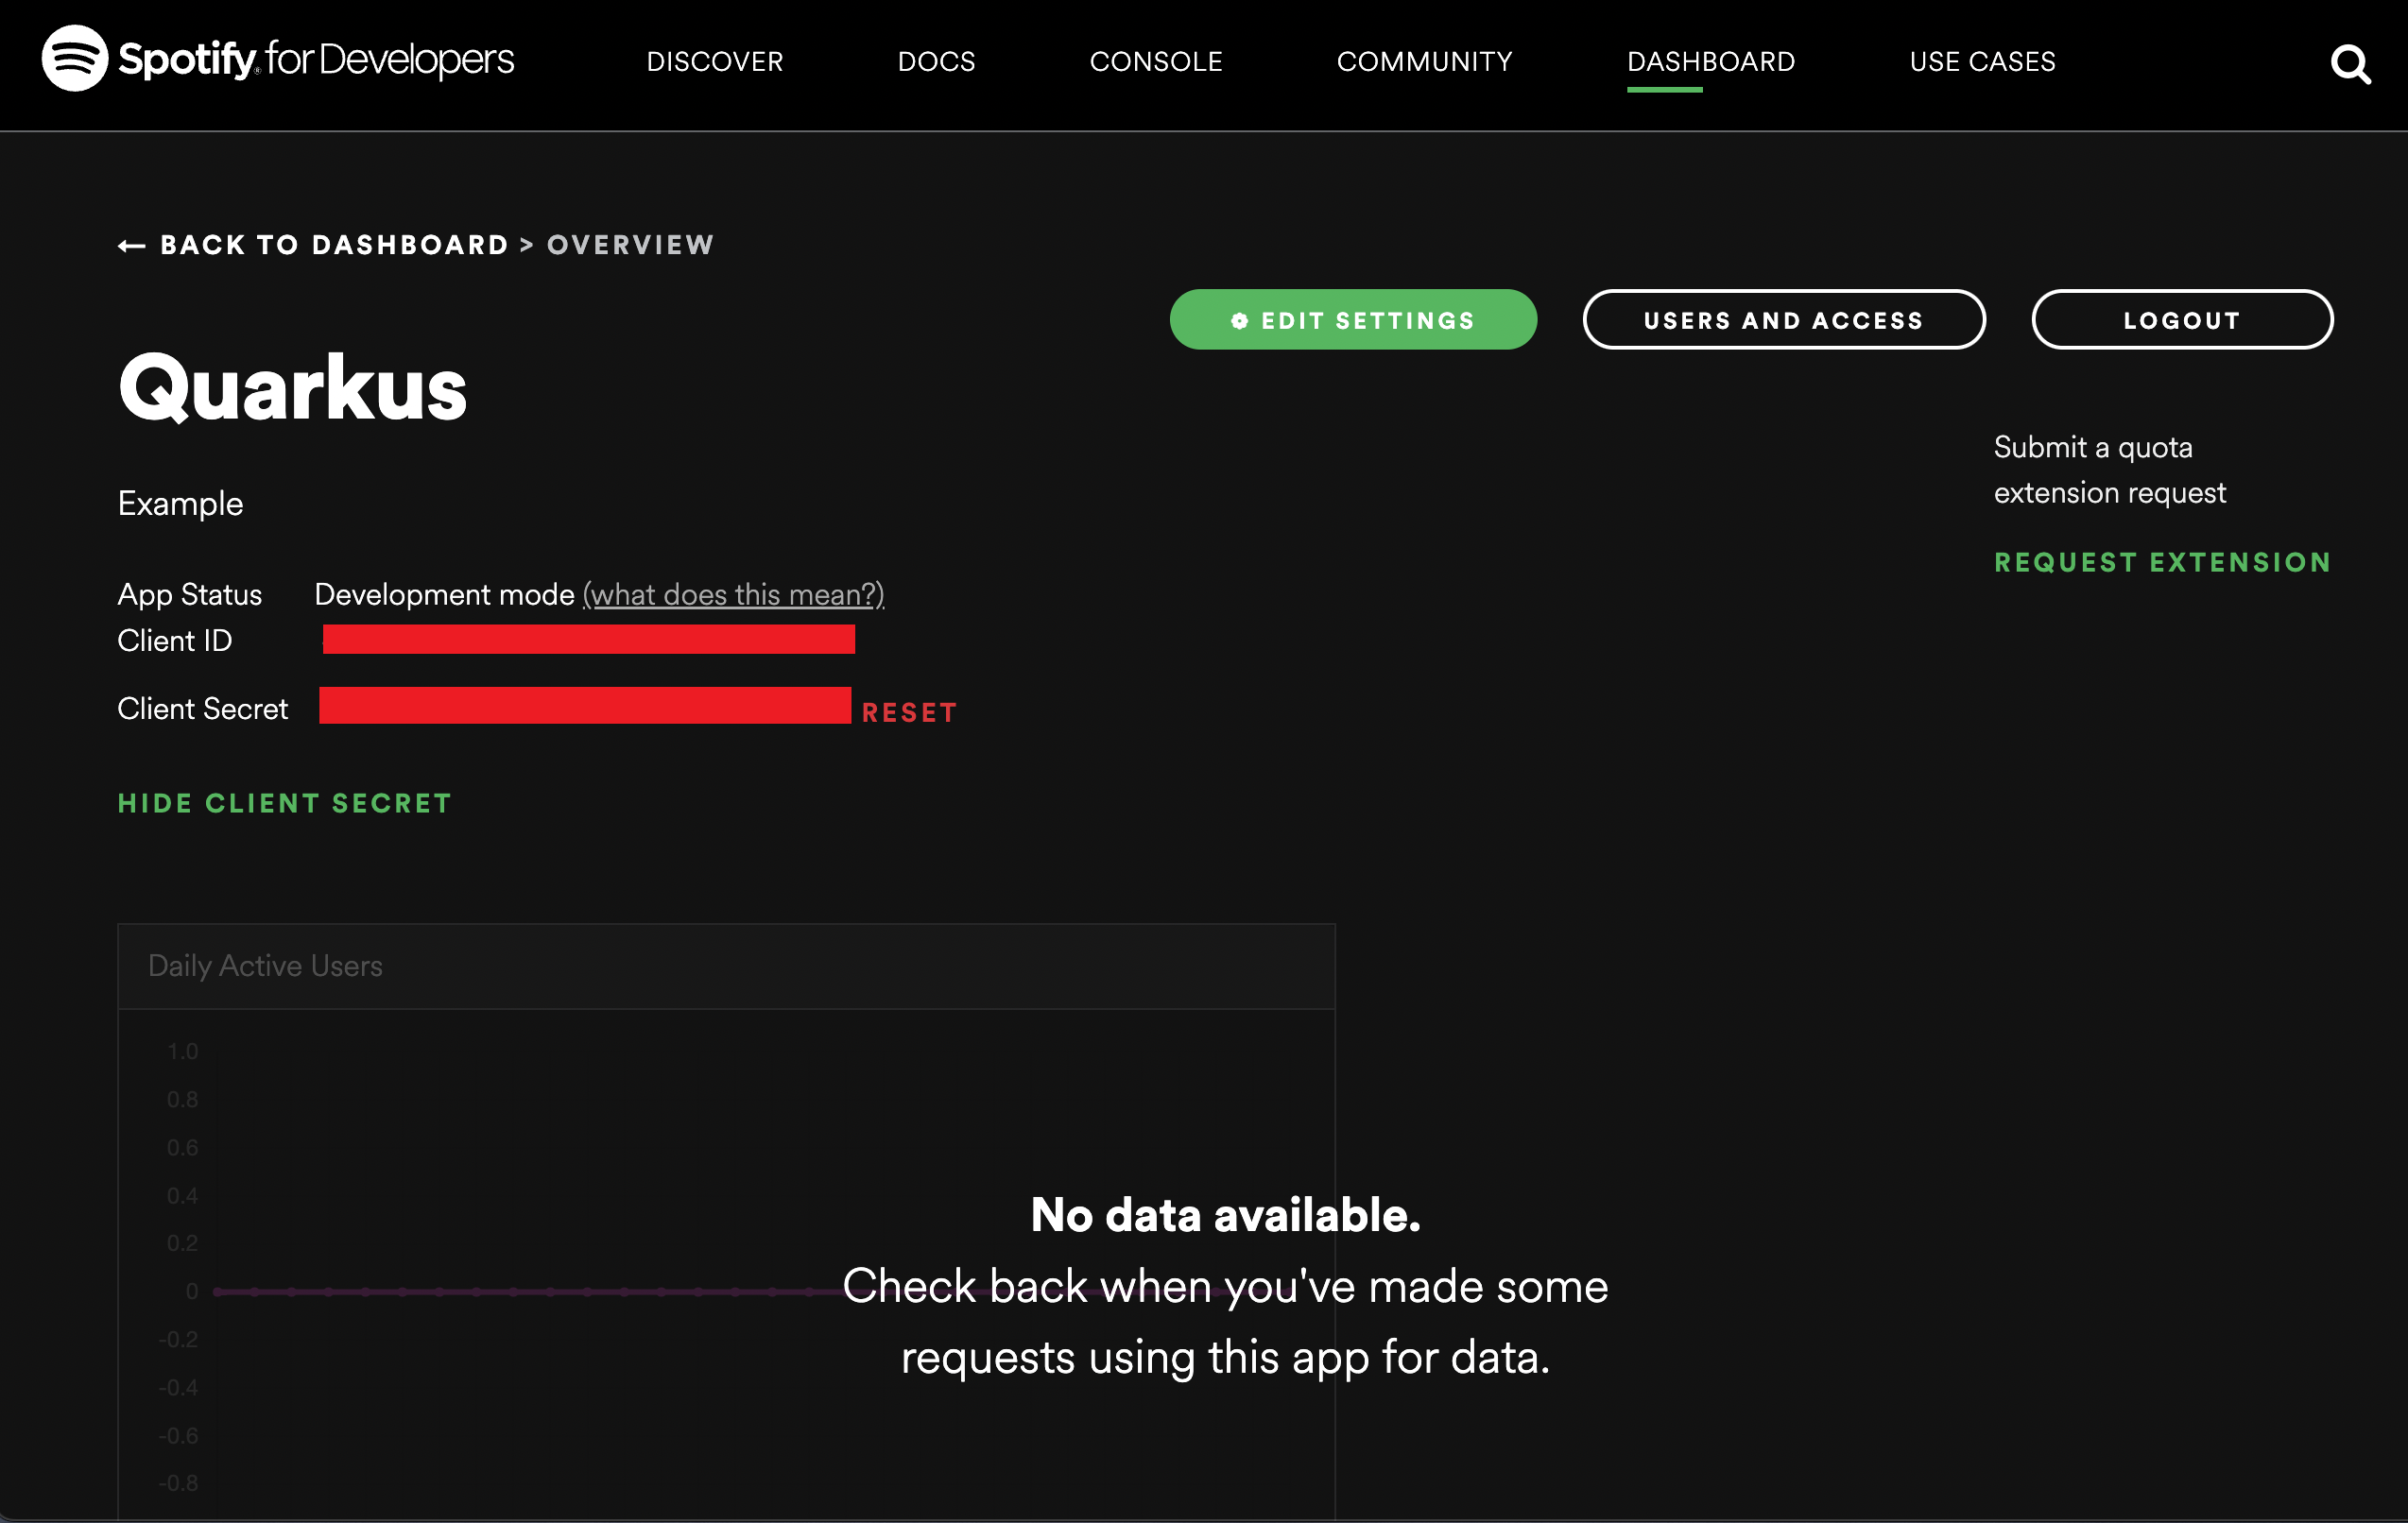
Create a Spotify application:
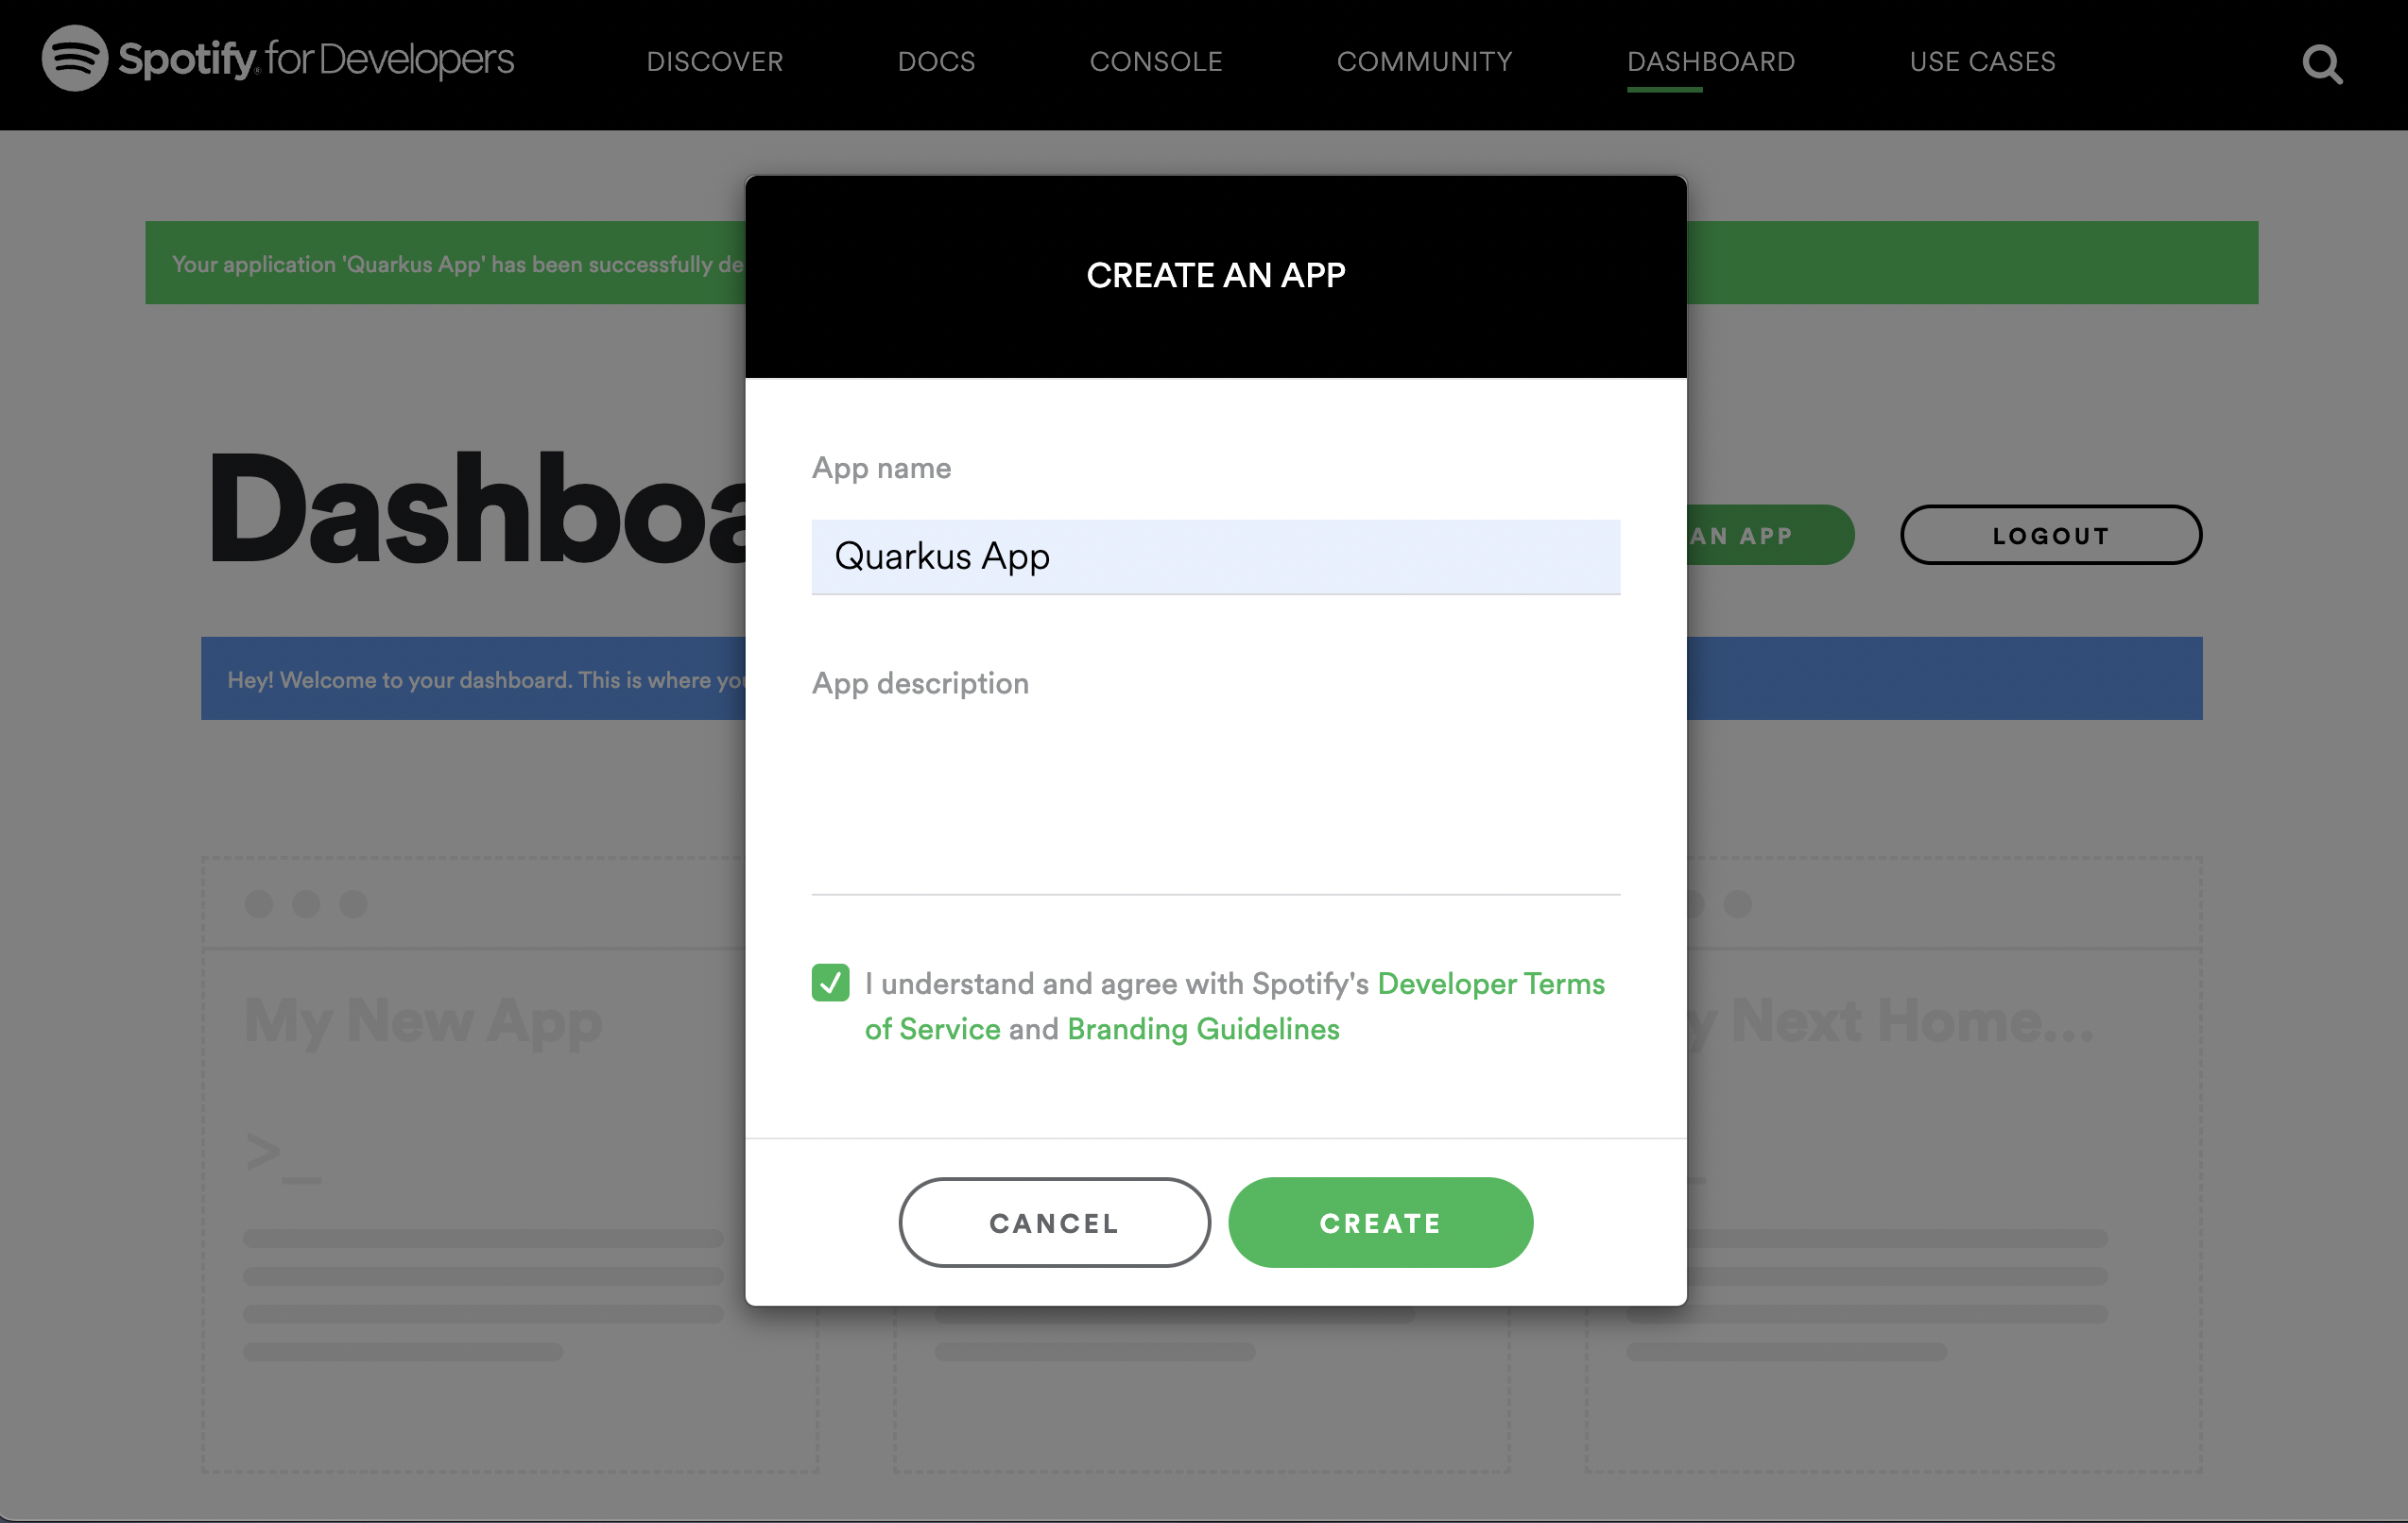
Don’t forget to add http://localhost:8080 as a redirect URI for testing during development purposes. You should get a client id and secret generated once a Spotify application setup has been complete, for example:
You can now configure your application.properties:
quarkus.oidc.provider=spotify
quarkus.oidc.client-id=<Client ID>
quarkus.oidc.credentials.secret=<Client Secret>
quarkus.oidc.provider=spotify will request Spotify to add user-read-private and user-read-email scopes to issued access tokens. For information about overriding these scopes or requesting more scopes, see the Provider scopes section.
Strava
Create a Strava application:
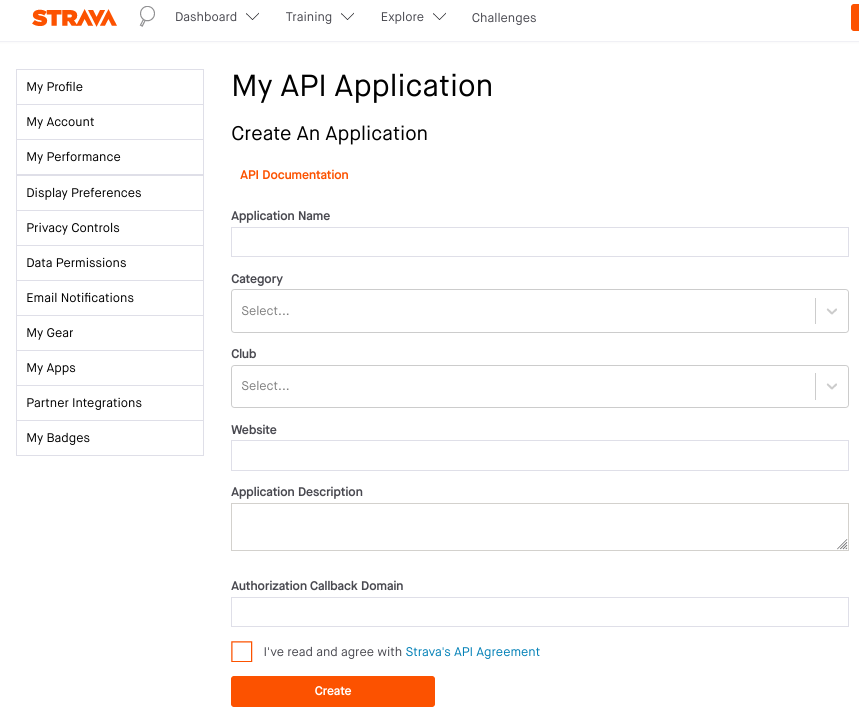
For example, set Category to SocialMotivation, and set ApplicationCallbackDomain to either localhost or the domain name provided by Ngrok, see the HTTPS Redirect URI for more information.
You can now configure your application.properties:
quarkus.oidc.provider=strava
quarkus.oidc.client-id=<Client ID>
quarkus.oidc.credentials.client-secret=<Client Secret>
# default value is '/strava'
quarkus.oidc.authentication.redirect-path=/fitness/welcome (1)| 1 | Strava does not enforce that the redirect (callback) URI which is provided as an authorization code flow parameter is equal to the URI registered in the Strava application because it only requires configuring ApplicationCallbackDomain. For example, if ApplicationCallbackDomain is set to www.my-strava-example.com, Strava will accept redirect URIs such as www.my-strava-example.com/a, www.my-strava-example.com/path/a, which is not recommended by OAuth2 best security practices, see Insufficient redirect_uri validation for more information.
Therefore you must configure a redirect path when working with the Strava provider and Quarkus will enforce that the current request path matches the configured quarkus.oidc.authentication.redirect-path value before completing the authorization code flow. See the Exact redirect URI match for more information. |
Twitch
Create a Twitch application:
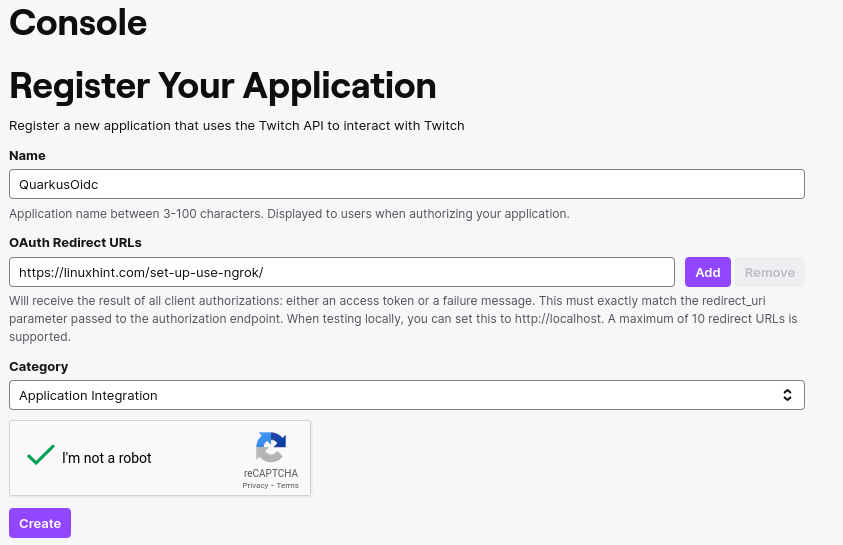
You can now configure your application.properties:
quarkus.oidc.provider=twitch
quarkus.oidc.client-id=<Client ID>
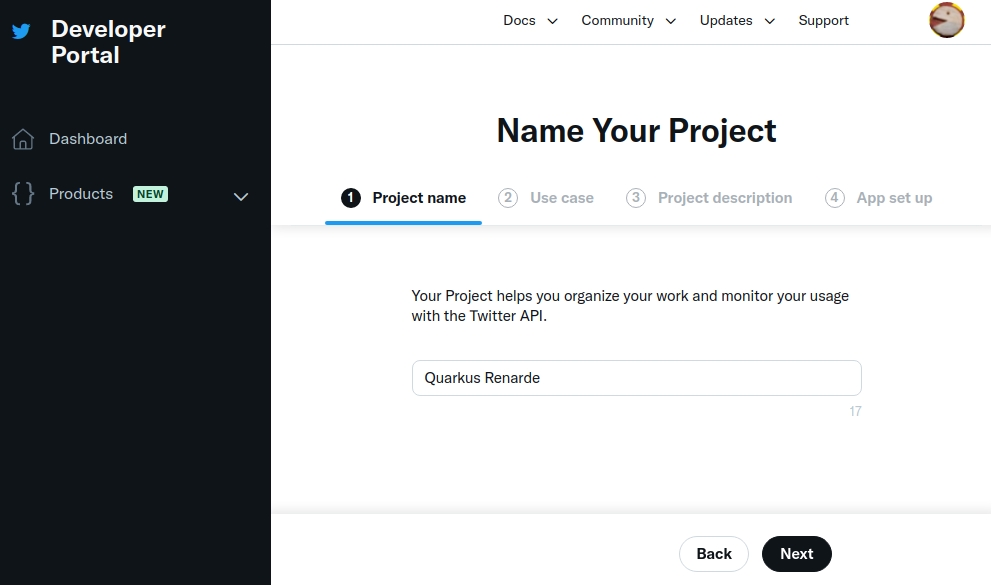
quarkus.oidc.credentials.client-secret.value=<Client Secret>X (formerly Twitter)
You can use X (formerly Twitter) for OIDC login, but at the moment, it restricts access to the user’s email, which means you will have to obtain it and verify it yourself.
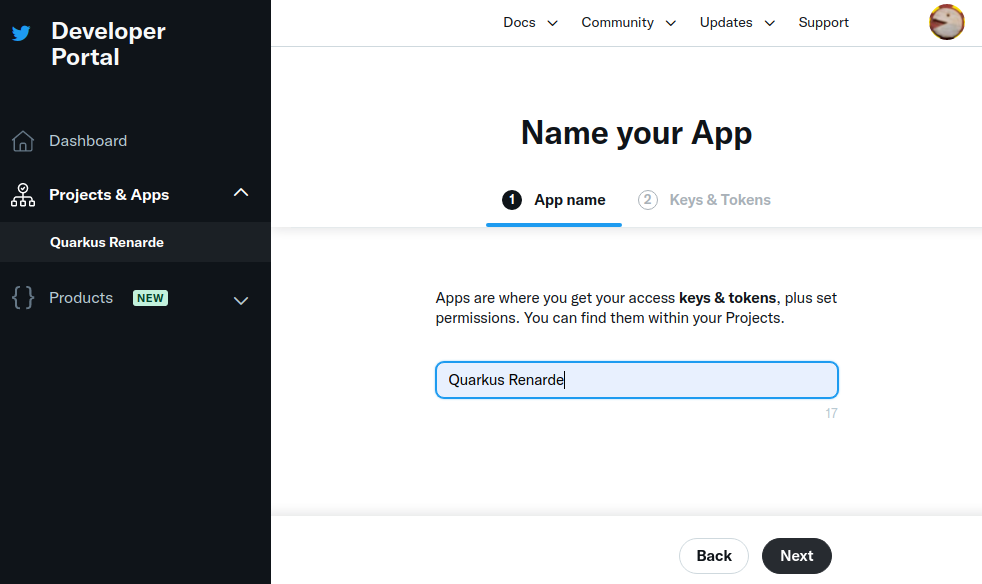
In order to set up OIDC for X, start by Creating a project, enter a project name, and press Next:
Enter a use case, and press Next:
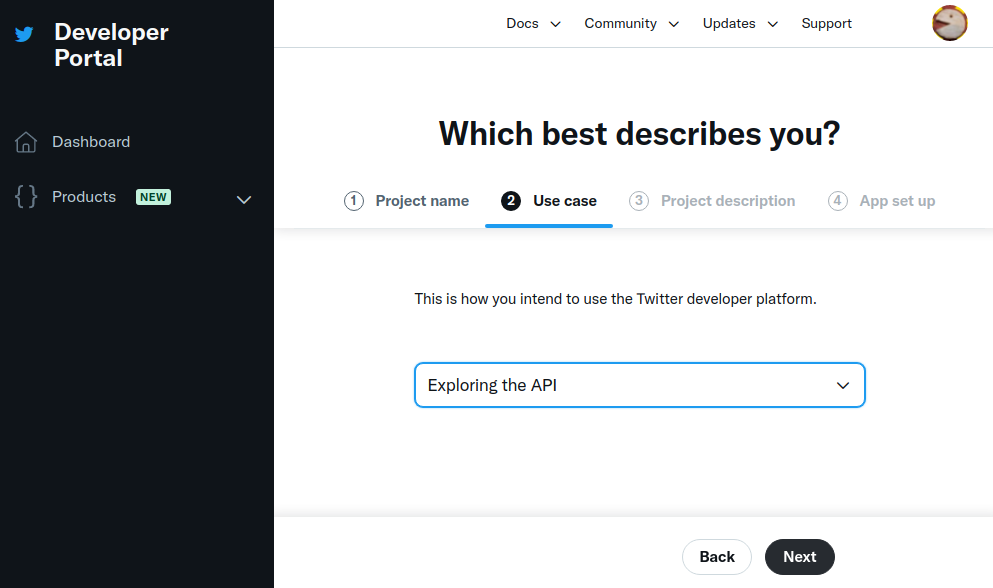
Enter a project description, and press Next:
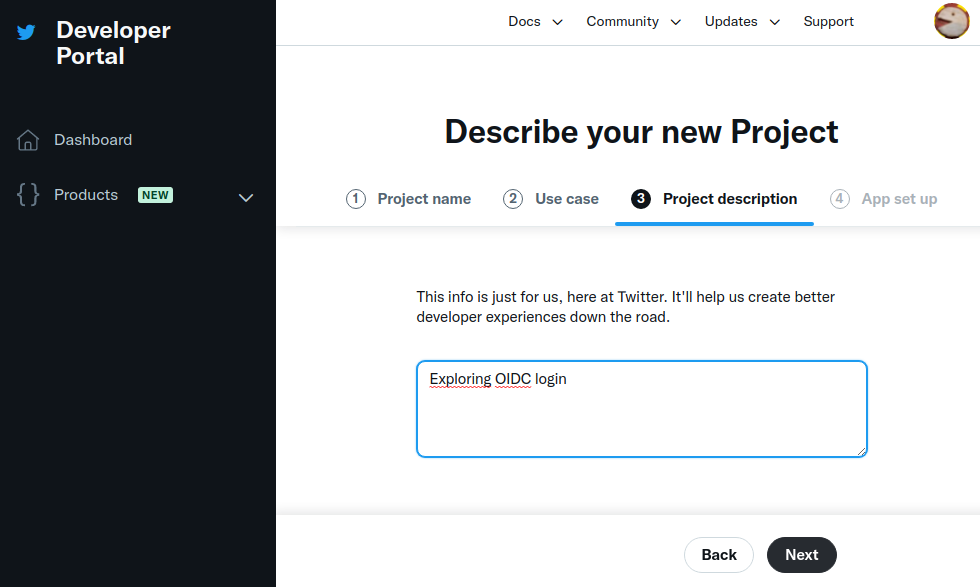
Now enter an application name, and press Next:
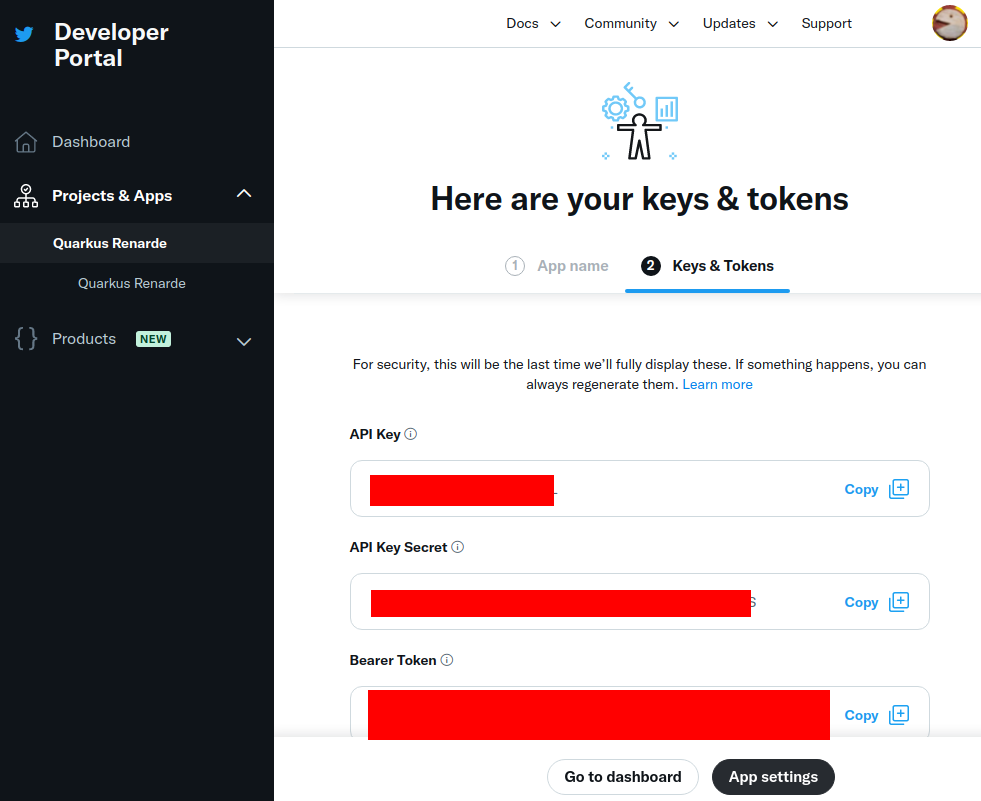
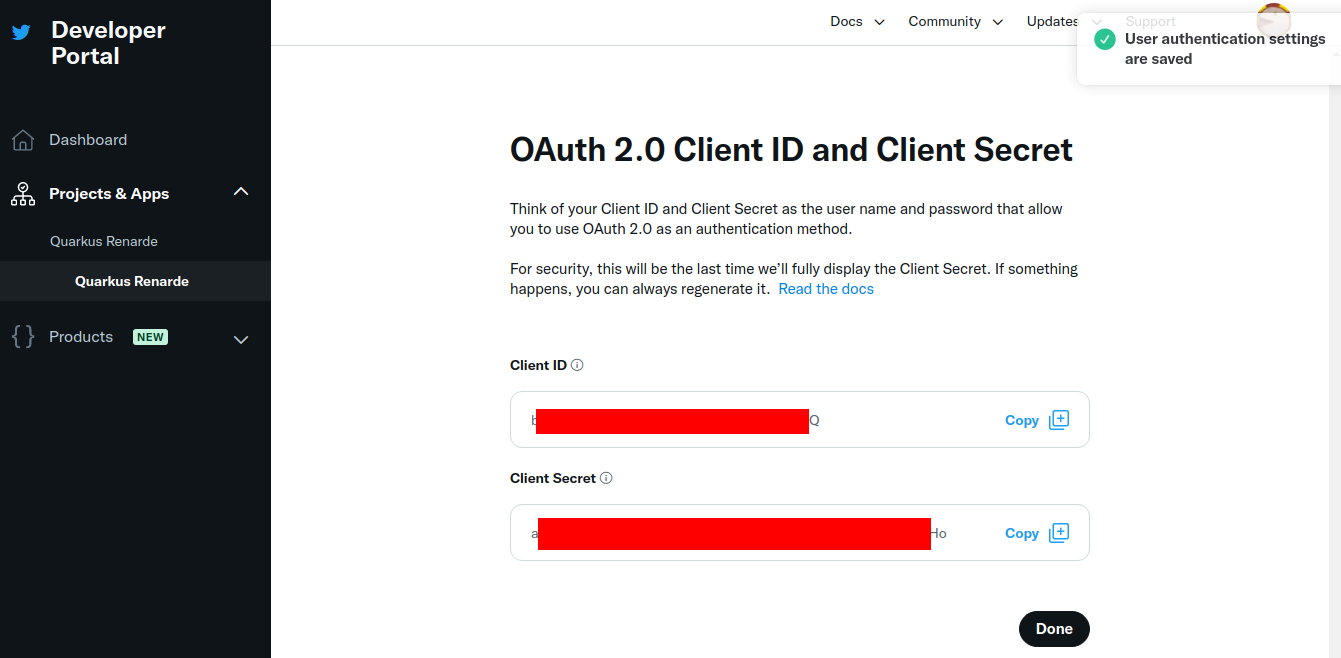
Write down your keys, because they will not be displayed again, and press App Settings:
Navigate down to the User authentication settings section and press Set up:

Check the OAuth 2.0 check box:
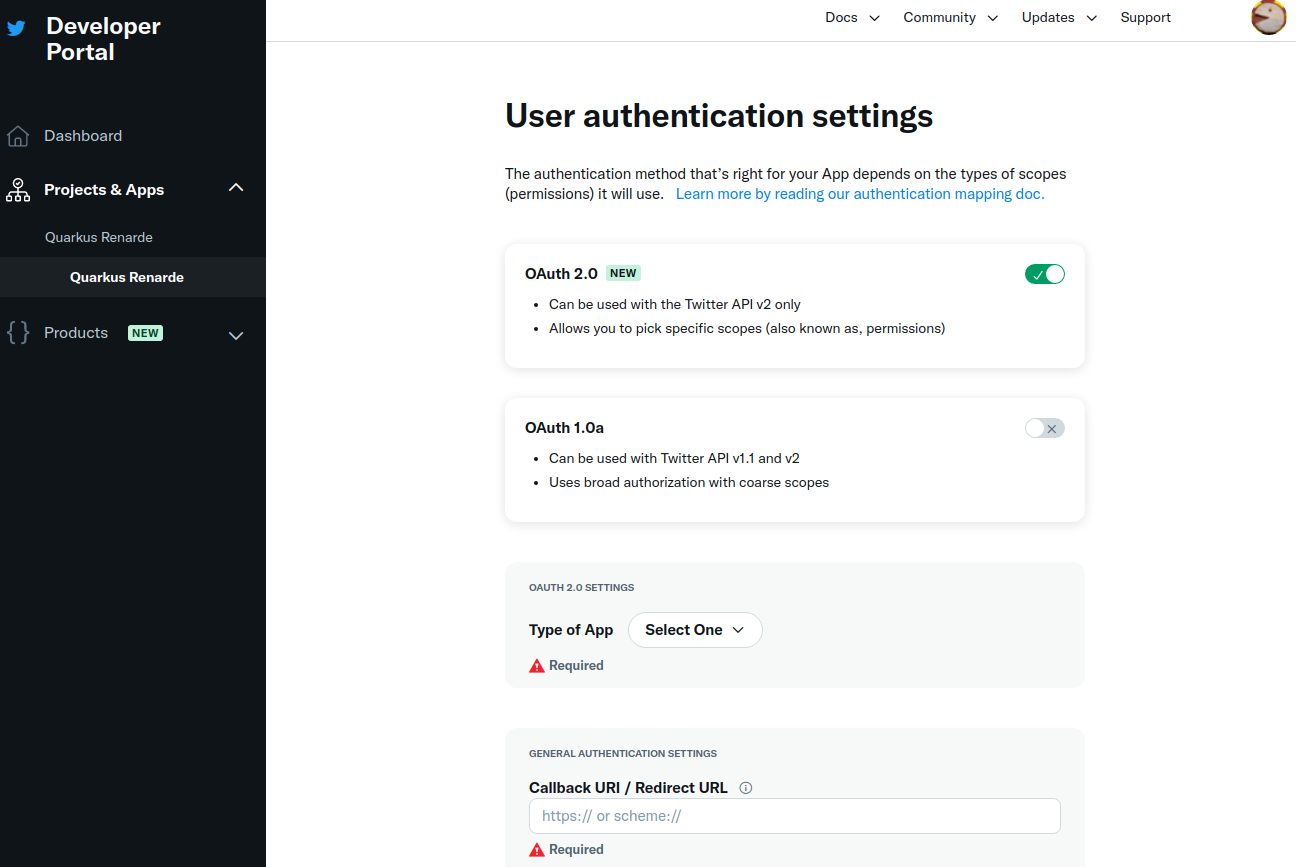
Select Web App as application type, then fill in your application details.
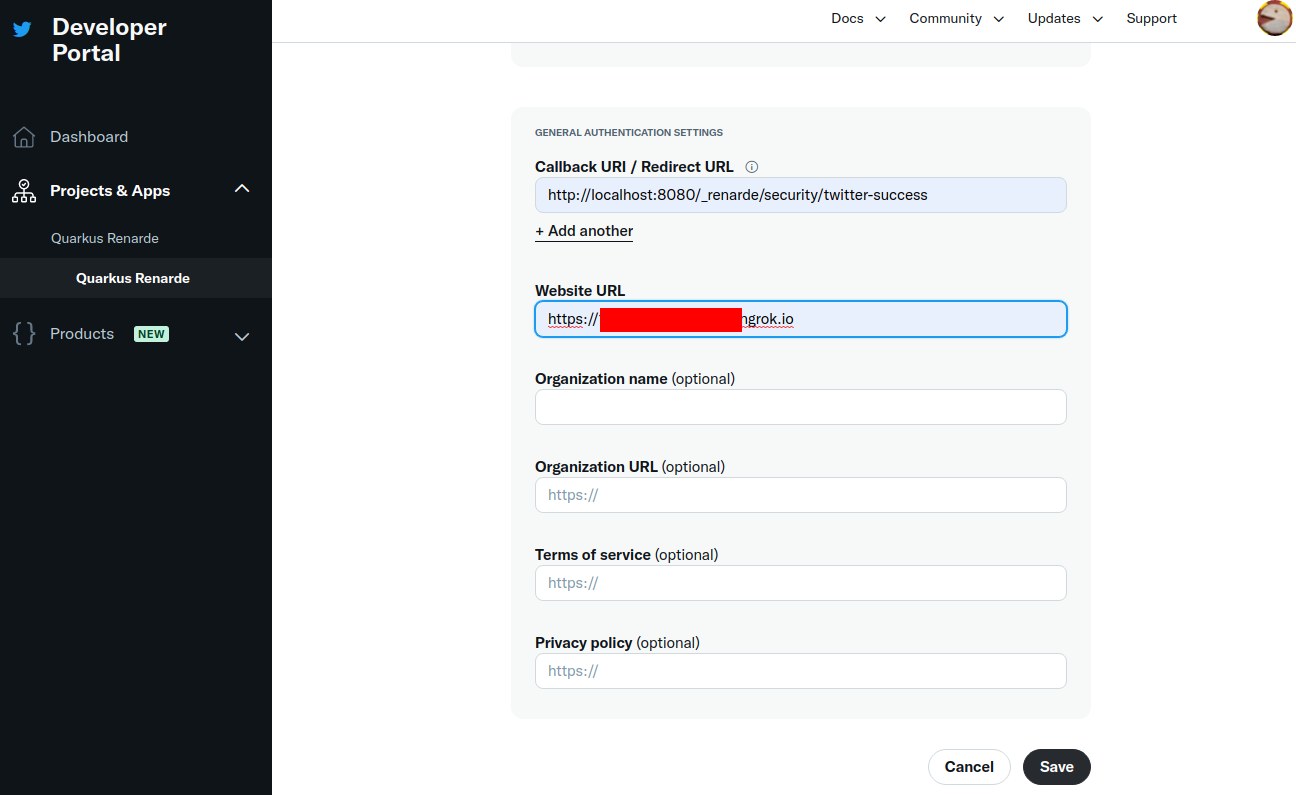
For the Callback URI, register the public URL where your Quarkus application completes the X authorization code flow.
If the callback is not the application root such as http://localhost:8080/, set quarkus.oidc.authentication.redirect-path and register that full URL with X; See the Exact redirect URI match section for how Quarkus validates redirect URIs against provider configuration.
X doesn’t require https usage in practice, but won’t accept your Website URL without it, so
you can still use ngrok for it.
|
Now press Save:
You can now copy your Client ID and Client Secret and press Done:
You can now configure your application.properties:
quarkus.oidc.provider=x
quarkus.oidc.client-id=<Client ID>
quarkus.oidc.credentials.secret=<Client Secret>
quarkus.oidc.provider=x will request X to add offline.access, tweet.read and users.read scopes to issued access tokens. For information about overriding these scopes or requesting more scopes, see the Provider scopes section.
|
X provider requires Proof Key for Code Exchange (PKCE) which is supported by the You can provide your own secret key for encrypting the PKCE code verifier if you prefer with the |
|
X is the new name of Twitter. You can continue using |
Provider scopes
Each provider declaration will request one or more token scopes added to access tokens issued by a given provider. For example, quarkus.oidc.provider=google will request Google to add openid, email and profile scopes.
You can override these scopes with quarkus.oidc.authentication.scopes property, for example, if you work with Google and would not like to have an email scope added to access tokens:
quarkus.oidc.provider=google
quarkus.oidc.authentication.scopes=oidc,profile
You may also want to add one or more scopes in addition to the scopes requested by default. For example, if you would like to use an access token issued by Google to access Google Calendar service, you can do it like this:
quarkus.oidc.provider=google
quarkus.oidc.authentication.extra-params.scope=https://www.googleapis.com/auth/calendar
It is simpler than using quarkus.oidc.authentication.scopes to add a new scope, because quarkus.oidc.authentication.scopes overrides the scopes already set by the provider declaration, which is why you need to list all the required scopes in this case:
quarkus.oidc.provider=google
quarkus.oidc.authentication.scopes=oidc,email,profile,https://www.googleapis.com/auth/calendar
Support for multiple providers
If you would like to support authenticating users with more than one provider then a provider-specific tenant configuration resolution must be supported.
For more information, see the Quarkus Using OpenID Connect (OIDC) Multi-Tenancy guide.
Access provider services with token propagation
Sometimes, only authenticating users with a social provider is not enough.
A provider-specific service also needs to be accessed for the Quarkus OIDC web-app application to fetch or update data from the provider service on behalf of the currently authenticated user.
As mentioned in the OIDC code flow mechanism for protecting web applications guide, ID and access tokens are returned after the authorization code flow has been completed, with some providers like GitHub returning an access token only.
It is this access token that has to be propagated to services such as Google Calendar, or Spotify Playlists for the currently authenticated user to be able to use such services.
You do not have to bring provider-specific libraries in order to achieve this, but instead you can use a reactive Token Propagation filter, which can be bound to a given REST client with a simple annotation.
For more information, see the Quarkus Access token propagation guide.
For example, after you have configured the Google provider, you can have events added to the user’s Google Calendar by using a REST client as shown in the following example:
package org.acme.calendar;

import org.eclipse.microprofile.rest.client.inject.RegisterRestClient;

import io.quarkus.oidc.token.propagation.common.AccessToken;
import io.smallrye.mutiny.Uni;
import jakarta.ws.rs.Consumes;
import jakarta.ws.rs.POST;
import jakarta.ws.rs.Path;
import jakarta.ws.rs.Produces;
import jakarta.ws.rs.core.MediaType;

@RegisterRestClient(configKey="google-calendar-api")
@AccessToken  (1)
@Path("/calendars/primary")
public interface GoogleCalendarClient {
    @POST
    @Path("events")
    @Consumes(MediaType.APPLICATION_JSON)
    @Produces(MediaType.APPLICATION_JSON)
    Uni<String> addEvent(Event event);
    public static class Event {
        public String summary;
        public String kind = "calendar#event";
        public Time start;
        public Time end
    }

    public static class Time {
        public String dateTime;
        public String timeZone = "Europe/CET";
        public Time() {
        }
        public Time(String value) {
            dateTime = value;
	}
    }
}| 1 | The @AccessToken annotation enables an access token propagation to the target service. |
Finally, you need to configure the Google Calendar address and request the Google Calendar scope for an access token, as outlined in the following example:
quarkus.oidc.provider=google
quarkus.oidc.client-id=<Client ID>
quarkus.oidc.credentials.secret=<Secret>

# Add a required calendar scope
quarkus.oidc.authentication.extra-params.scope=https://www.googleapis.com/auth/calendar

# Point REST client to Google Calendar endpoint
quarkus.rest-client.google-calendar-api.url=https://www.googleapis.com/calendar/v3
Now you are ready to have users authenticated with Google and support updating their Google calendars on their behalf, for example:
package org.acme.calendar;
import org.eclipse.microprofile.jwt.JsonWebToken;
import org.eclipse.microprofile.rest.client.inject.RestClient;
import io.quarkus.oidc.IdToken;
import io.quarkus.security.Authenticated;
import io.smallrye.mutiny.Uni;
import jakarta.inject.Inject;
import jakarta.ws.rs.GET;
import jakarta.ws.rs.Path;
import jakarta.ws.rs.Produces;
@Path("/calendar")
@Authenticated
public class CalendarService {
@Inject
@IdToken
JsonWebToken jwt;
@Inject
@RestClient
GoogleCalendarClient calendarClient;
@GET
@Path("/event")
@Produces("text/plain")
public Uni<String> get() {
return calendarClient.addEvent(new Event()).onItem()
.transform(c -> ("Hello " + jwt.getName() + ", new event: " + c));
}
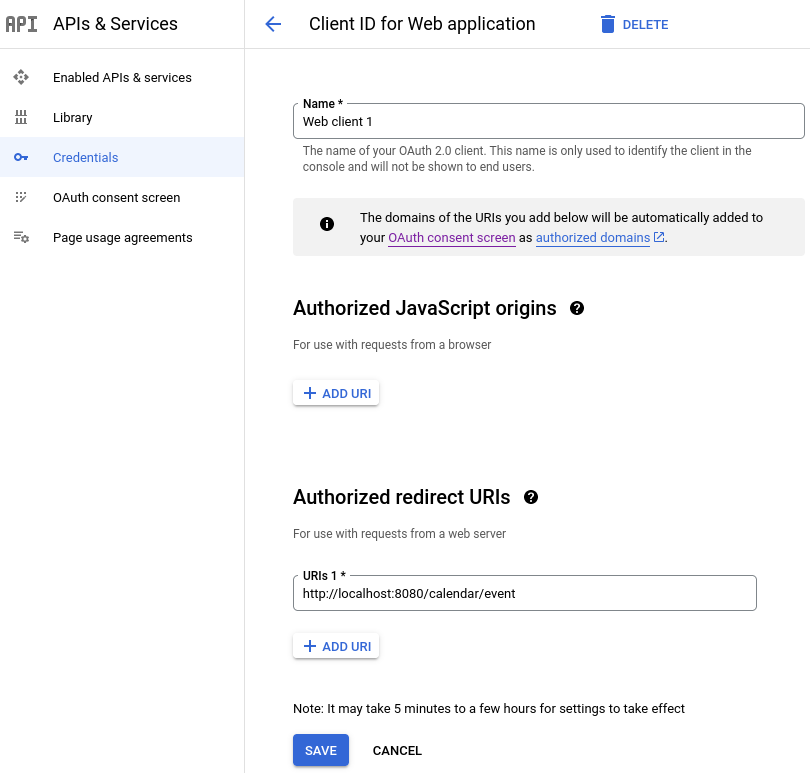
}You must update the application registered with the Google provider to list http://localhost:8080/calendar/event as one of the authorized redirect URIs if you would like to test this endpoint on the local host, for example:
You might also have to register one or more test users:
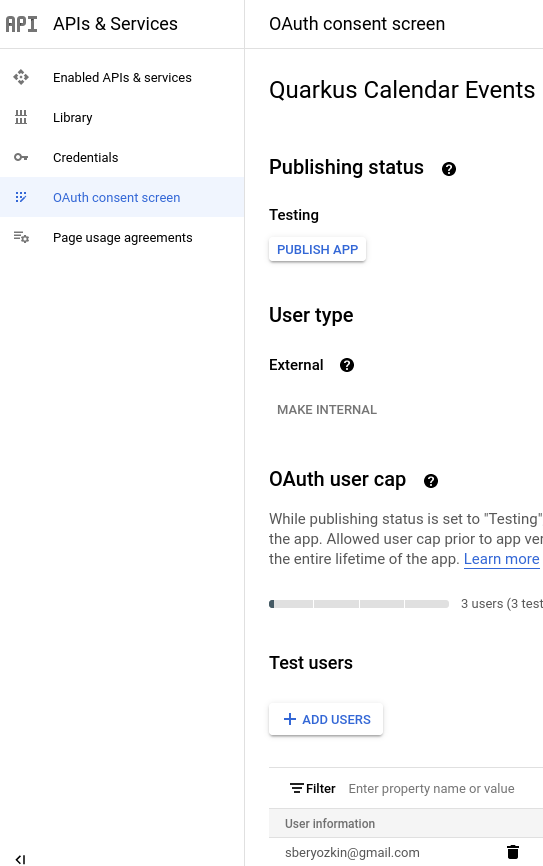
Follow the same approach if the endpoint must access other Google services.
The pattern of authenticating with a given provider, where the endpoint uses either an ID token or UserInfo (especially if an OAuth2-only provider such as GitHub is used) to get some information about the currently authenticated user and using an access token to access some downstream services (provider or application specific ones) on behalf of this user can be universally applied, irrespectively of which provider is used to secure the application.
Exact redirect URI match
Most OIDC and OAuth2 providers with the exception of Strava will enforce that the authorization code flow can be completed only if the redirect URI matches precisely the redirect URI configured in a given provider’s dashboard.
From the practical point of view, your Quarkus endpoint will most likely need to have the quarkus.oidc.authentication.redirect-path relative path property set to an initial entry path for all the authenticated users, for example, quarkus.oidc.authentication.redirect-path=/authenticated, which means that newly authenticated users will land on the /authenticated page, irrespectively of how many secured entry points your application has and which secured resource they initially accessed.
It is a typical flow for many OIDC web-app applications. Once the user lands on the initial secured page, your application can return an HTML page which uses links to guide users to other parts of the application or users can be immediately redirected to other application resources with the help of JAX-RS API.
If necessary, you can configure Quarkus to restore the original request URI after the authentication has been completed. For example:
quarkus.oidc.provider=strava (1)
quarkus.oidc.client-id=<Client ID>
quarkus.oidc.credentials.secret=<Secret>
quarkus.oidc.authentication.restore-path-after-redirect=true (2)| 1 | strava provider configuration is the only supported configuration which enforces the quarkus.oidc.authentication.redirect-path property with the /strava path which you can override with another path such as /fitness. |
| 2 | If the users access the /run endpoint before the authentication, then, once they have authenticated and been redirected to the configured redirect path such as /strava, they will land on the original request /run path. |
You do not have to set quarkus.oidc.authentication.redirect-path immediately because Quarkus assumes the current request URL is an authorization code flow redirect URL if no quarkus.oidc.authentication.redirect-path is configured. For example, to test that a Google authentication is working, you can have a Quarkus endpoint listening on /google and update the Google dashboard that http://localhost:8080/google redirect URI is supported. Setting quarkus.oidc.authentication.redirect-path property will be required once your secured application URL space grows.
HTTPS Redirect URI
Some providers will only accept HTTPS-based redirect URIs. Tools such as ngrok can be set up to help testing such providers with Quarkus endpoints running on localhost in dev mode.
Rate Limiting
Depending on your developer API subscription level, some providers may enforce a rather strict request rate limiting policy.
It may not be a problem when Quarkus fetches public verification keys from OIDC-compliant providers like the Google provider and keeps verifying the user session with these keys locally. However, for pure OAuth2 providers where only an access token is available and which has to be verified indirectly by requesting UserInfo from the provider endpoint on every request done by an already authenticated user, it can become a problem.
Therefore, UserInfo is embedded in an internally generated ID token and is encrypted in the session cookie. You can disable it with quarkus.oidc.cache-user-info-in-idtoken=false.
Alternatively, use a default or custom UserInfo cache provider, please see the Token Introspection and UserInfo cache section of the "OpenID Connect (OIDC) Bearer token authentication" guide.